Installing Logitech Media Server on the Raspberry Pi 4B with 5 inch display
A few months have passed since I described how to install the Logitech Media Server on a Raspberry Pi 3B. In the meantime, however, the situation is such that the Raspberry 3 models are hardly available any more, or only at outrageously high prices. A few days ago, however, I was able to get hold of a Raspberry 4B bundle with a Raspberry 4B (4GB RAM), power supply, SD card and heat sink set for just under 120 euros. That's still way too expensive, but who knows how long it will take for prices to recover.
Since some things have changed and been simplified in the meantime when installing the Logitech Media Server, I would like to provide you with updated instructions for the Raspberry 4B here.
Hardware
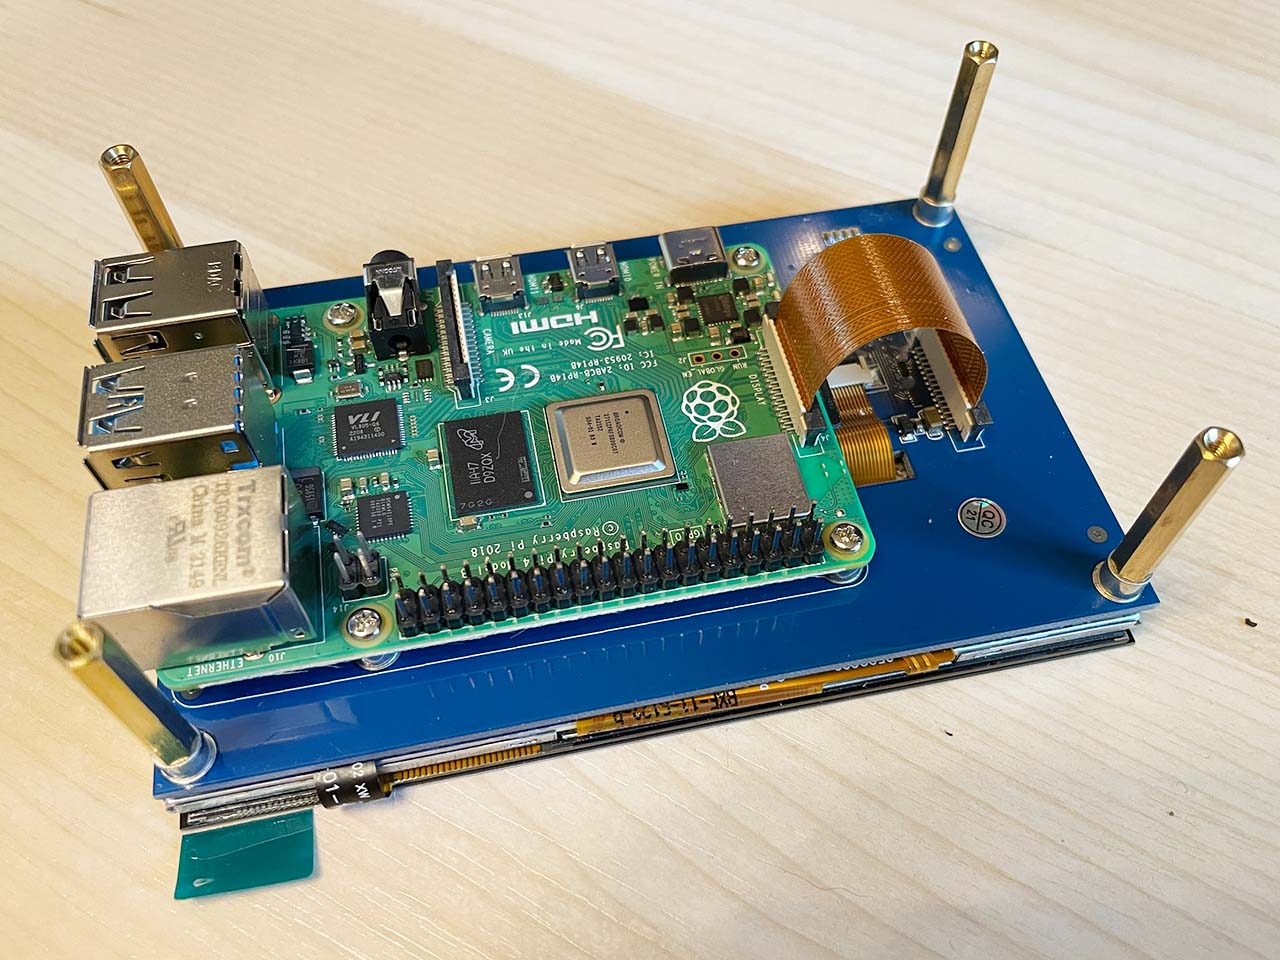
Not much hardware is needed to run a Squeezebox server. The following picture shows all the components I used for it. The display is not essential, it only serves to show status information.

In detail, I used these components:
- Raspberry Pi 4 Model B, 4 GB RAM
- SD card with 32 GB
- official power supply for Raspberry Pi 4 Model B, USB-C, 5.1V, 3A
- Waveshare 5 inch display with DSI interface
- 2.5 inch hard disk
- Enclosure for the hard disk
- USB connection cable
The Raspberry Pi is simply screwed onto the display with 4 screws. Then the display is connected to the Raspberry Pi with the included ribbon cable:
Then the heat sink is screwed onto the Raspberry Pi and the connection of the fan is plugged into the GPIO strip.
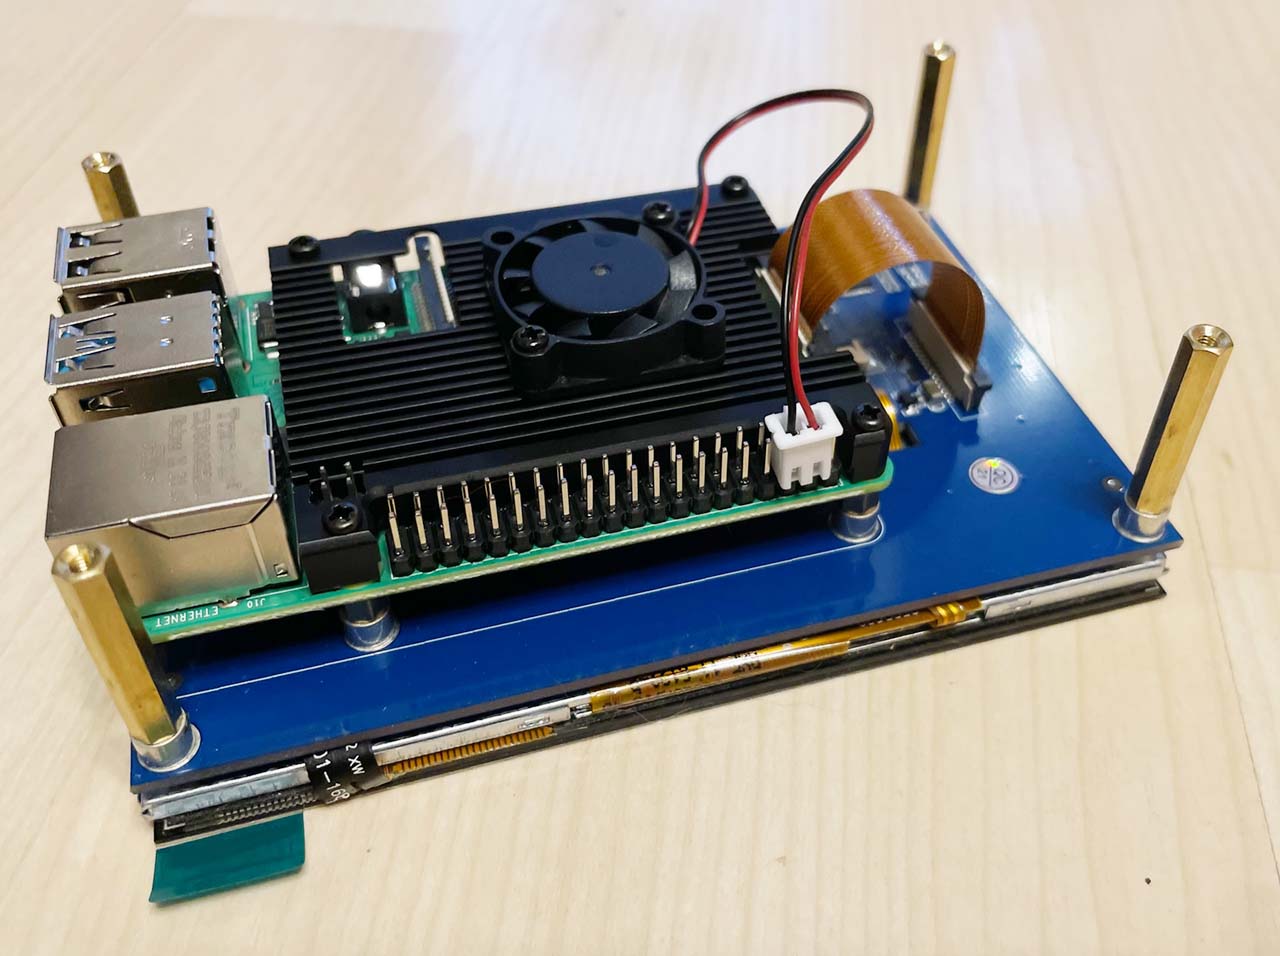
This completes the hardware. As mentioned above, you can also leave out the display. This makes no difference to the functionality of the Squeezebox server.
Installation Raspberry Pi OS
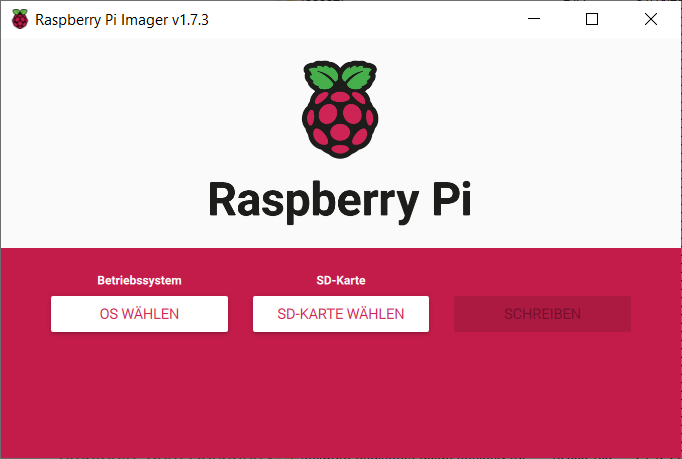
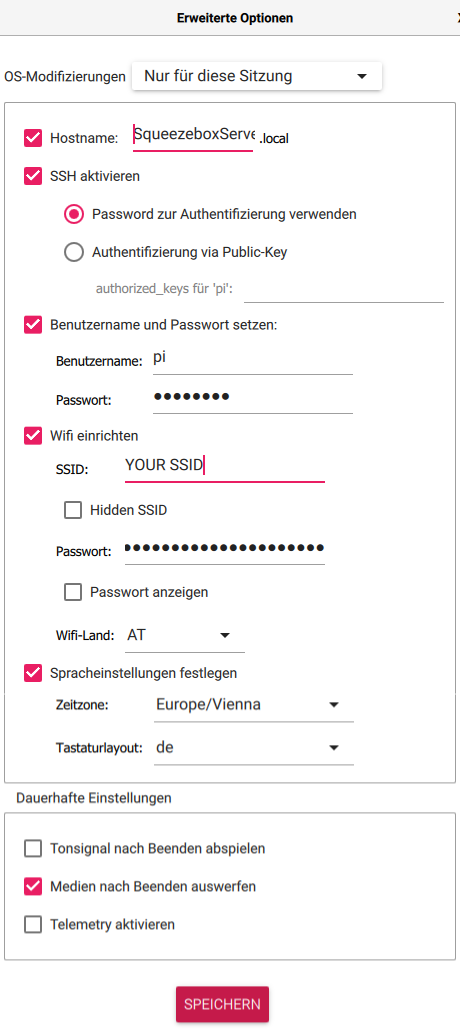
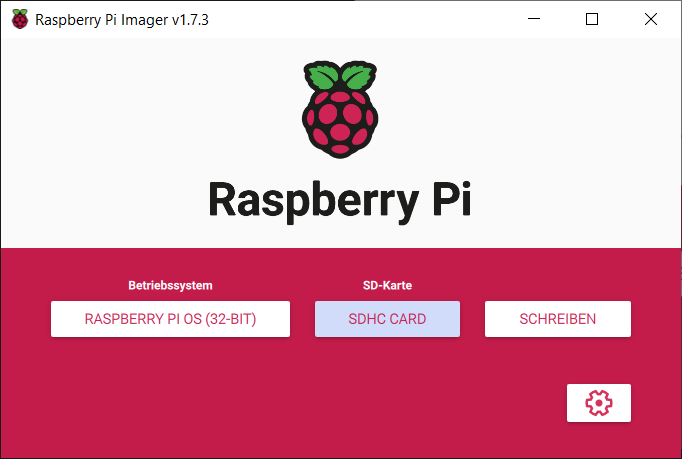
The installation of the current Raspberry OS (Debian "Bullseye") can be done most easily with the Raspberry Pi Imager. With this tool, all important basic settings, such as Wi-Fi access, user account, host name and language settings, can be configured. SSH access must also be activated. The following screenshots show the installation process:

After the operating system has been written to the SD card, it can be inserted into the slot of the Raspberry Pi and the power supply connected. After the boot process, you can check via the router whether the Raspberry has started correctly and which IP address it has. It appears in the list of connections under the name that was specified in the setup. I recommend assigning a fixed IP address to the Raspberry Pi so that it can always be called up with this address later.
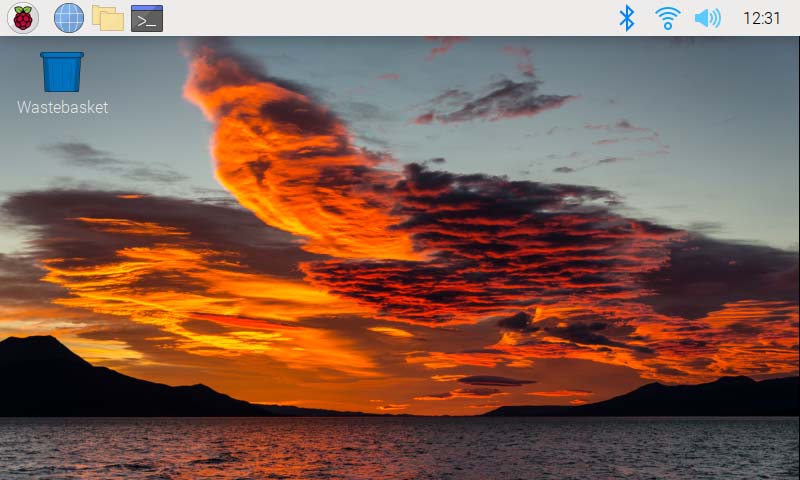
After the boot process, this picture should appear on the display:
Now you can log in (most easily with PuTTY) via SSH on the Raspberry with the configured user. It is recommended to first update the system with the commands
sudo apt-get update
sudo apt-get upgrade
sudo reboot
to bring the system up to date. This can take a few minutes. After rebooting, you now have an up-to-date Raspberry Pi OS installation.
Next, there are a few configurations to increase the life span of the SD card. First, swapping is deactivated with these commands:
sudo service dphys-swapfile stop
sudo systemctl disable dphys-swapfile
sudo apt-get purge dphys-swapfile
sudo apt autoremove
An entry is then made in /boot/cmdline.txt. The editor is started with
sudo nano /boot/cmdline.txt
The option noswap is added to the end of the line. The line then looks like this:
console=serial0,115200 console=tty1 root=PARTUUID=221d34c4-02 rootfstype=ext4 fsck.repair=yes rootwait quiet splash plymouth.ignore-serial-consoles noswap
To prevent log files from being permanently written to the SD card, temporary directories can be relocated to the working memory. To do this, the file /etc/fstab is modified with
sudo nano /etc/fstab
and it should look like this:
proc            /proc           proc    defaults          0       0
PARTUUID=221d34c4-01  /boot           vfat    defaults,noatime  0       2
PARTUUID=221d34c4-02  /               ext4    defaults,noatime  0       1

# Log to RAM
tmpfs   /tmp            tmpfs   defaults,noatime,nosuid,mode=1777,size=256m 0 0
tmpfs   /var/log        tmpfs   defaults,noatime,nosuid,mode=0755,size=128m 0 0
tmpfs   /var/tmp        tmpfs   defaults,noatime,nosuid,mode=0755,size=128m 0 0

# a swapfile is not a swap partition, no line here
#   use  dphys-swapfile swap[on|off]  for that
After a reboot, the adjustments can be checked with the command
df -h
The result should look something like this:
Filesystem      Size  Used Avail Use% Mounted on
/dev/root        29G  3.8G   24G  14% /
devtmpfs        1.8G     0  1.8G   0% /dev
tmpfs           1.9G     0  1.9G   0% /dev/shm
tmpfs           768M  9.2M  759M   2% /run
tmpfs           5.0M  4.0K  5.0M   1% /run/lock
tmpfs           256M  4.0K  256M   1% /tmp
tmpfs           128M  280K  128M   1% /var/log
tmpfs           128M     0  128M   0% /var/tmp
/dev/mmcblk0p1  255M   50M  206M  20% /boot
tmpfs           384M   20K  384M   1% /run/user/1000
Mount external hard disk
The external hard drive is to be automatically mounted in the directory /media/usb-drive/. I use exFAT as the file system so that files larger than 4GB can also be stored.
First, the directory is created:
sudo mkdir /media/usb-drive
sudo chown pi:pi /media/usb-drive/
Now the external USB hard disk is connected. With the command
sudo blkid
the available partitions are displayed. The list looks like this, for example:
/dev/mmcblk0p1: LABEL_FATBOOT="boot" LABEL="boot" UUID="D386-9DE9" BLOCK_SIZE="512" TYPE="vfat" PARTUUID="221d34c4-01"
/dev/mmcblk0p2: LABEL="rootfs" UUID="996c1b5f-170b-4f38-a5e0-85eef5acf12c" BLOCK_SIZE="4096" TYPE="ext4" PARTUUID="221d34c4-02"
/dev/sda1: LABEL="Musik" UUID="A635-6C3E" BLOCK_SIZE="512" TYPE="exfat" PARTUUID="ac3dfbd1-01"
The last line shows the external hard disk. The UUID is now required for mounting, in this case A635-6C3E. Now the file /etc/fstab is edited again with
sudo nano /etc/fstab
and the entry for this external hard disk is inserted. The file then looks like this:
proc            /proc           proc    defaults          0       0
PARTUUID=221d34c4-01  /boot           vfat    defaults,noatime  0       2
PARTUUID=221d34c4-02  /               ext4    defaults,noatime  0       1

# Musik Disk
UUID=A635-6C3E /media/usb-drive exfat utf8,uid=pi,gid=pi,noatime 0

# Log to RAM
tmpfs   /tmp            tmpfs   defaults,noatime,nosuid,mode=1777,size=256m 0 0
tmpfs   /var/log        tmpfs   defaults,noatime,nosuid,mode=0755,size=128m 0 0
tmpfs   /var/tmp        tmpfs   defaults,noatime,nosuid,mode=0755,size=128m 0 0

# a swapfile is not a swap partition, no line here
#   use  dphys-swapfile swap[on|off]  for that
After a restart, the external hard disk is now available under /media/usb-drive/.
Set up Samba share
In order to copy the music files from the PC to the Squeezebox server, it is helpful to set up a shared folder. To do this, the Samba package must first be installed.
sudo apt-get install samba
Afterwards, the shared folder is configured in the file /etc/samba/smb.conf:
sudo nano /etc/samba/smb.conf
The following configuration is added at the end of the file:
[Musik]
 comment=Raspberry Pi Share
 path=/media/usb-drive
 browseable=Yes
 writeable=Yes
 only guest=no
 create mask=0644
 directory mask=0755
 public=no
Now a Samba user must be created. I also use the user pi with the same password as above.
sudo smbpasswd -a pi
After restarting the Samba service with
sudo service smbd restart
the network drive can be mounted on the PC. When logging in, enter the user that has just been created. Now the music collection can be copied to the hard disk of the Squeezebox server.
Install Logitech Media Server
Now follows the actual server software. For the Raspberry Pi, the version for Arm architecture must be downloaded. Currently, it is version 8.3.0. In addition, some other necessary packages are also installed:
sudo apt-get install libsox-fmt-all libflac-dev libfaad2
sudo apt-get install libio-socket-ssl-perl
sudo apt-get install libcrypt-openssl-bignum-perl
sudo apt-get install libcrypt-openssl-random-perl
sudo apt-get install libcrypt-openssl-rsa-perl
wget https://downloads.slimdevices.com/LogitechMediaServer_v8.3.0/logitechmediaserver_8.3.0_arm.deb
sudo dpkg -i logitechmediaserver_8.3.0_arm.deb
As soon as the packages are installed, the server is accessible under port 9000 with the respective IP address. For me this is
http://192.168.0.150:9000/
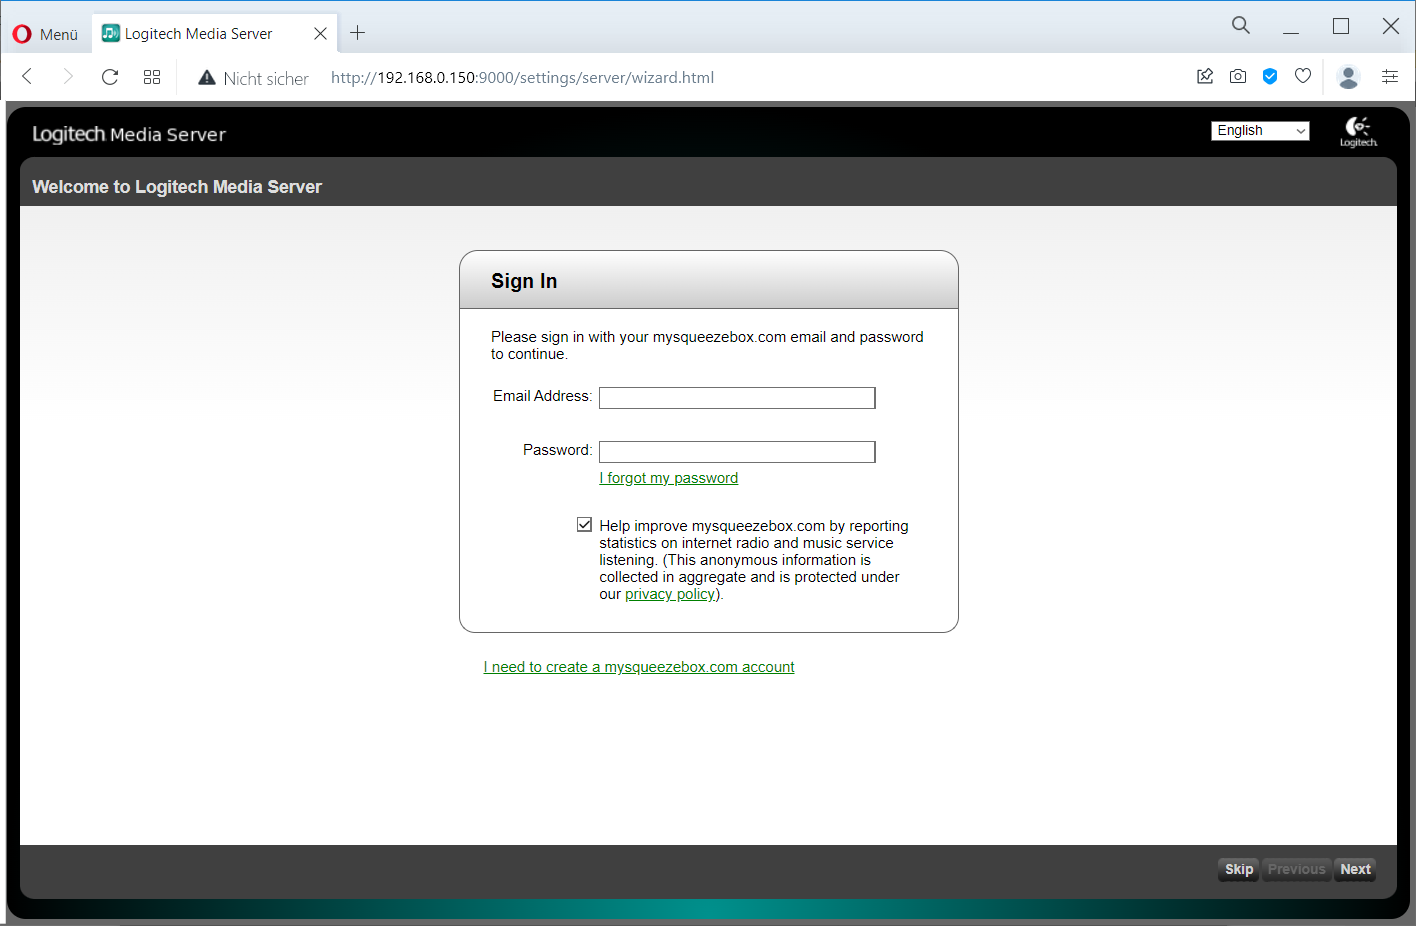
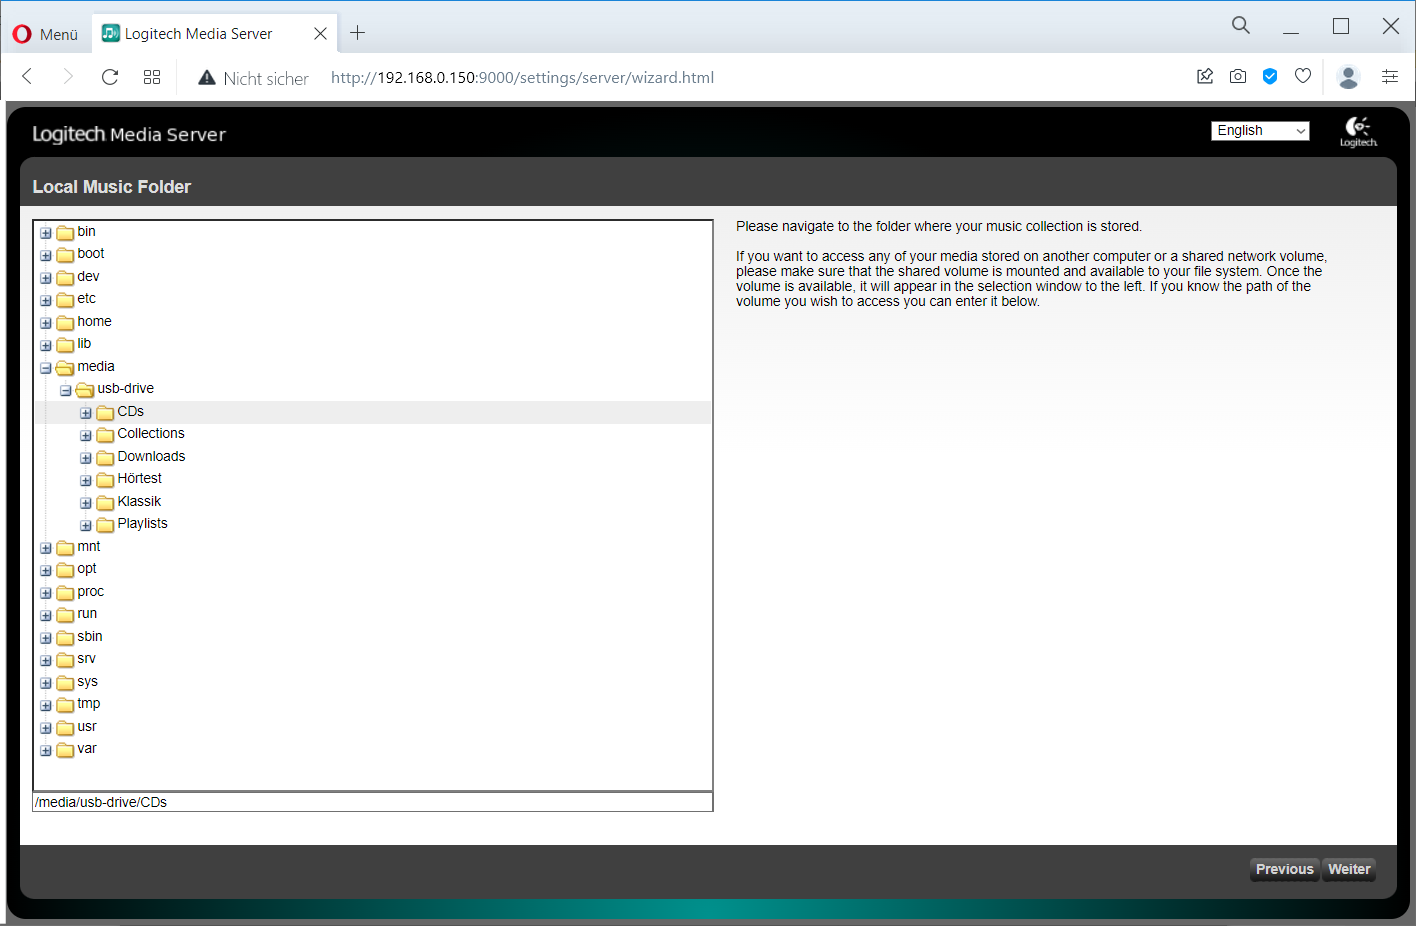
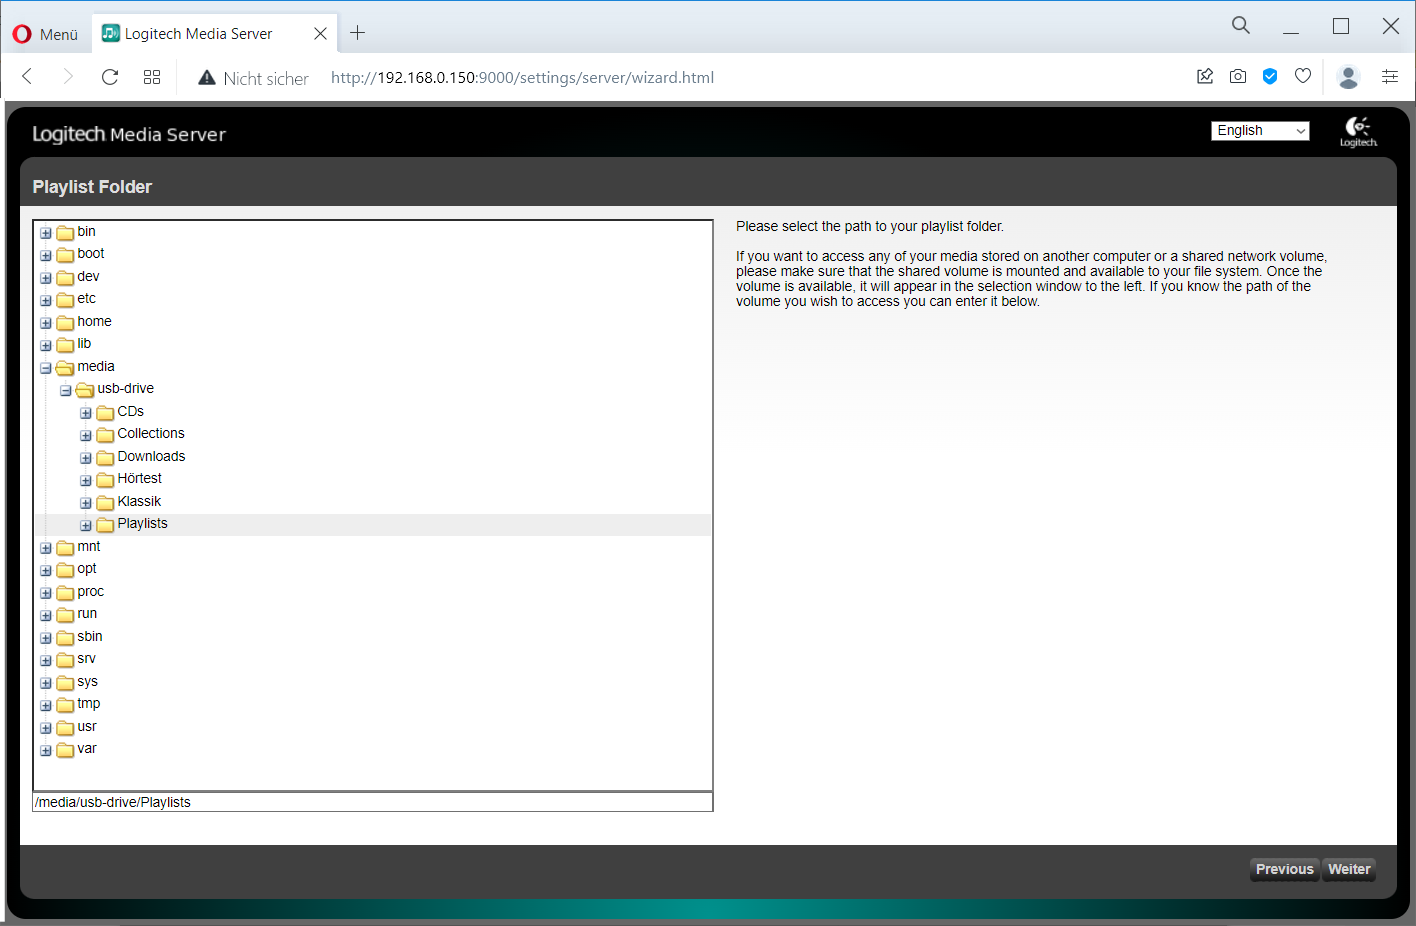
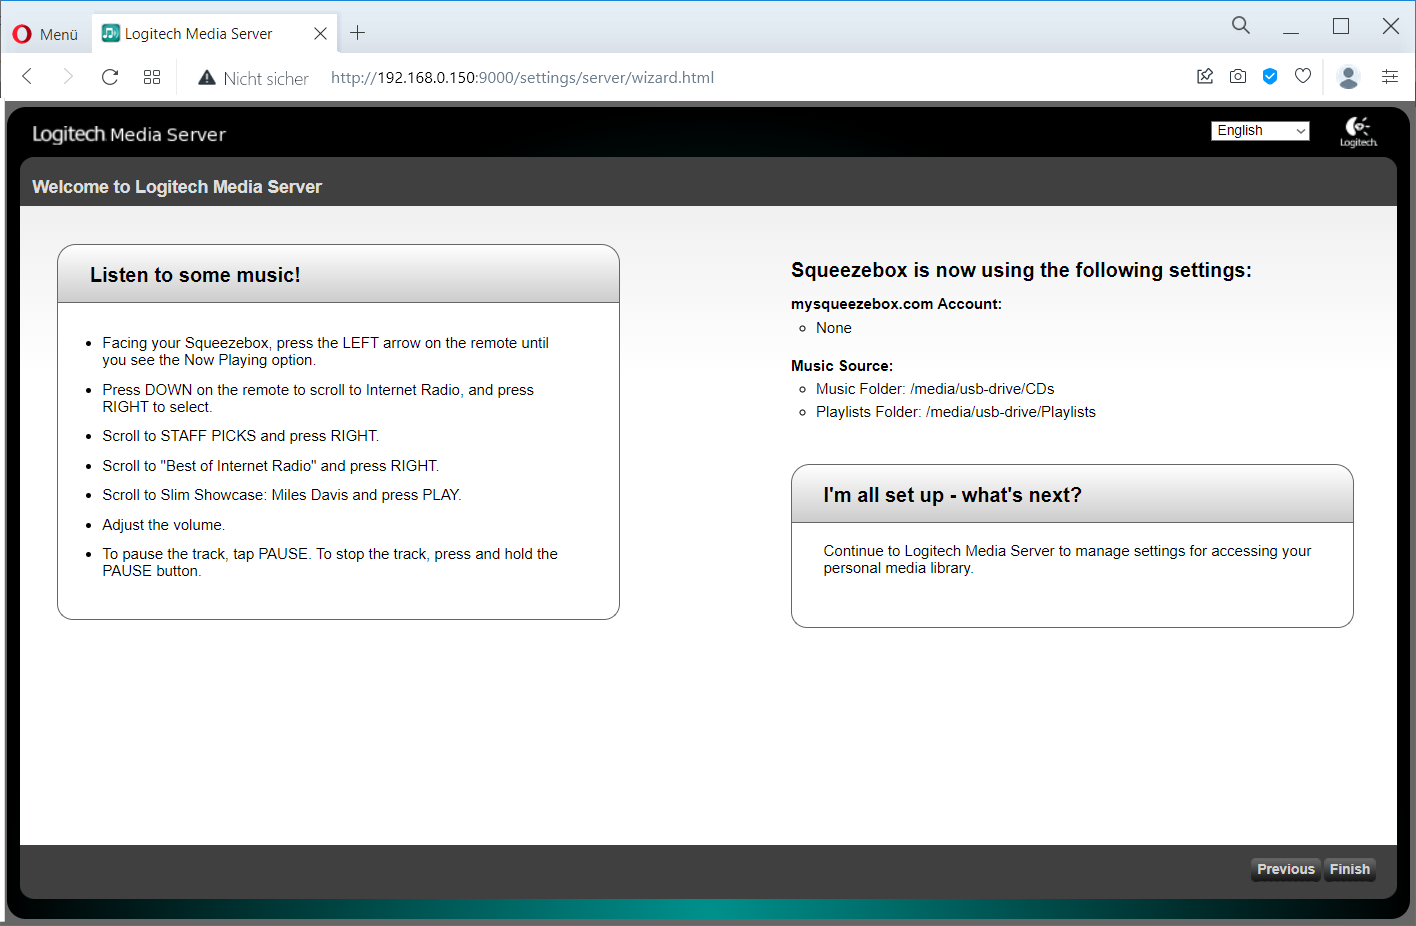
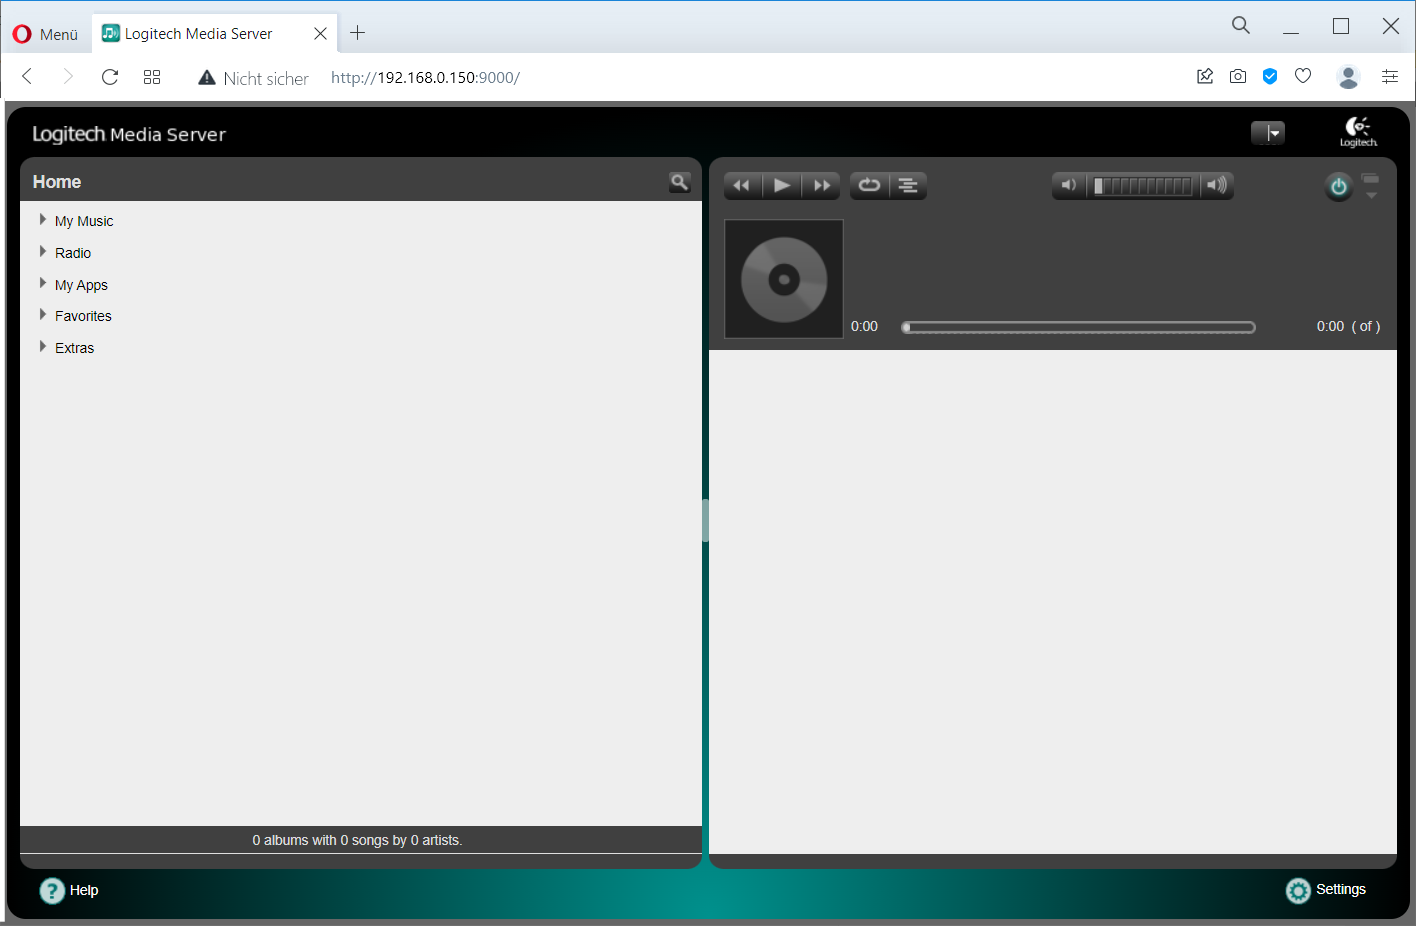
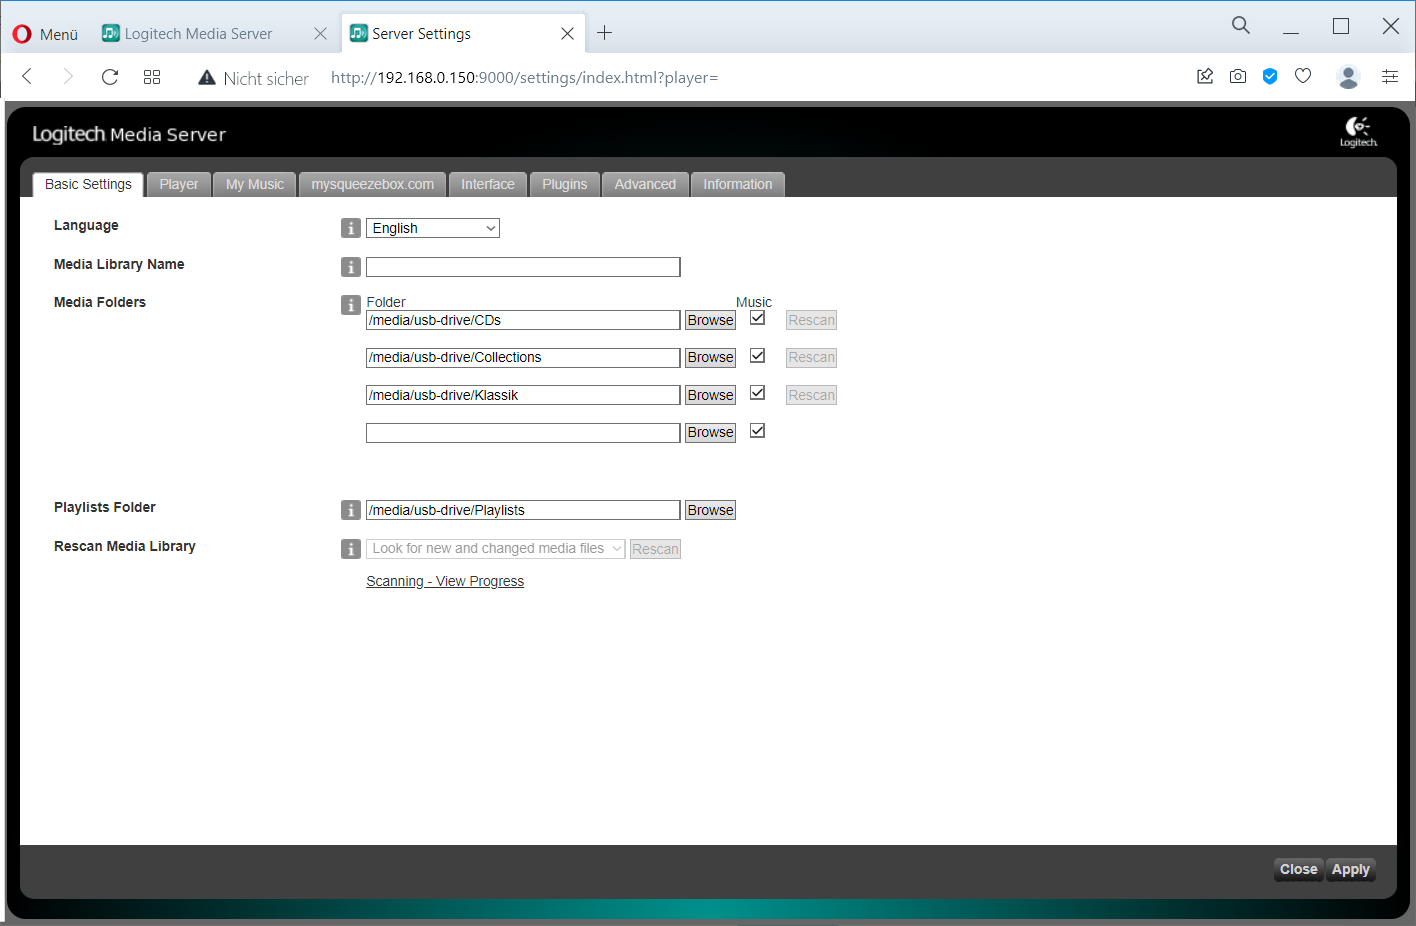
A setup wizard opens in the browser at this address, with which the most important basic settings of the Logitech Media Server can be made. The registration at mysqueezebox.com is optional and can be skipped. After completing the setup, the actual start page appears. Under Settings, additional directories containing music files can be configured if necessary.
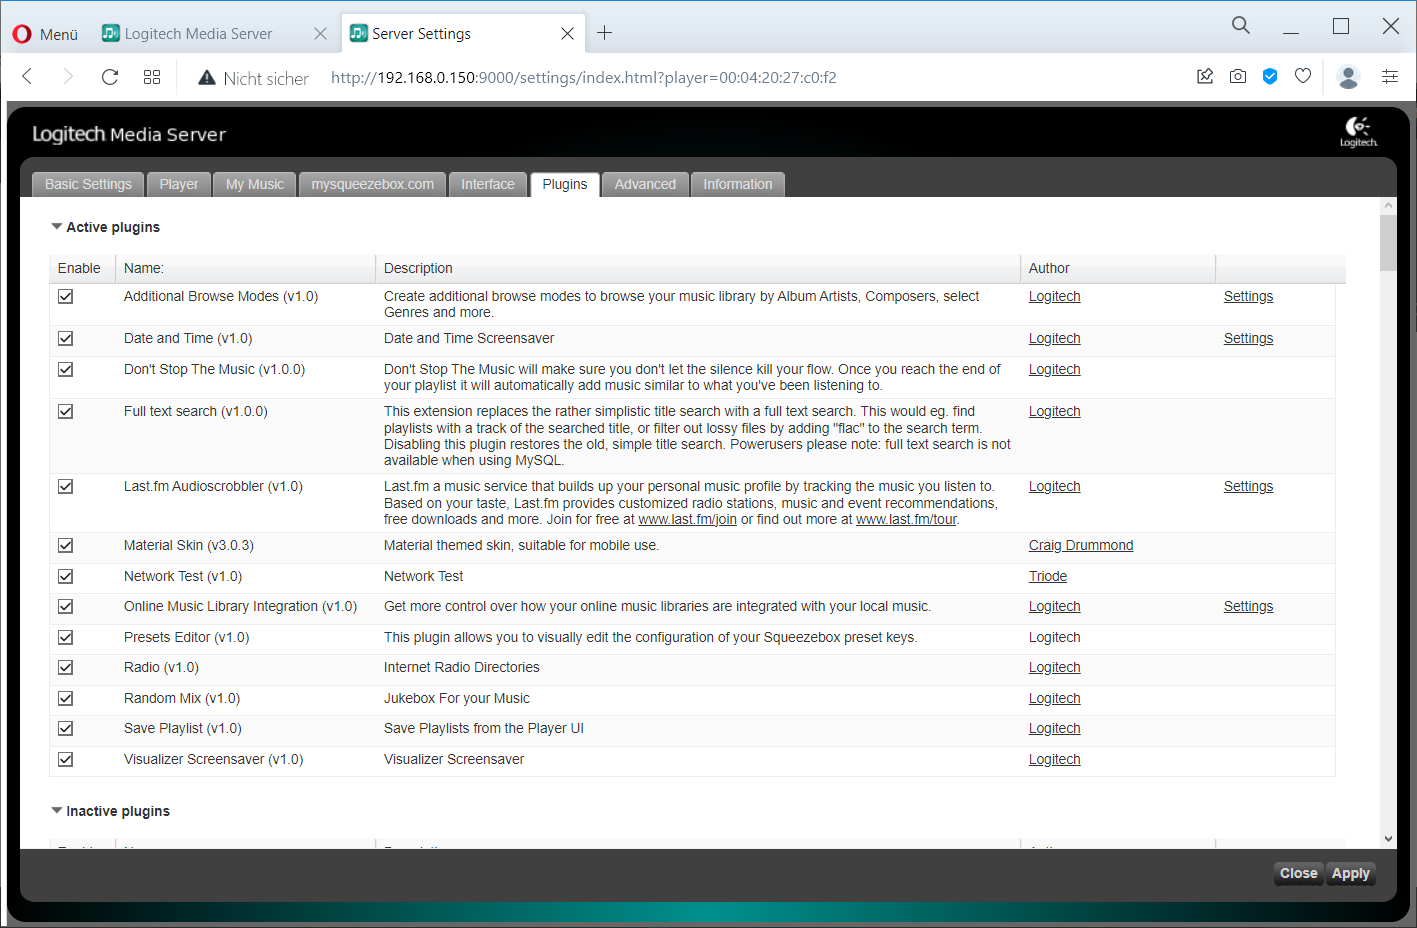
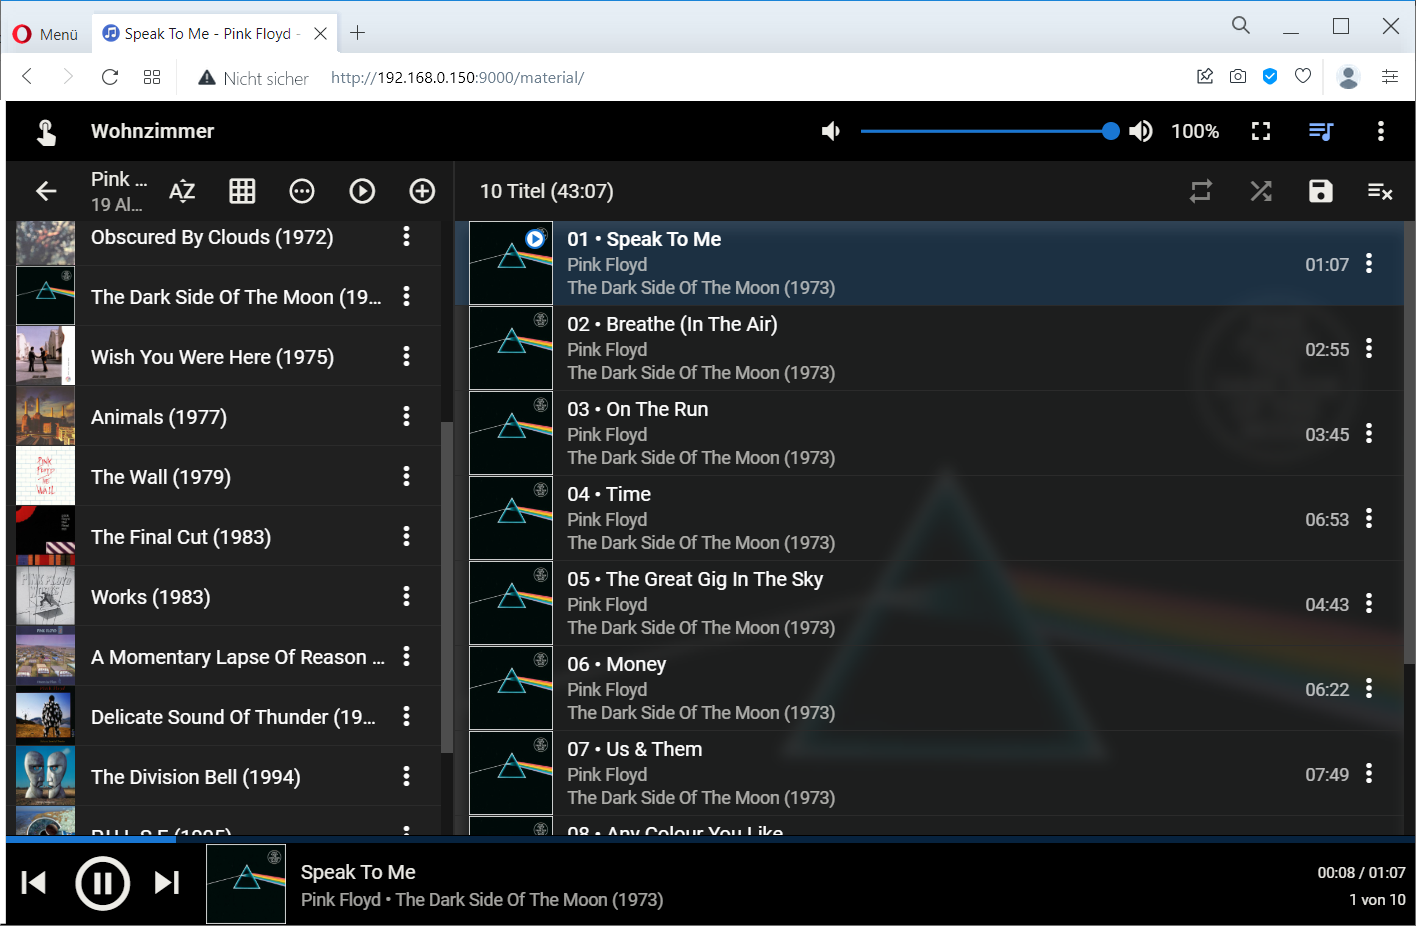
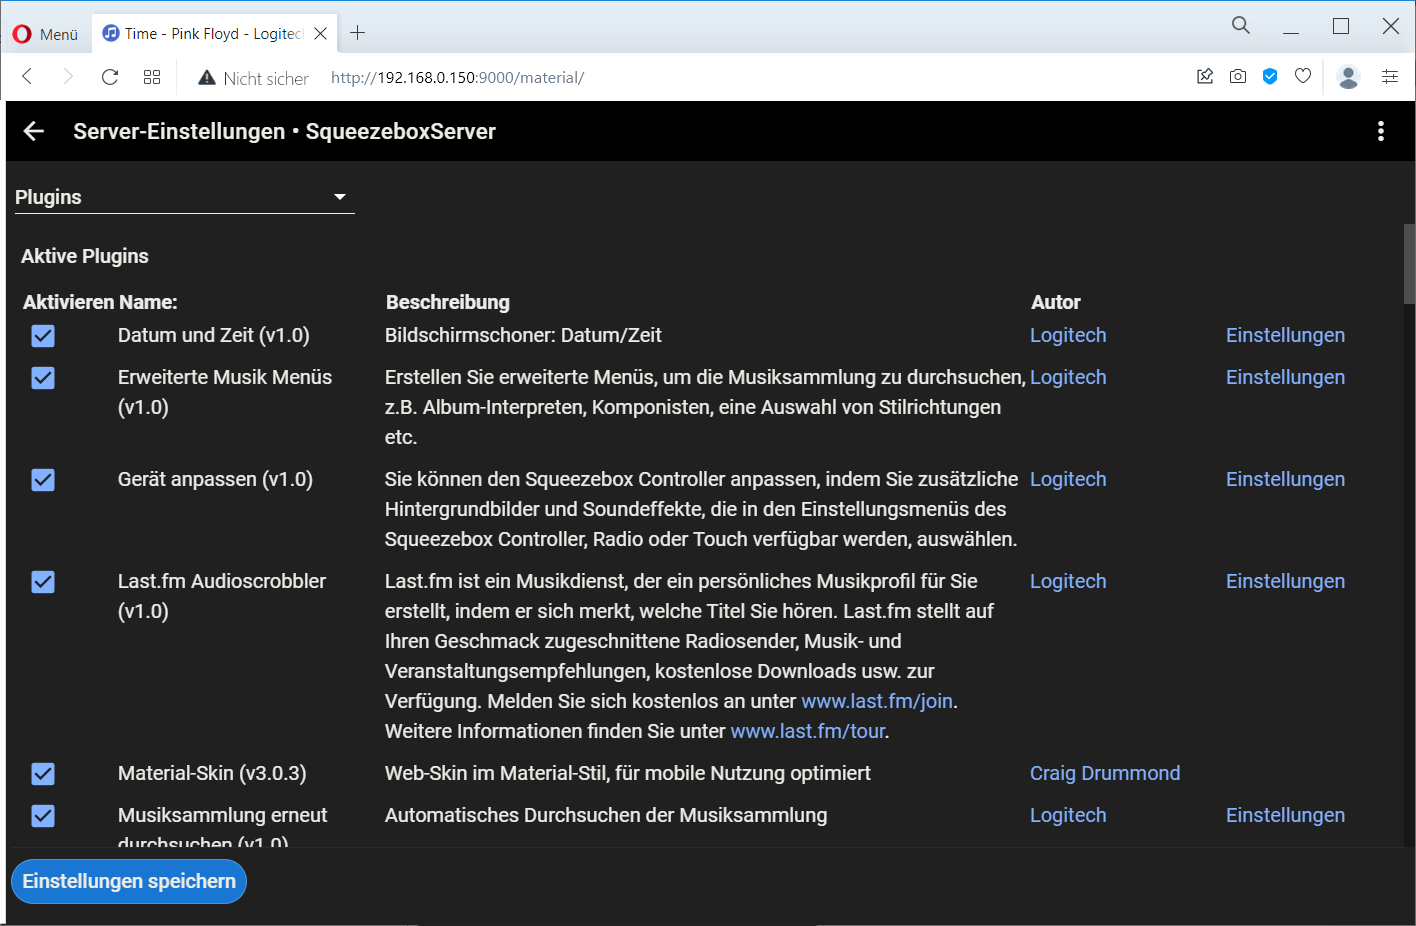
This completes the installation of the Logitech Media Server. In the settings, under the Plugins tab, unnecessary plugins can now be removed and, if necessary, additional plugins can be added. Since the user interface is now somewhat outdated, I recommend the Plugin Material Skin. After installation, the web interface can be reached under the address
http://192.168.0.150:9000/material/
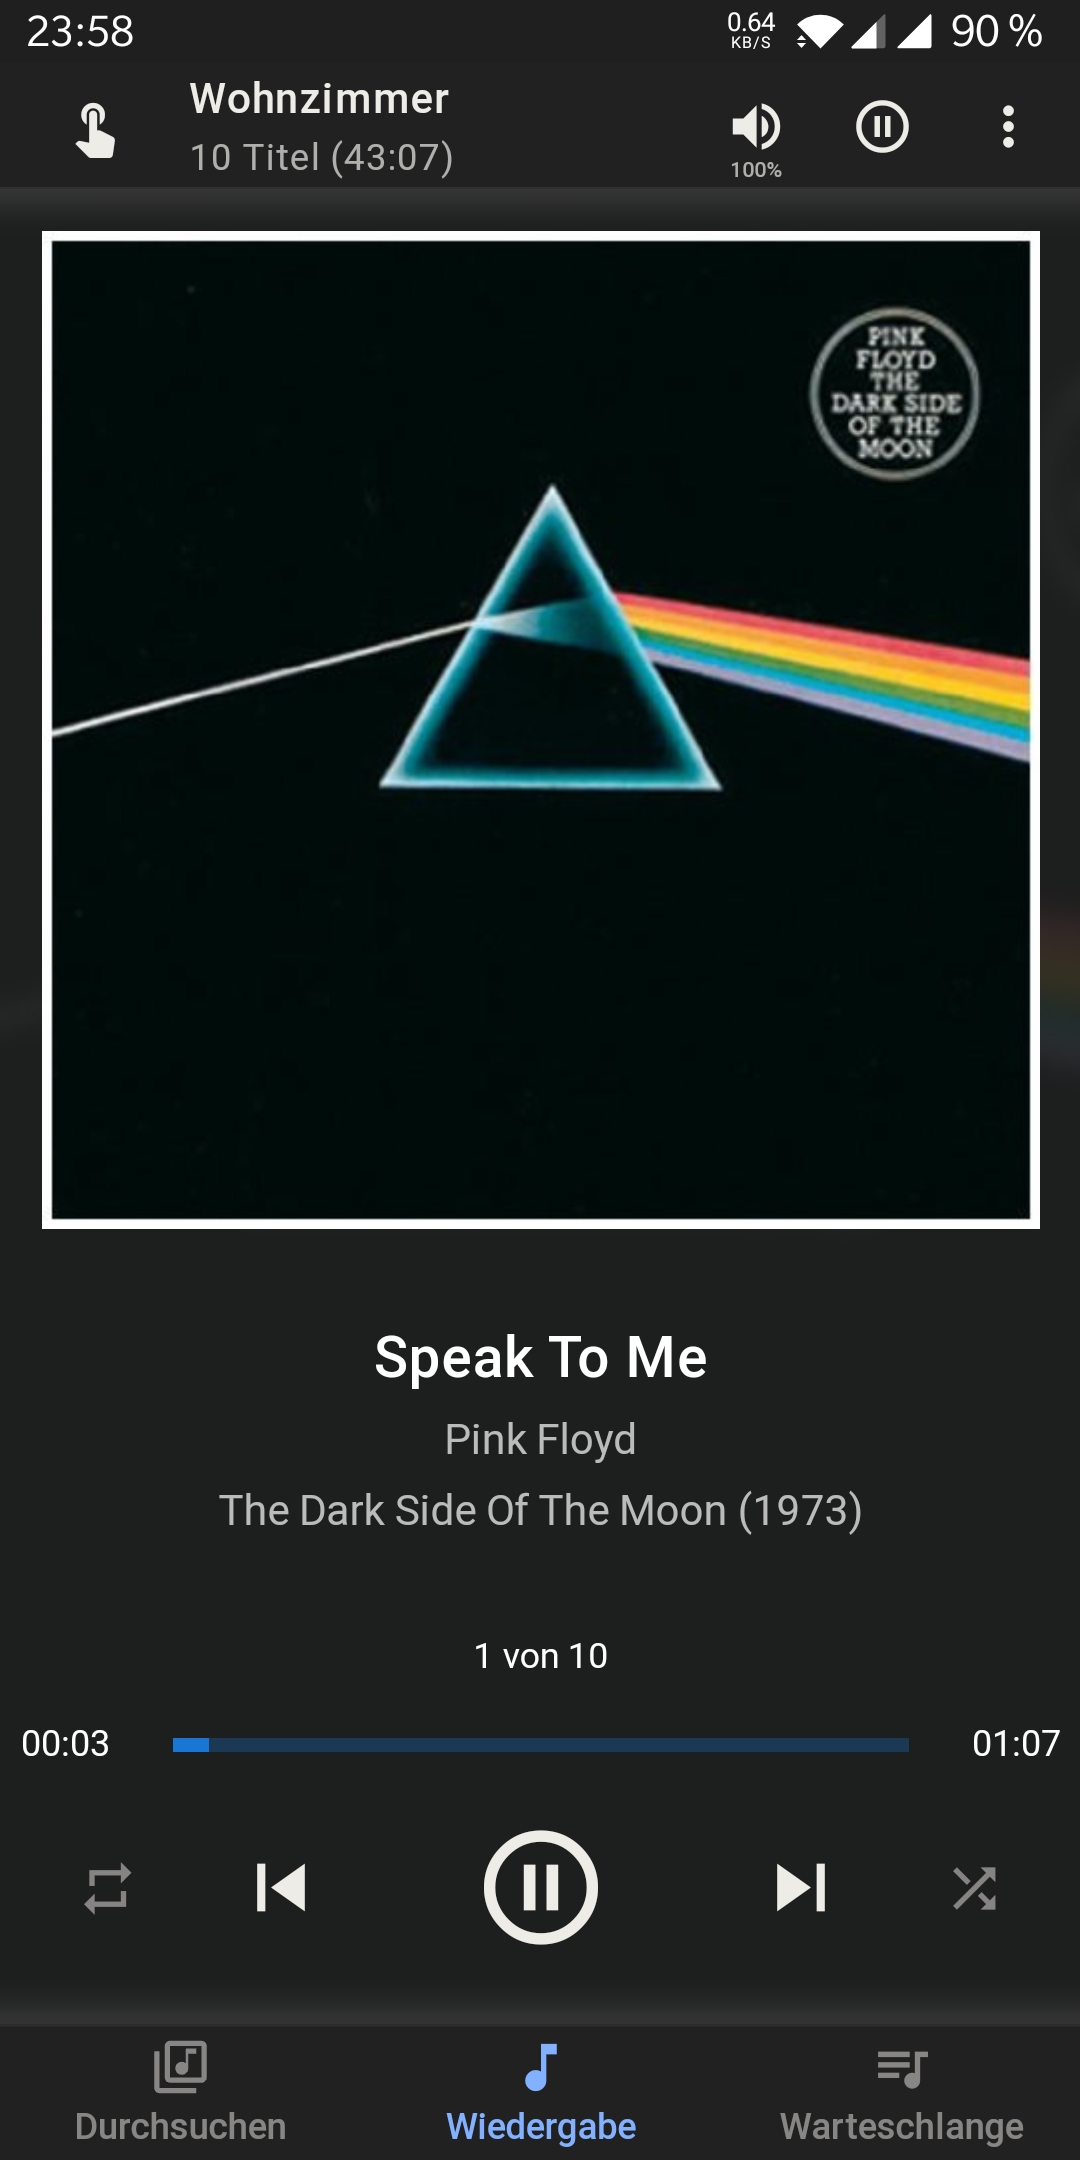
With this plugin, the user interface is not only designed in a much more modern way, but can also be used on the smartphone, thus replacing the need for stand-alone apps.
Install system monitor
To monitor the system and show the most important data on the display, you still need a small program called Conky. Conky is a powerful system monitor that can be easily installed with the help of
sudo apt-get install conky
In a configuration file you can define which objects are to be displayed where. The configuration is created with
nano .config/.conkyrc
and then the following content is copied into it:
conky.config = {
    alignment = 'top_left',
    double_buffer = true,
    background = false,
    border_width = 0,
    cpu_avg_samples = 2,
    default_color = 'white',
    default_outline_color = 'white',
    default_shade_color = 'white',
    draw_borders = false,
    draw_graph_borders = true,
    draw_outline = false,
    draw_shades = false,
    use_xft = true,
    font = 'LiberationMono:bold:size=14',
    gap_x = 0,
    gap_y = 0,
    minimum_width = 800,
    maximum_width = 800,
    minimum_height = 600,
    maximum_height = 600,
    net_avg_samples = 2,
    no_buffers = true,
    out_to_console = false,
    out_to_stderr = false,
    extra_newline = false,
    own_window = true,
    own_window_class = 'Conky',
    own_window_type = 'desktop',
    stippled_borders = 0,
    update_interval = 1.0,
    uppercase = false,
    use_spacer = 'none',
    show_graph_scale = false,
    show_graph_range = false
}

conky.text = [[
${color grey}Time: $color${time %a %d. %b %k:%M}  ${color grey}Uptime: $color$uptime
${voffset 4}${color grey}CPU Freq: $color$freq MHz   ${goto 225}${color grey}Temp: $color$acpitemp °C ${goto 400}${color grey}RAM Used:$color $mem  ${goto 615}${color grey}Total: $color$memmax
${color grey}CPU Usage:$color ${goto 115}${cpugraph cpu0 64,270 00ff00 ff0000 -t} ${goto 400}${color grey}RAM Usage:$color${offset 4}${memgraph 64,280 00ff00 ff0000 -t}
${color grey}Net Up: $color ${goto 115}${upspeedgraph wlan0 64,270 00ff00 ff0000 -t} ${goto 115}${voffset 10} ${upspeed wlan0}  ${voffset -10}  ${goto 400}${color grey}Down: $color ${goto 514}${downspeedgraph wlan0 64,280 00ff00 ff0000 -t} ${goto 514}${voffset 10} ${downspeed wlan0}  ${voffset -10}
${color grey}SD Card: $color ${goto 115}${fs_used /}/${fs_size /} ${goto 400}${color grey}Disk IO: $color${goto 514}${diskiograph sda1 64,280 00ff00 ff0000 -t}
${voffset -60}${color grey}Disk: $color ${goto 115}${fs_used /media/usb-drive}/${fs_size /media/usb-drive}
${voffset 40}${tail /var/log/squeezeboxserver/server.log 7}
]]
In order for the system monitor to start automatically after booting, a special file must be created with
mkdir -p .config/autostart
nano .config/autostart/conky.desktop
and the following content must be entered:
[Desktop Entry]
Type=Application
Name=Conky
Comment=Conky starten
Exec=/usr/bin/conky -b -c /home/pi/.config/.conkyrc
Now the top menu bar of the desktop must be hidden. To do this, call the editor with
sudo nano /etc/xdg/lxsession/LXDE-pi/autostart
and comment out the first line. The content must then look like this:
#@lxpanel --profile LXDE-pi
@pcmanfm --desktop --profile LXDE-pi
@xscreensaver -no-splash
To deactivate the screensaver, a file is again created with
mkdir -p .config/lxsession/LXDE-pi
nano .config/lxsession/LXDE-pi/autostart
and enter this content:
@xset s 0 0
@xset s noblank
@xset s noexpose
@xset dpms 0 0 0
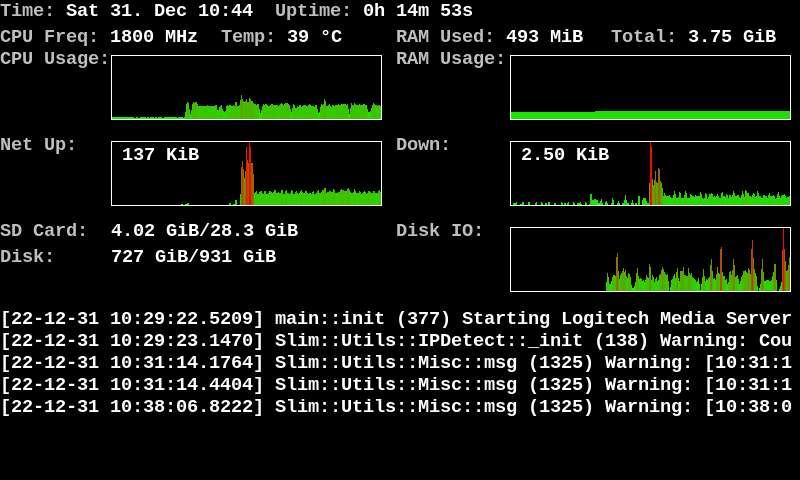
After a restart, you should see this picture on the monitor:
This completes the installation of the Logitech Media Server on the Raspberry 4B. I wish you a lot of fun with your new server and hope that you spend many hours listening to your favourite songs. If you have any questions or suggestions for improvement, please don't hesitate to contact me.