Photographing water drops with the Raspberry Pi as a control device
Almost nine years have passed since I last experimented with drop photography. So it was high time to revive the now slightly dusty device. To make it a bit more interesting, however, I didn't want to just pick up where I left off in 2012, but somehow improve the control device. At the time, the timing of the water drops was controlled by a laptop connected to the Arduino via USB. I had written the software in Java and for the GUI I used special classes of the NetBeans development environment. Even then it seemed a bit cumbersome to me, but at that time it was the easiest way to develop a graphical user interface for the droplet control. The search for new hardware and software cost me quite some time. If you want to skip this odyssey, you can read on at the final solution.
Search for suitable hardware/software

Nowadays you use your smartphone for pretty much everything, so my first thought was to write an app where you can enter the timings. The connection with the Arduino could be done via Bluetooth. So I bought the Bluetooth module HC-06 for a few Euros, which is connected to the Arduino with only four wires. But during the first tests I already had problems. I tried it with several smartphones, and pairing worked smoothly with very few of them. Some did not even want to. Thus, this variant was immediately eliminated.
But if it doesn't work via Bluetooth, then I at least wanted to have a display in the housing and enter the values for the water drops directly on the control unit via a rotary encoder, for example. 
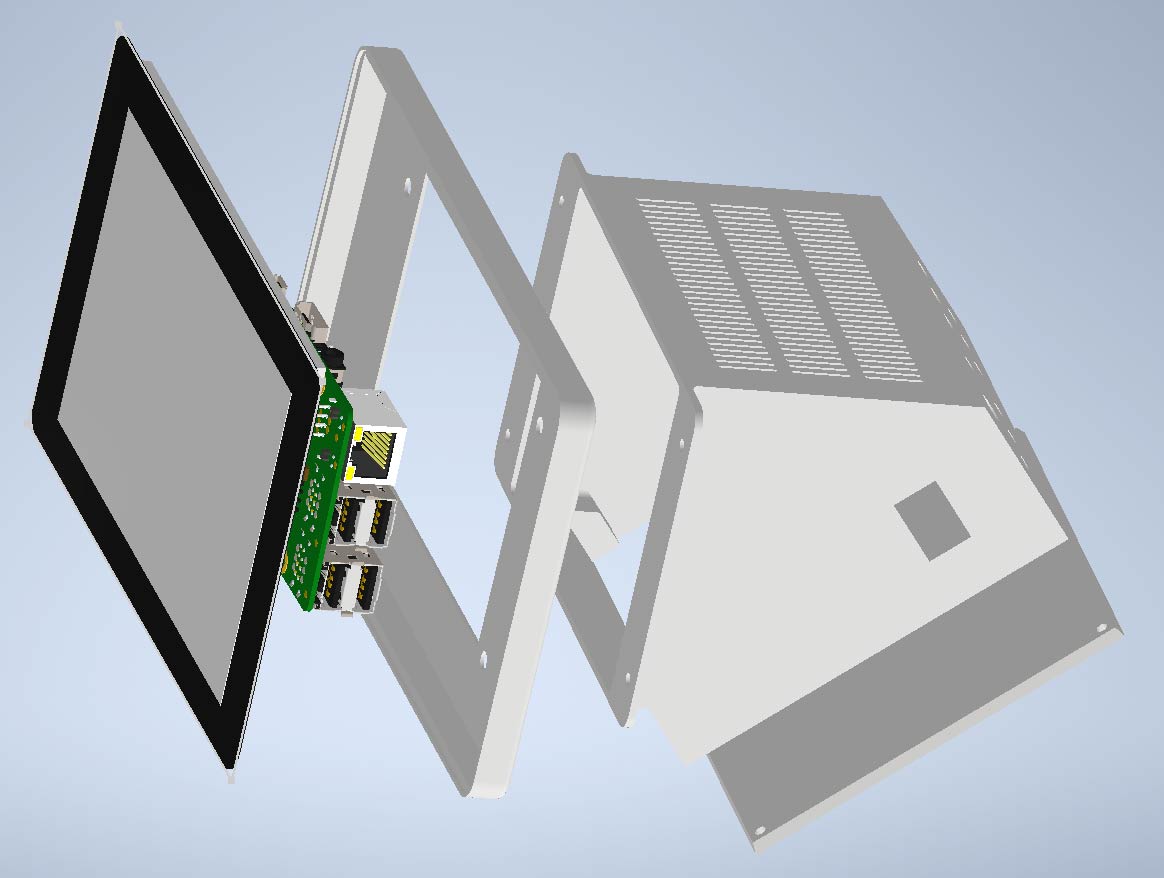
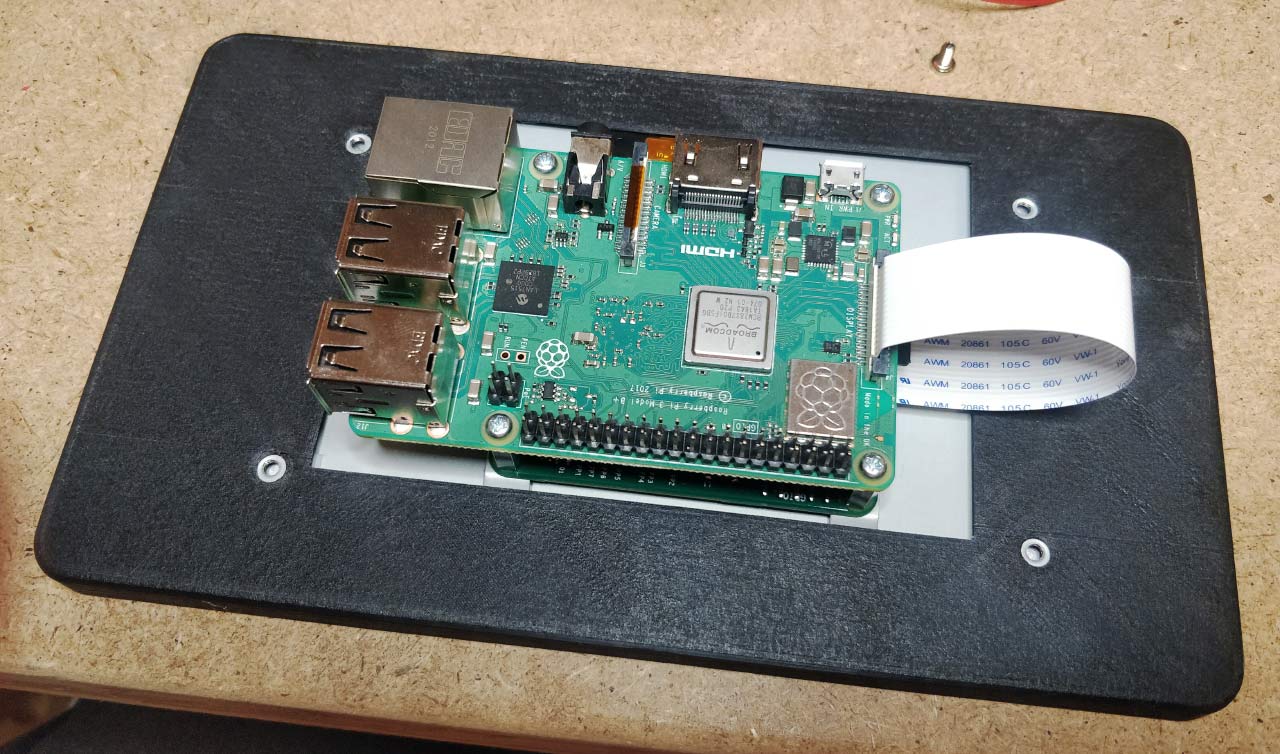
But I didn't want to give up the idea of having my own display. Preferably with touch input. But an Arduino is much too weak for that. By chance I had a Raspberry Pi 3 Model B+ lying around, so the only thing missing was a suitable display. After some research I decided to use the official 7" touchscreen display, because it uses the DSI connector of the Raspberry Pi. This saves the hassle of wiring through the HDMI port. Now I just had to figure out what software to use to write the graphical user interface for the droplet controller. Since I come from the Java world, I first tried JavaFX. Unfortunately, JavaFX is now no longer part of the Java SDK and therefore does not run natively on the Raspberry Pi. But there is the LibericaJDK from BellSoft, which contains JavaFX and is also available for the ARM architecture of the Raspberry Pi. But also here the disillusionment came quickly. The fullscreen mode did not work properly, which also made this variant unusable for me. But I still had a second Java option. 
The solution: Python & Kivy
It was time to look for a completely different solution. So I searched the internet again and soon realized that Python is the most common language in hobbyist circles. If I had known before that the Pi in Raspberry Pi stands for Python Interpreter, I would have figured it out faster. All I needed now was a GUI framework. Python offers a wide range of GUI frameworks. After some experiments with PyQT and Tkinter I finally ended up with Kivy. Kivy is a very lightweight open source GUI toolkit to create graphical user interfaces with touch input. The toolkit is directly based on OpenGL ES 2, which has the big advantage that no graphical desktop is needed. So the Raspberry Pi OS Lite image is sufficient to create graphical user interfaces. However, some additional packages are needed, which you still have to install. With these steps I got it working on my Raspberry 3 B+:
sudo apt-get update
sudo apt-get upgrade

sudo apt-get install libsdl2-dev libsdl2-image-dev libsdl2-mixer-dev libsdl2-ttf-dev \
 pkg-config libgl1-mesa-dev libgles2-mesa-dev \
 python-setuptools libgstreamer1.0-dev \
 gstreamer1.0-plugins-{bad,base,good,ugly} \
 gstreamer1.0-{omx,alsa} python-dev

sudo apt install python3-pip

pip3 install kivy[base]

sudo apt-get install libmtdev1 xclip xsel

sudo apt-get install python3-rpi.gpio
Another advantage of Kivy is the platform independence. This facilitates the development enormously, because you can write the software very comfortably on the PC with PyCharm as development environment. There is a free community edition of this IDE, which is completely sufficient for the development. The Python scripts then only have to be copied to the Raspberry Pi and started there. Remote execution on the Raspberry Pi is unfortunately reserved for the Professional Edition.
Three months of intensive learning, programming and testing followed. Especially the extension of the Kivy framework took a lot of time. But now the software is so to a point that I would call it finished.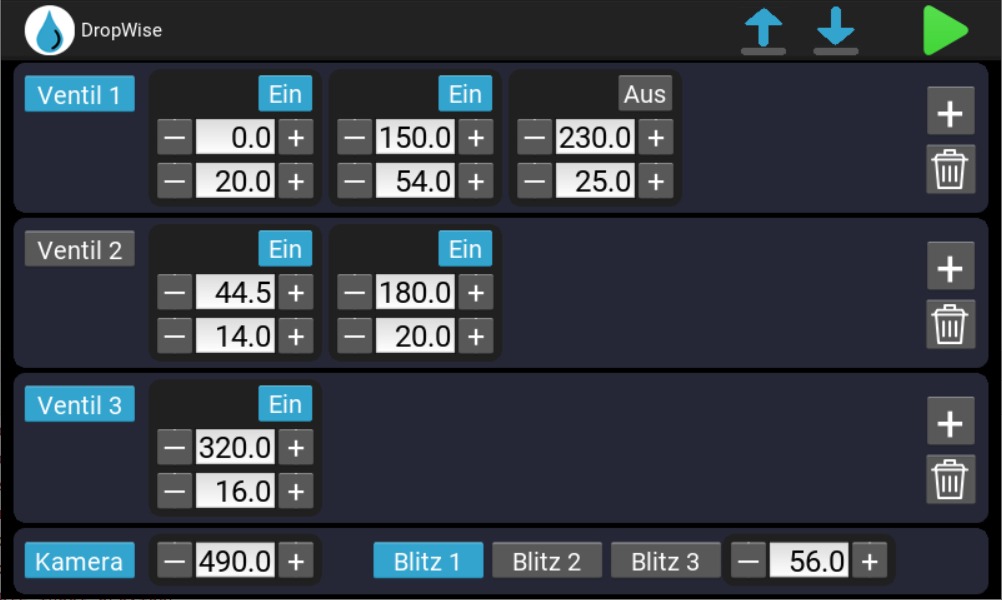
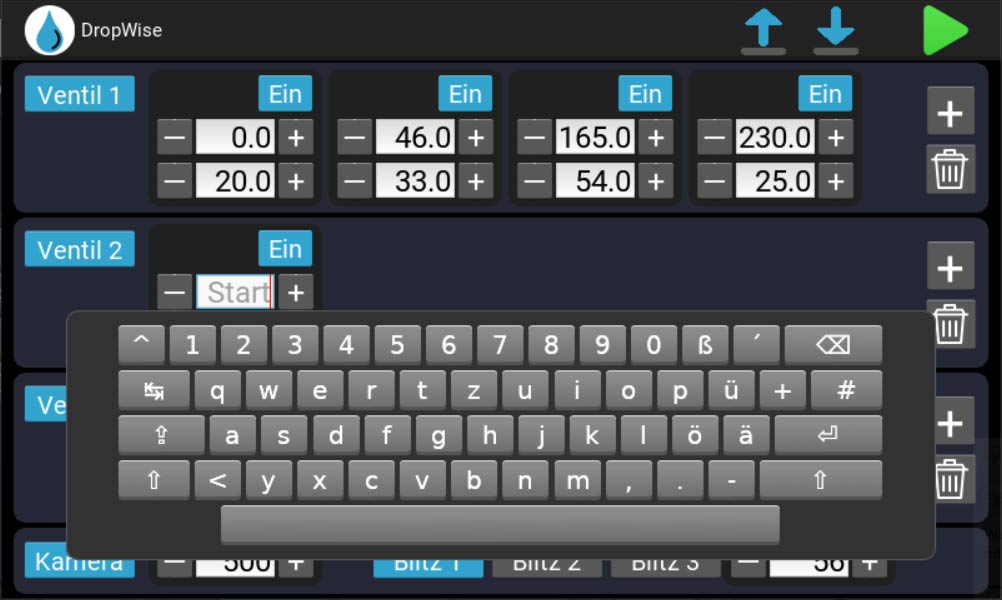
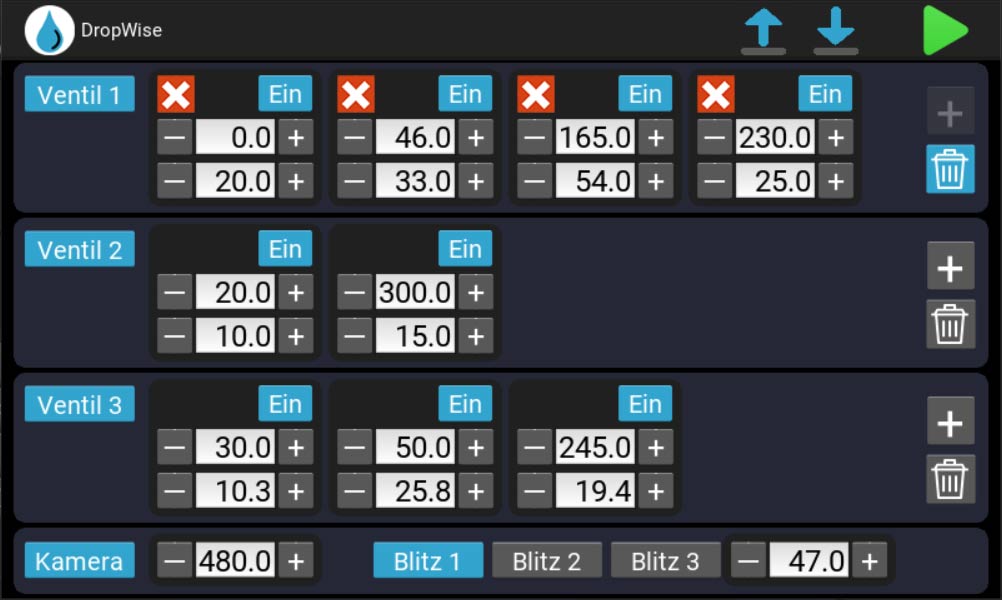
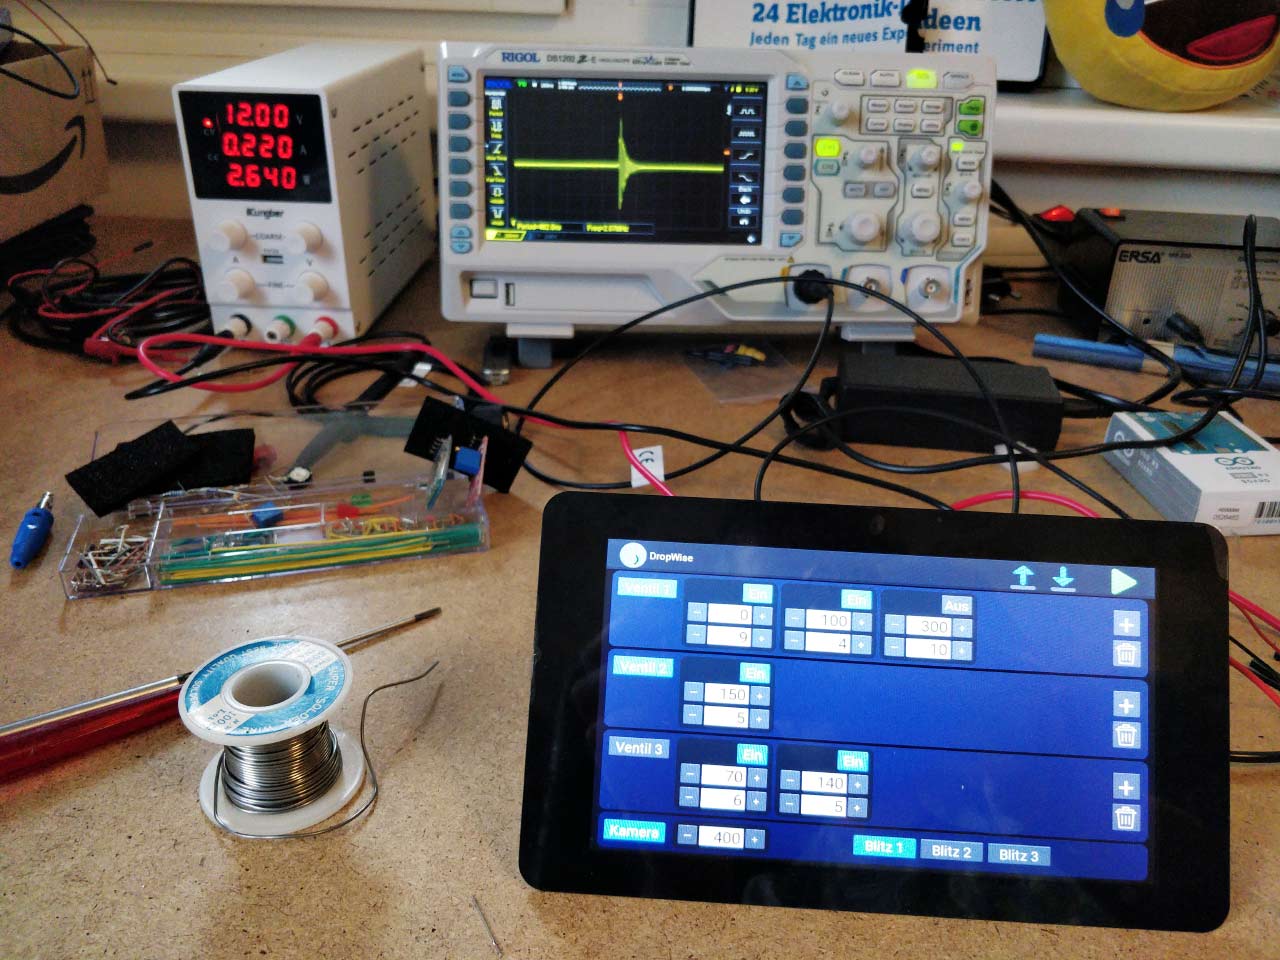
The control device offers the following features:
- Easy operation with user-friendly touch interface
- Controls up to 3 valves
- Controls up to 3 flashes
- Adjustable delay of the flashes
- Any number of drops
- Each valve, camera and flashes can be turned on/off separately
- Extremely accurate timings, adjustable to tenths of a millisecond
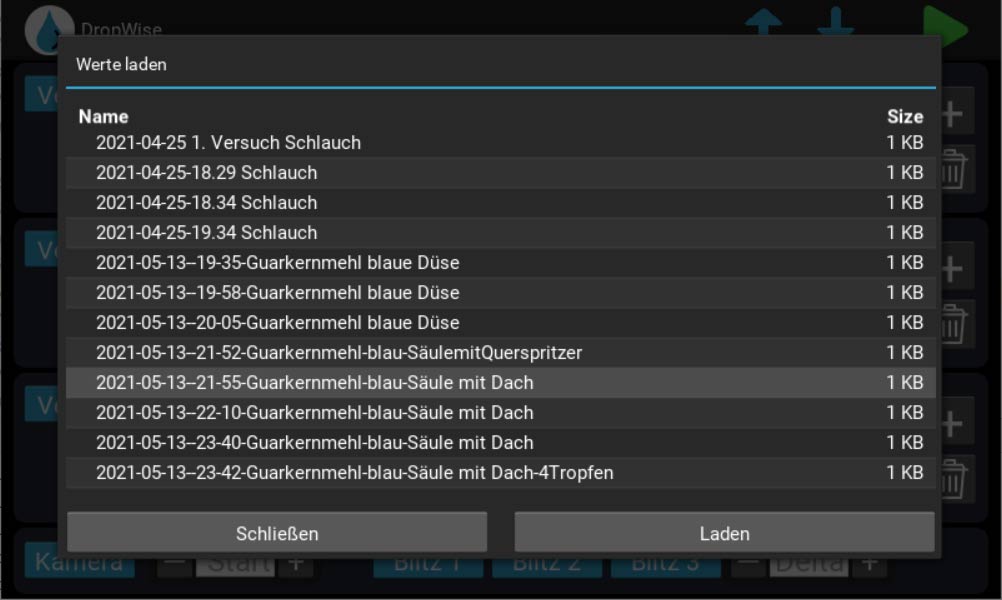
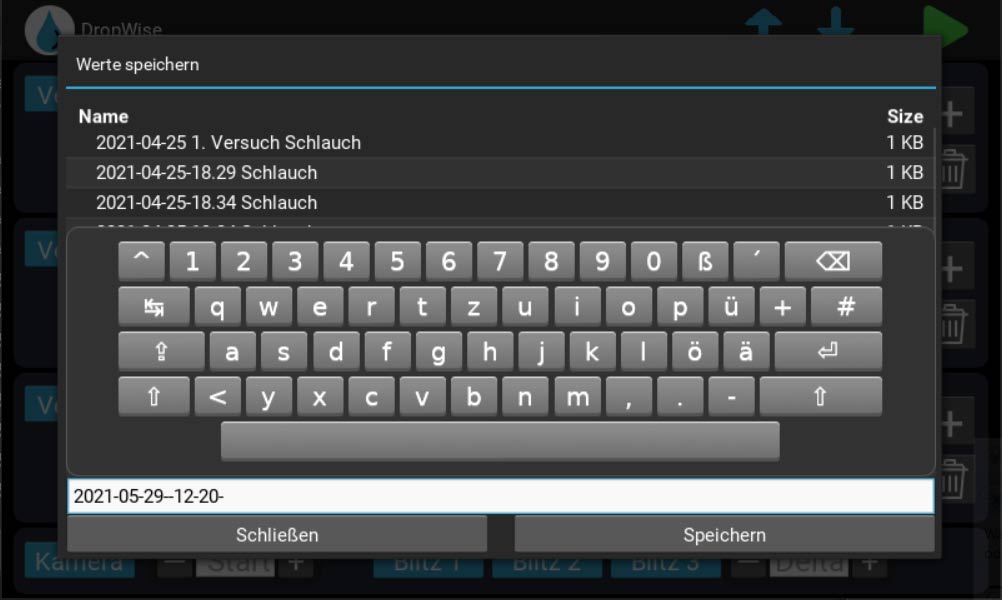
- Load and save any number of settings with automatic time stamp in name
- Input via on-screen keyboard or buttons with slow and fast modes
- Works with Nikon, Canon and Fuji cameras
Here are some more screenshots of the application:
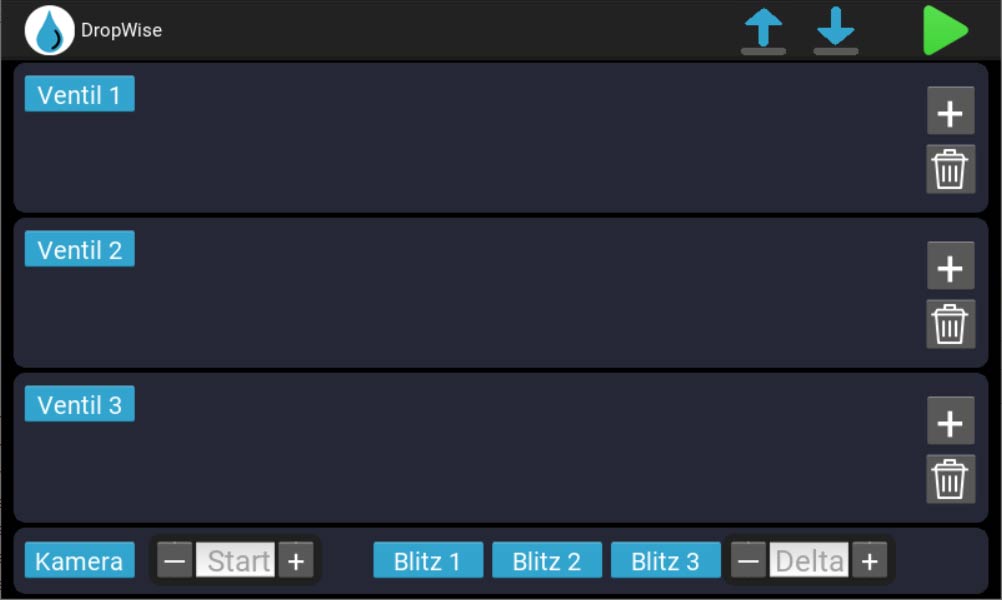

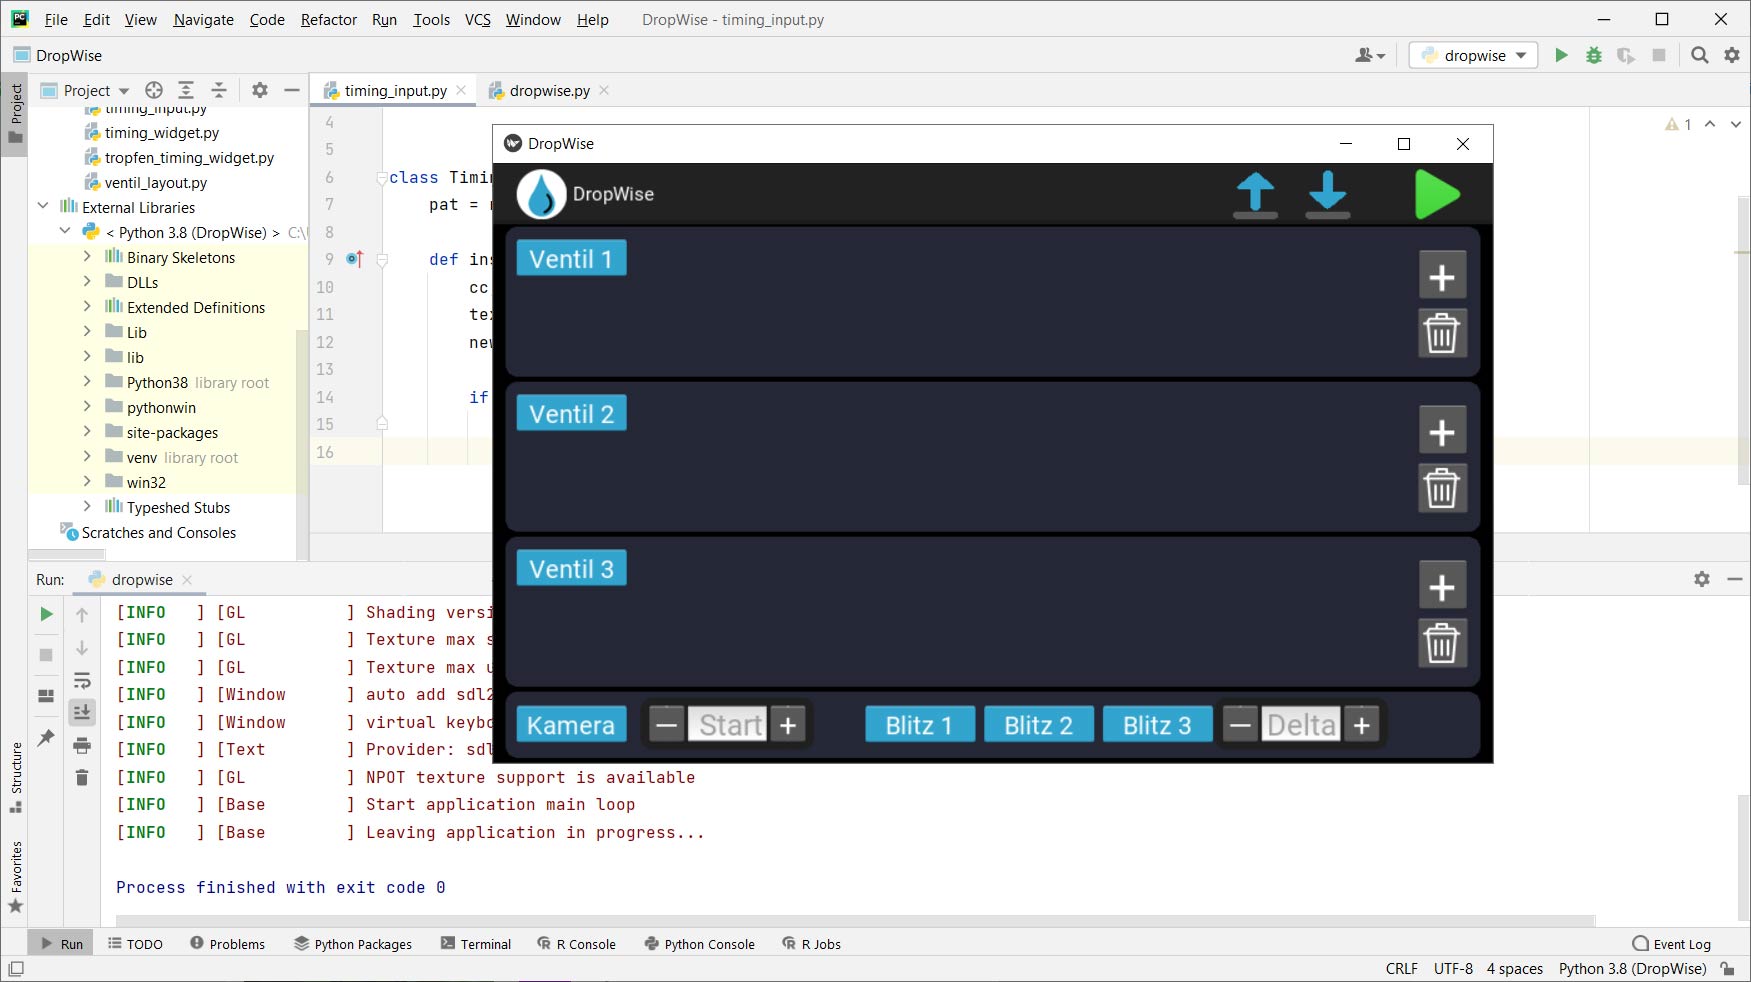
The layout was designed specifically for photographing water drops or drops on drops. The handling should be as simple as possible, and I think that this goal was achieved. But there are already some features on the to-do list, which will be integrated in the future.
Of course, the program must also have a name. After some research I decided to use DropWise. Somehow it sounds nice and I like the ambiguity...
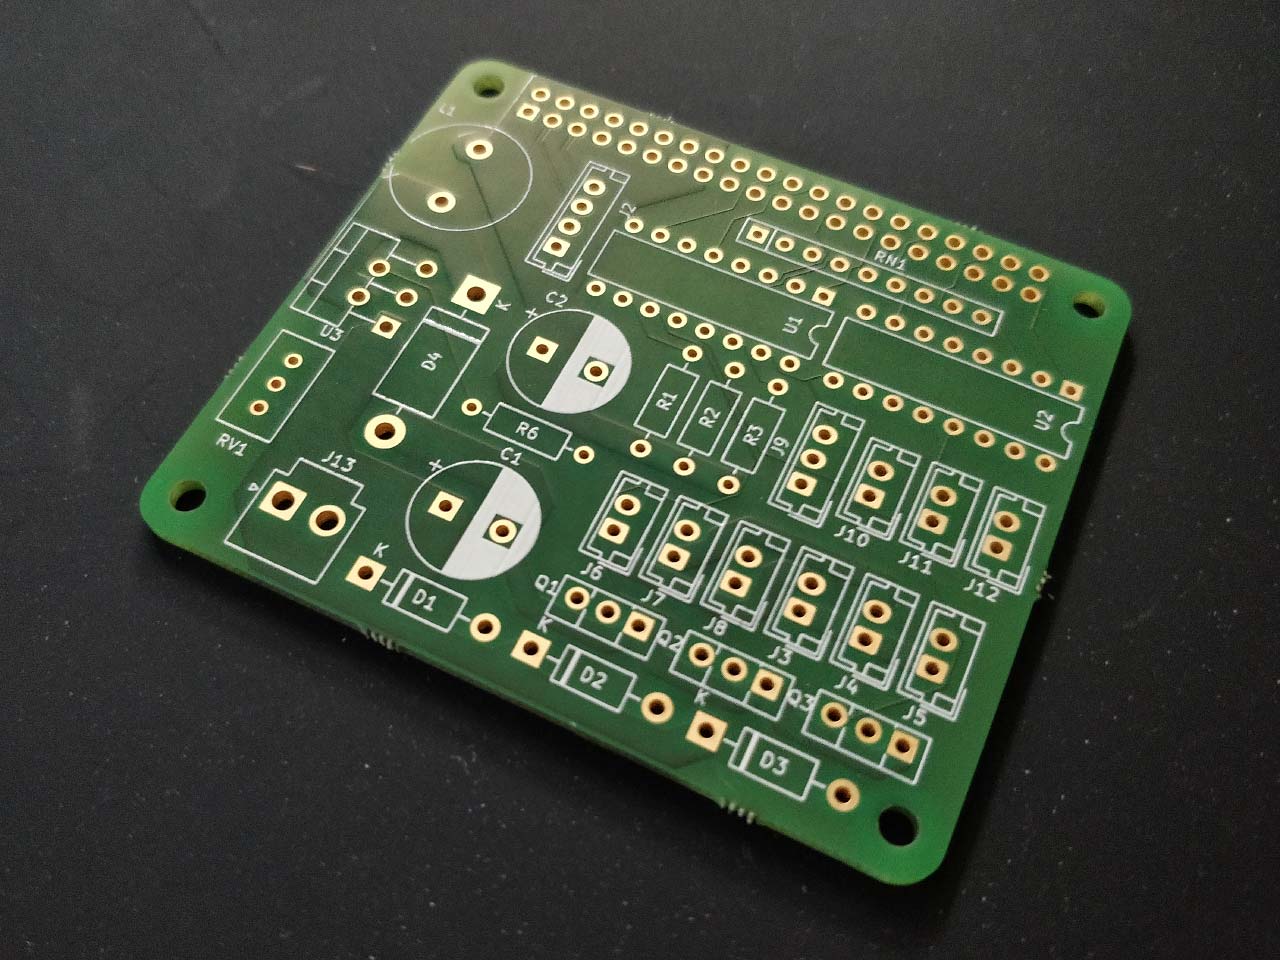
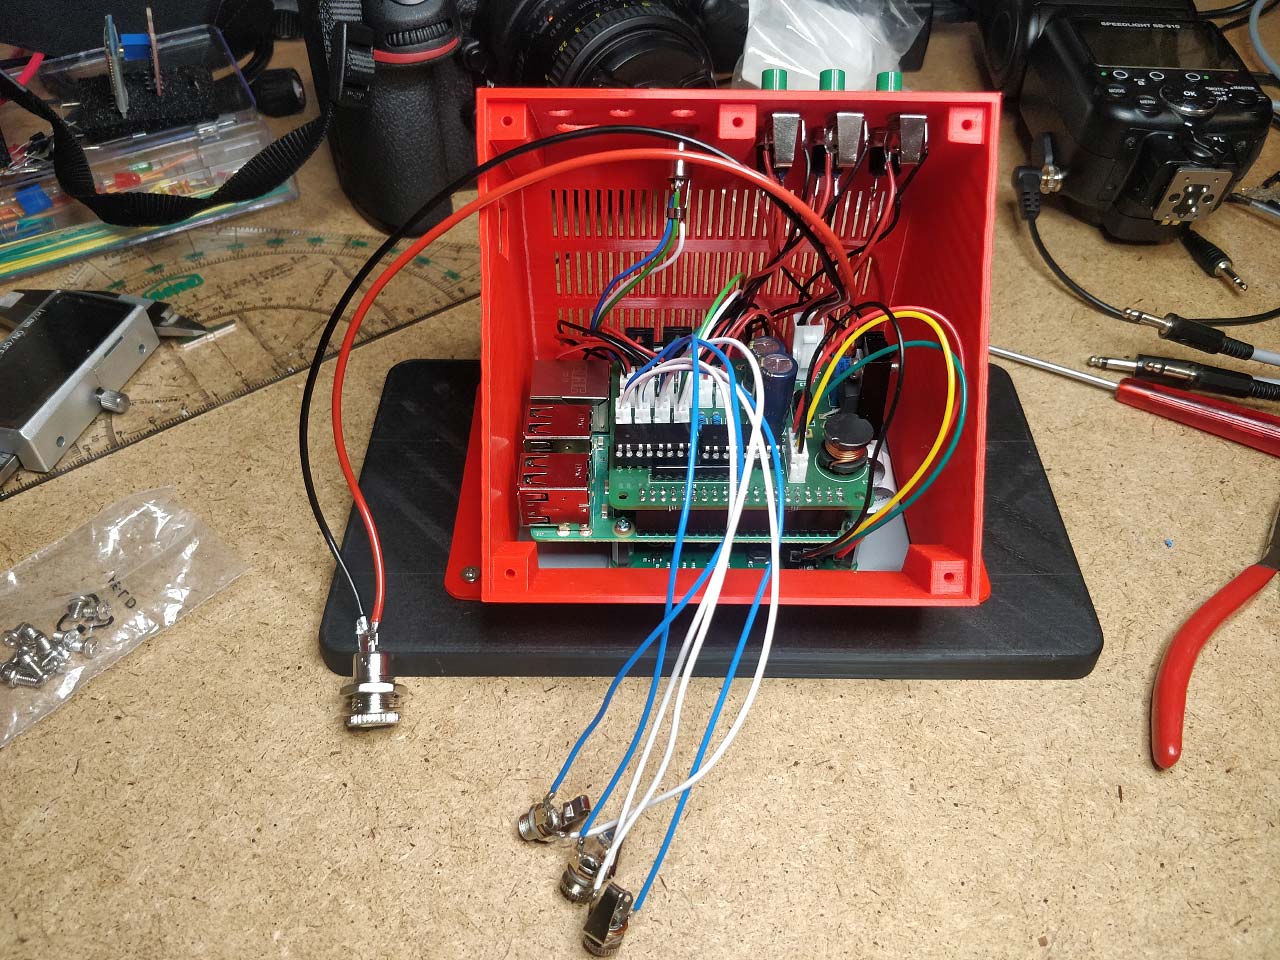
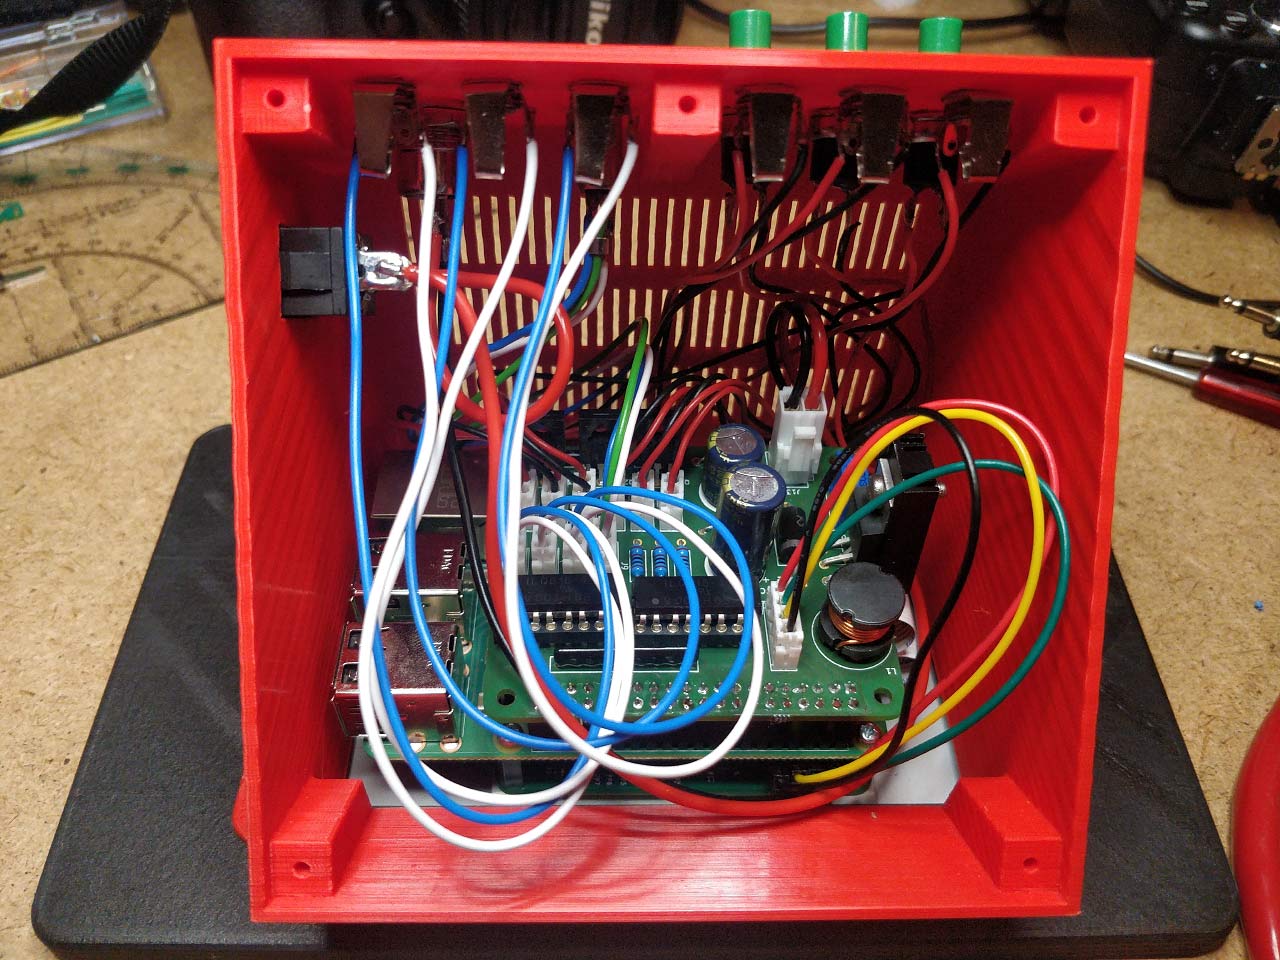
The electronics
The circuit for controlling the valves is basically the same as in my old solution. The valves are controlled by one BD139 NPN universal transistor each, which can handle a maximum collector current of 3 amperes. This is more than enough for the valves. An optocoupler serves as galvanic isolation between the Raspberry Pi and the transistors. Additionally, a flyback diode serves as protection against overvoltage when the valves are switched off.
In my first version, the flashes were still triggered by the camera via radio trigger. This time the flashes are triggered directly by the electronics. Thus the flashes can be switched on and off comfortably from the application. The circuit is designed so that any flash can be used that is triggered by short circuit.
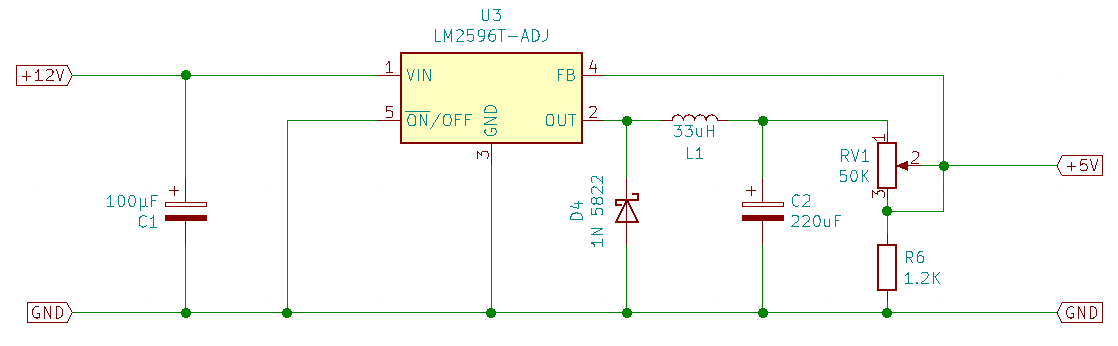
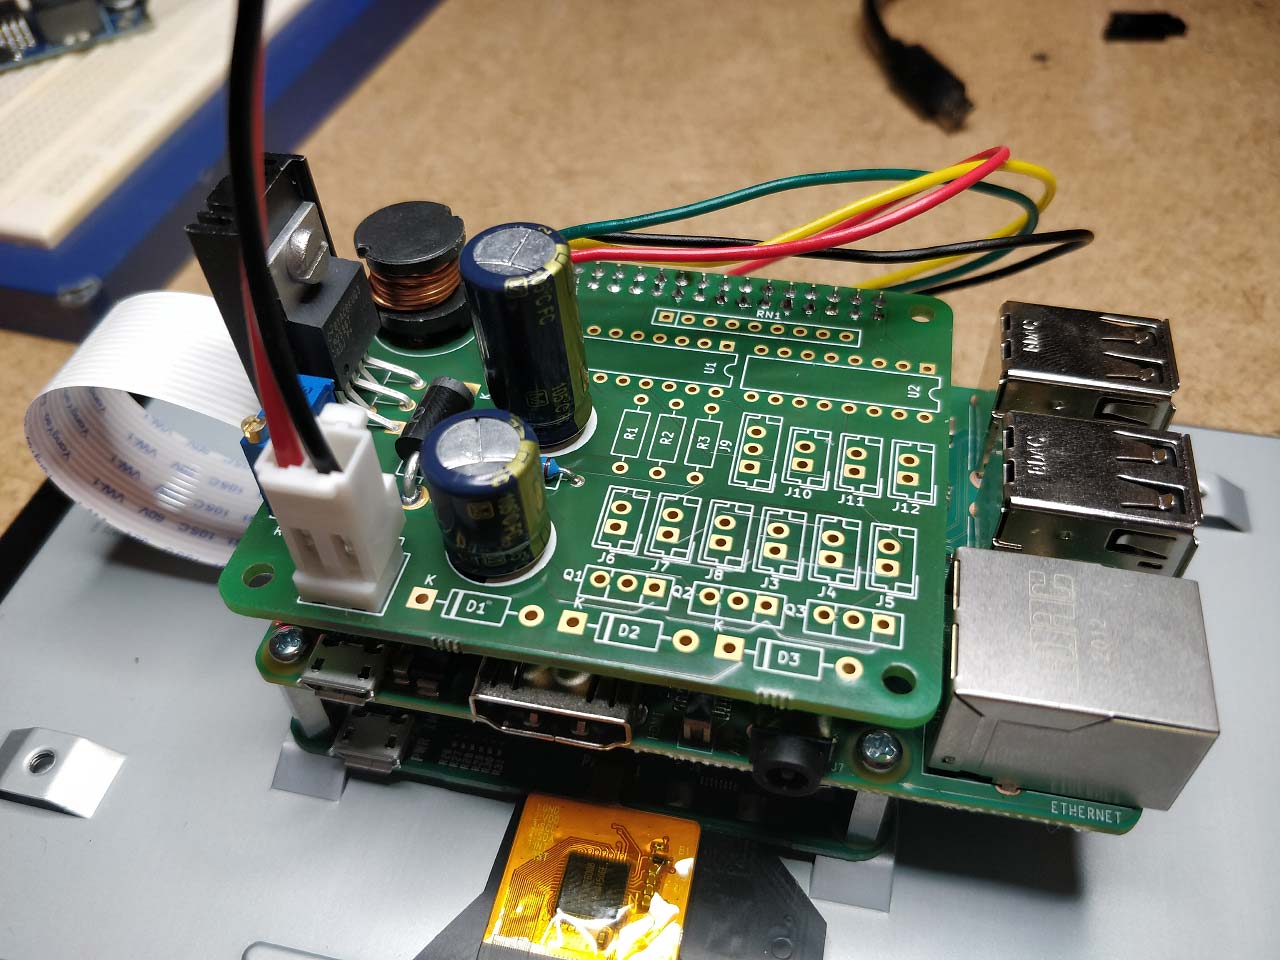
The power supply is a bit more complex. The Arduino has the advantage of being powered by 12 volts, just like the valves. Therefore, a simple 12 volt power supply is sufficient to operate the drop controller. The Raspberry Pi, however, needs a power supply of 5 volts. For this purpose, an LM2596T-ADJ step-down switching voltage regulator is integrated into the circuit, which can convert the voltage with very low losses, unlike a linear voltage regulator. The circuit for this looks like this:
I designed the entire circuit of the drop controller in KiCAD and created the board layout together with Freerouting. The finished board is then simply plugged onto the Raspberry and supplies it with power via the GPIO connector.
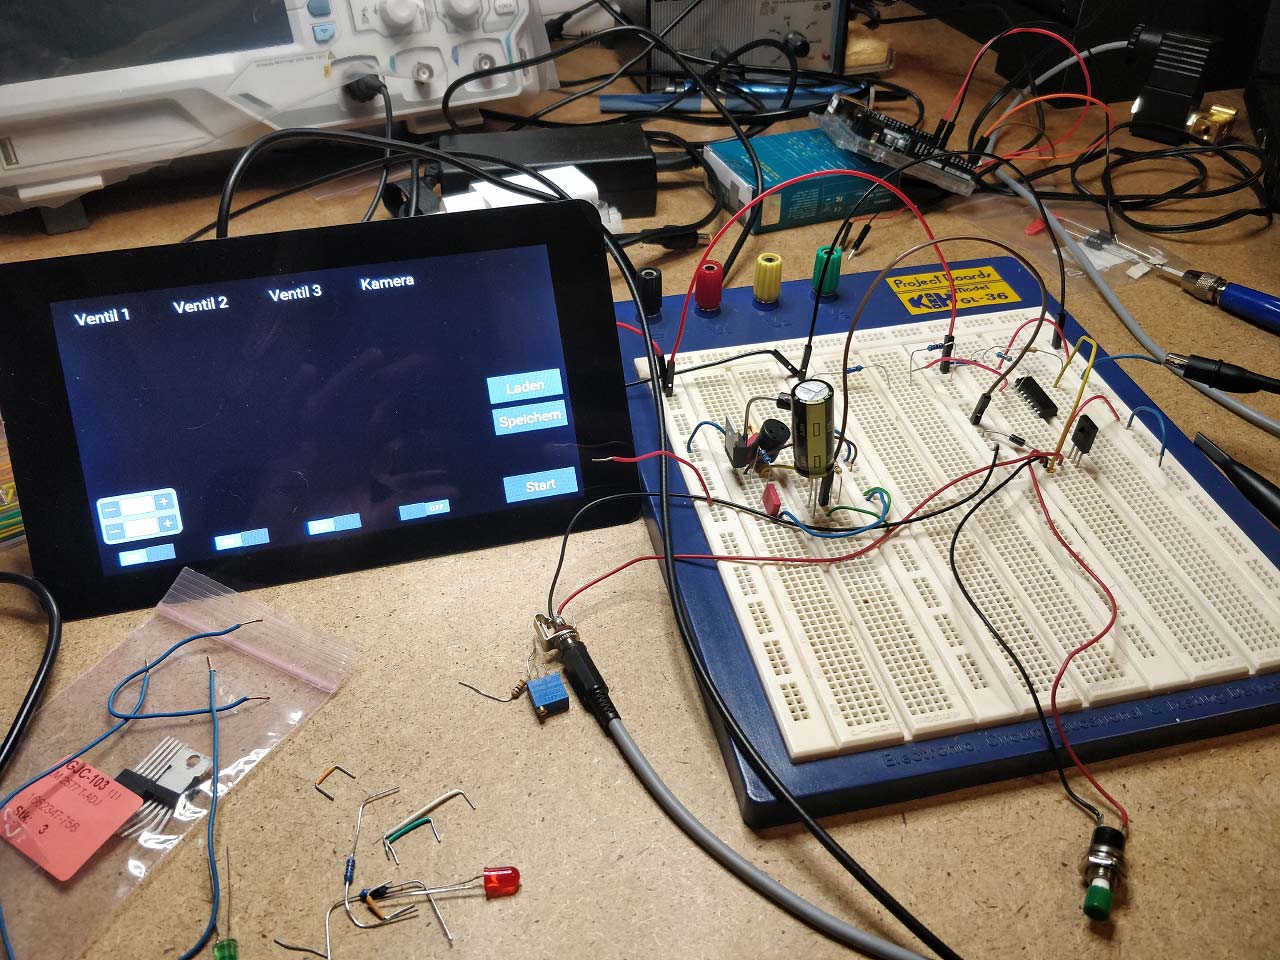
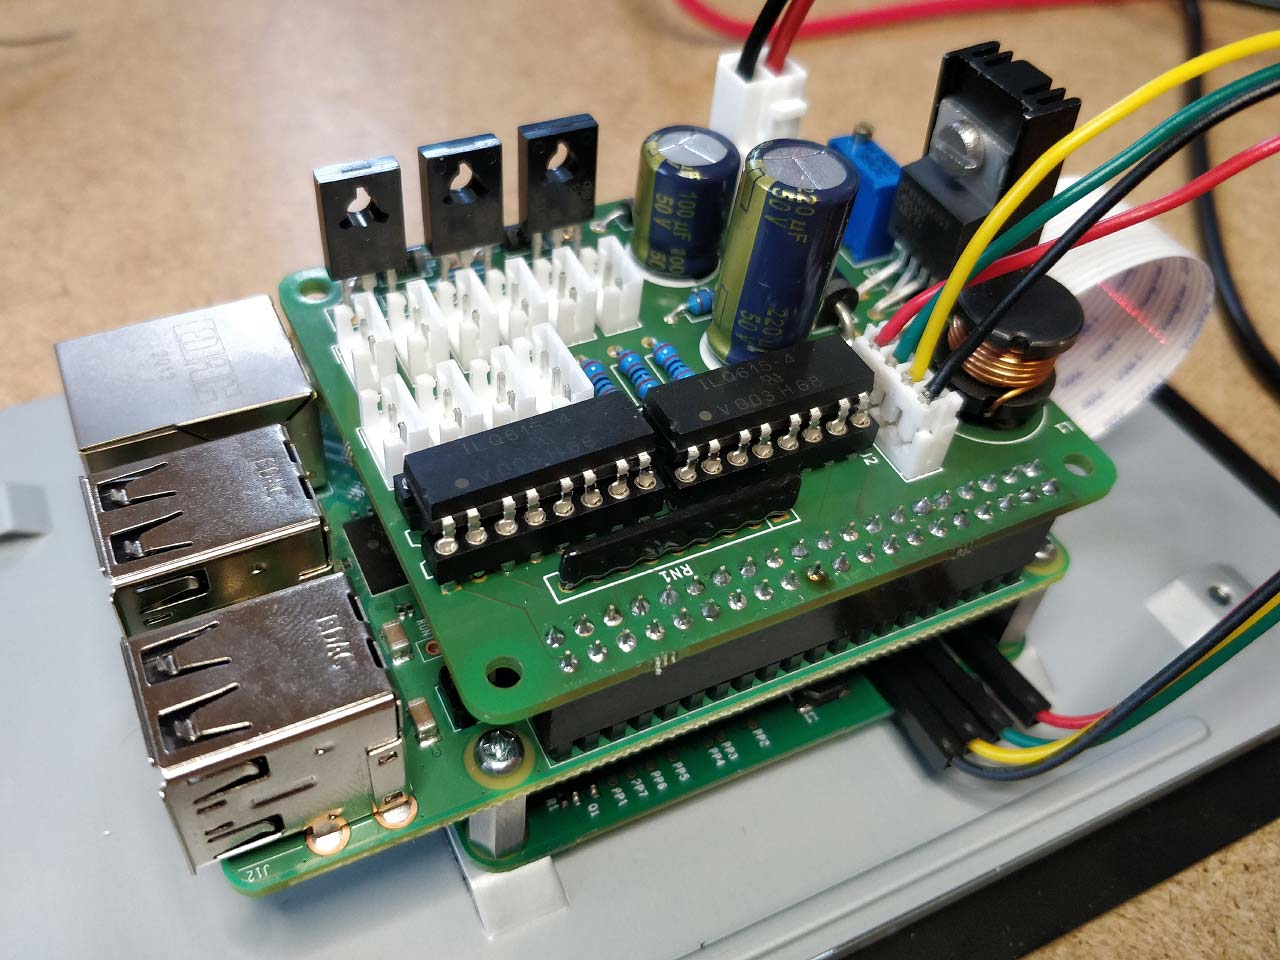
After soldering all the components together, a final test with camera, flash and the valves must not be missing, of course. The video should be watched with sound, so you can hear the click of the camera and the valves :)
By the way, the entire electronics including the Raspberry Pi and the display only need 2.64 watts. To reduce the consumption, the brightness of the display was lowered a bit and the HDMI output as well as the USB/LAN chip on the Raspberry were deactivated. With a Raspberry Pi 3 A+ I could have done this easier and cheaper, but I didn't know it at that time.
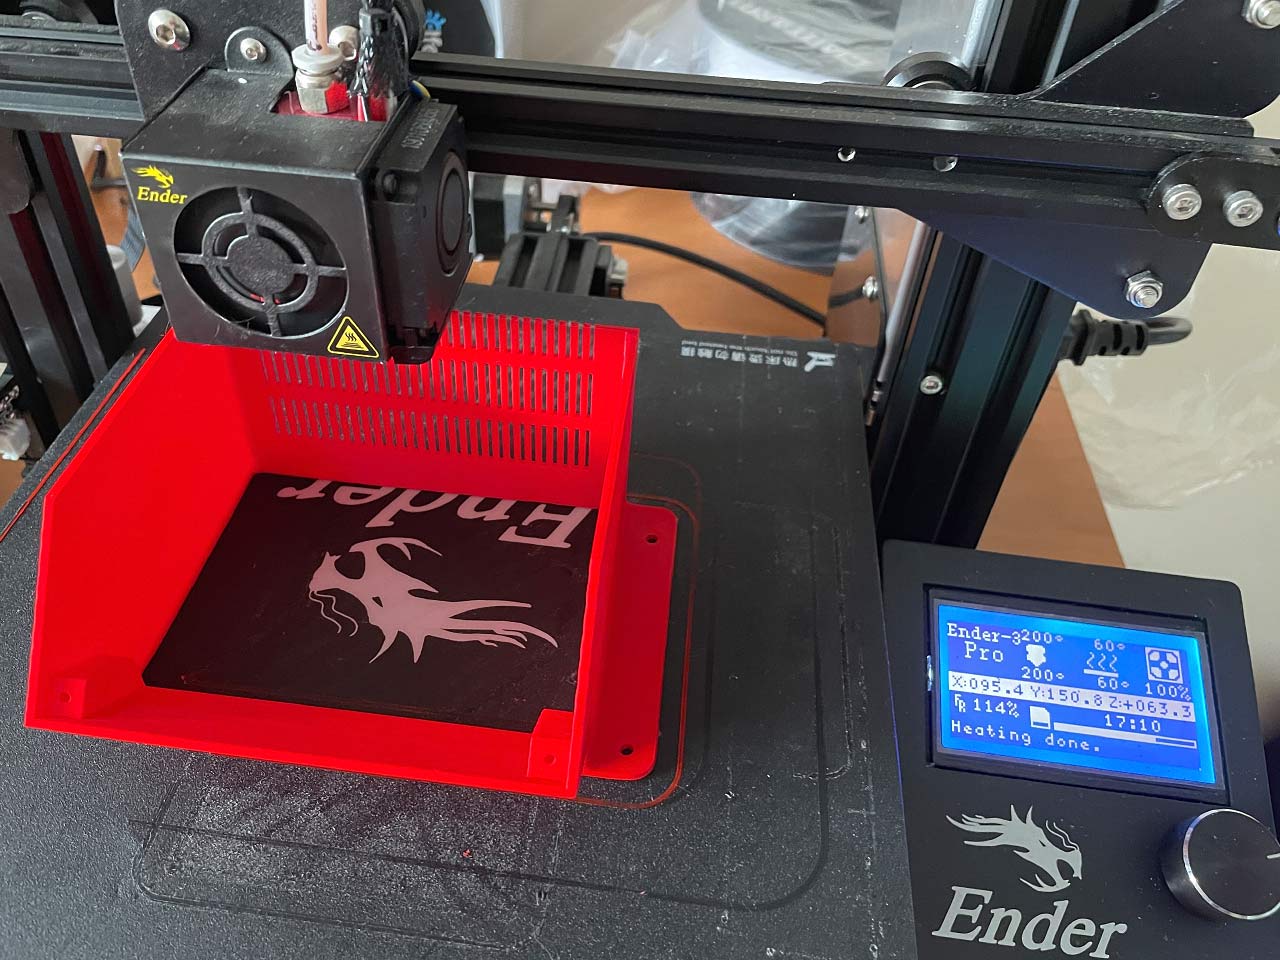
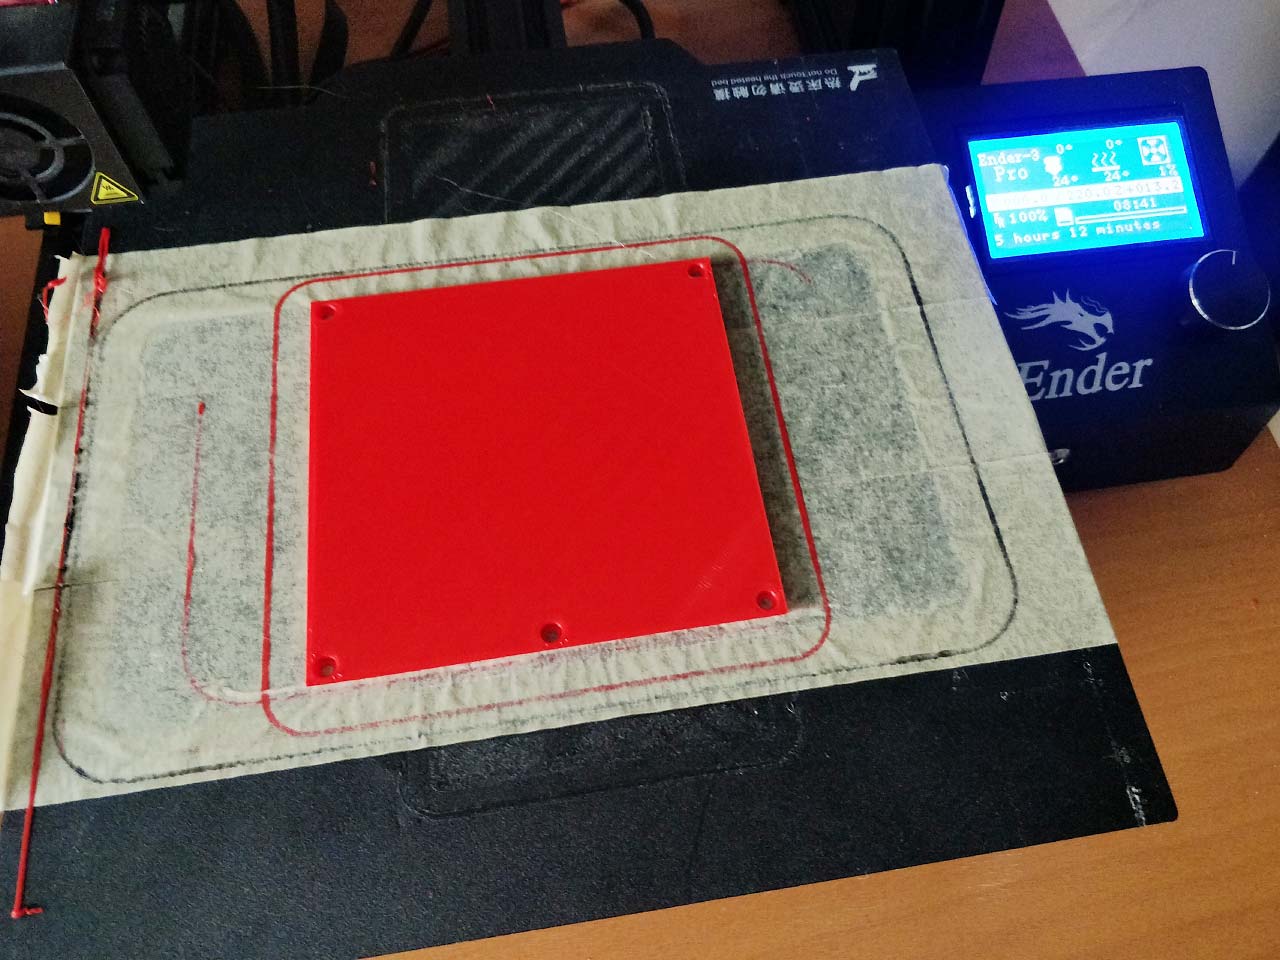
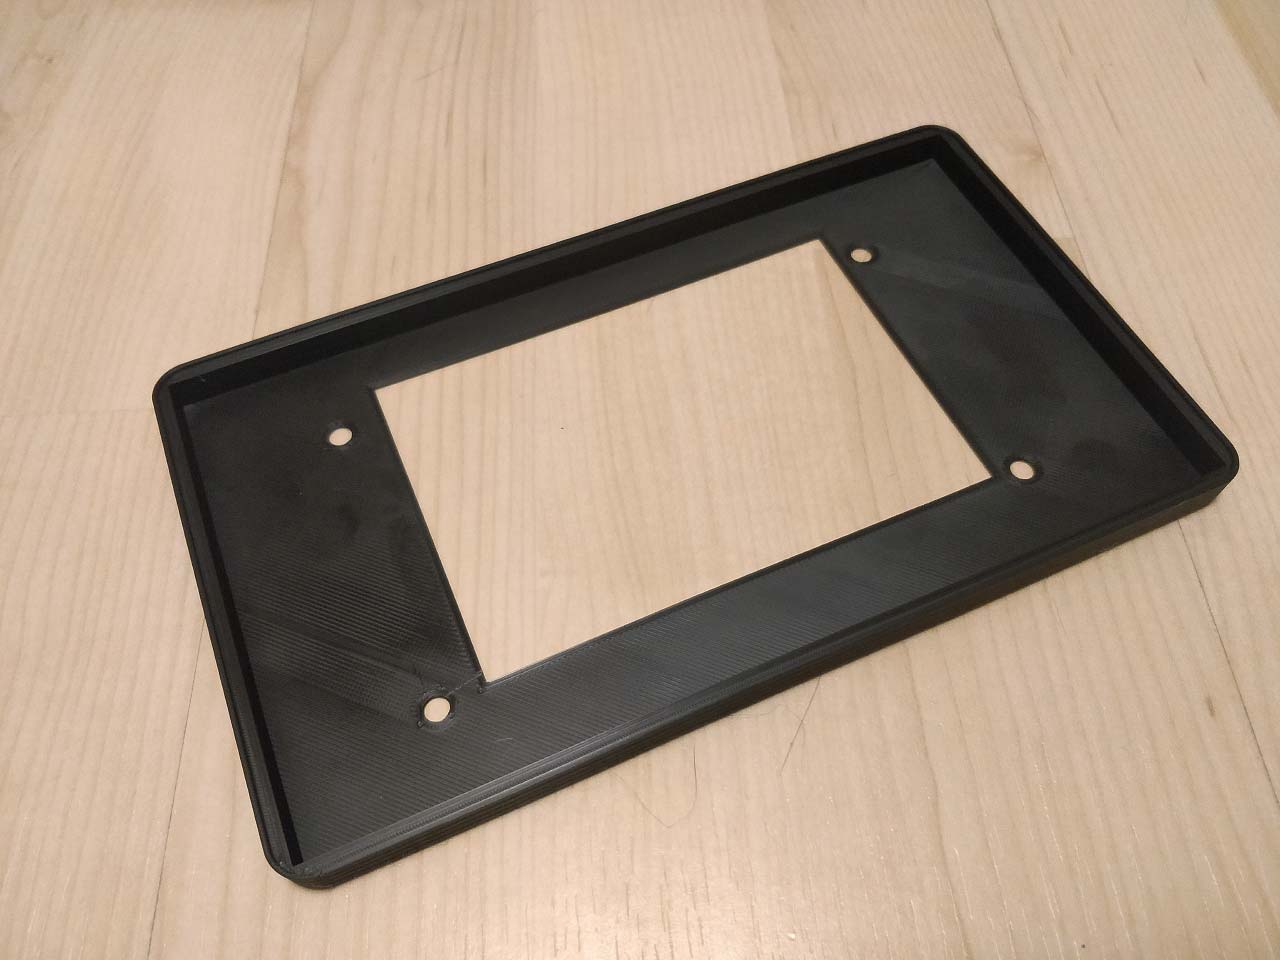
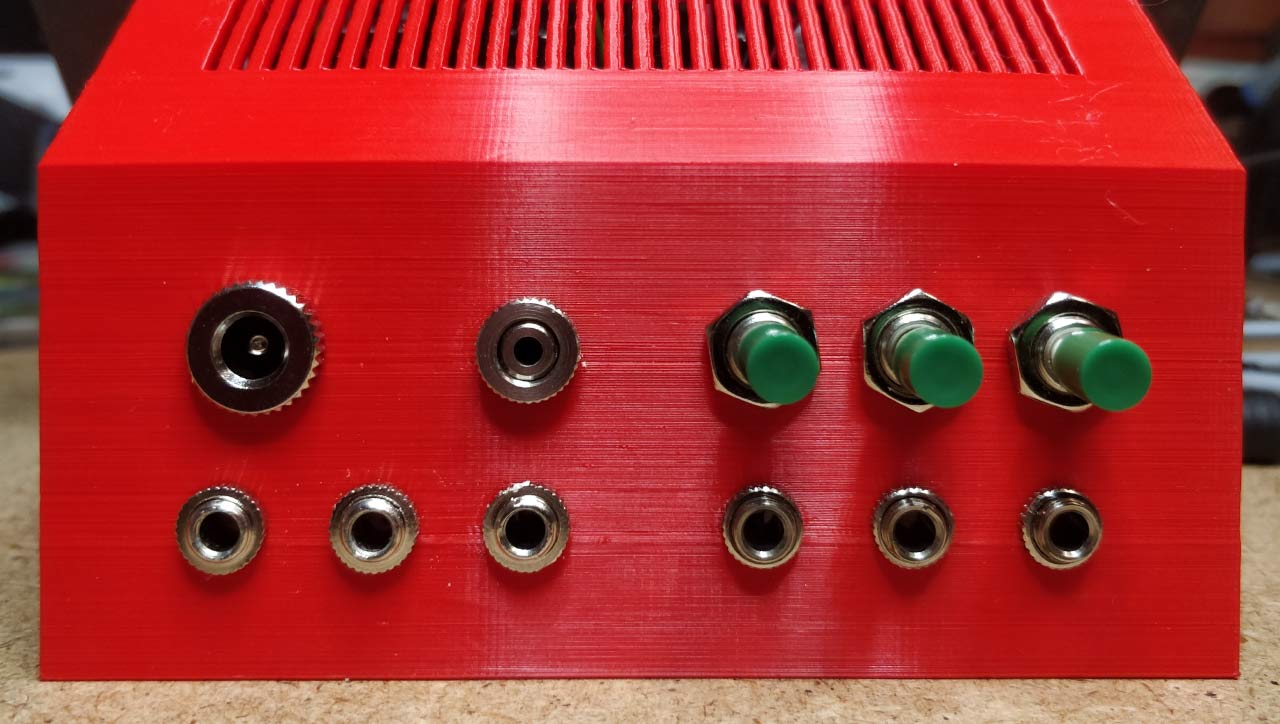
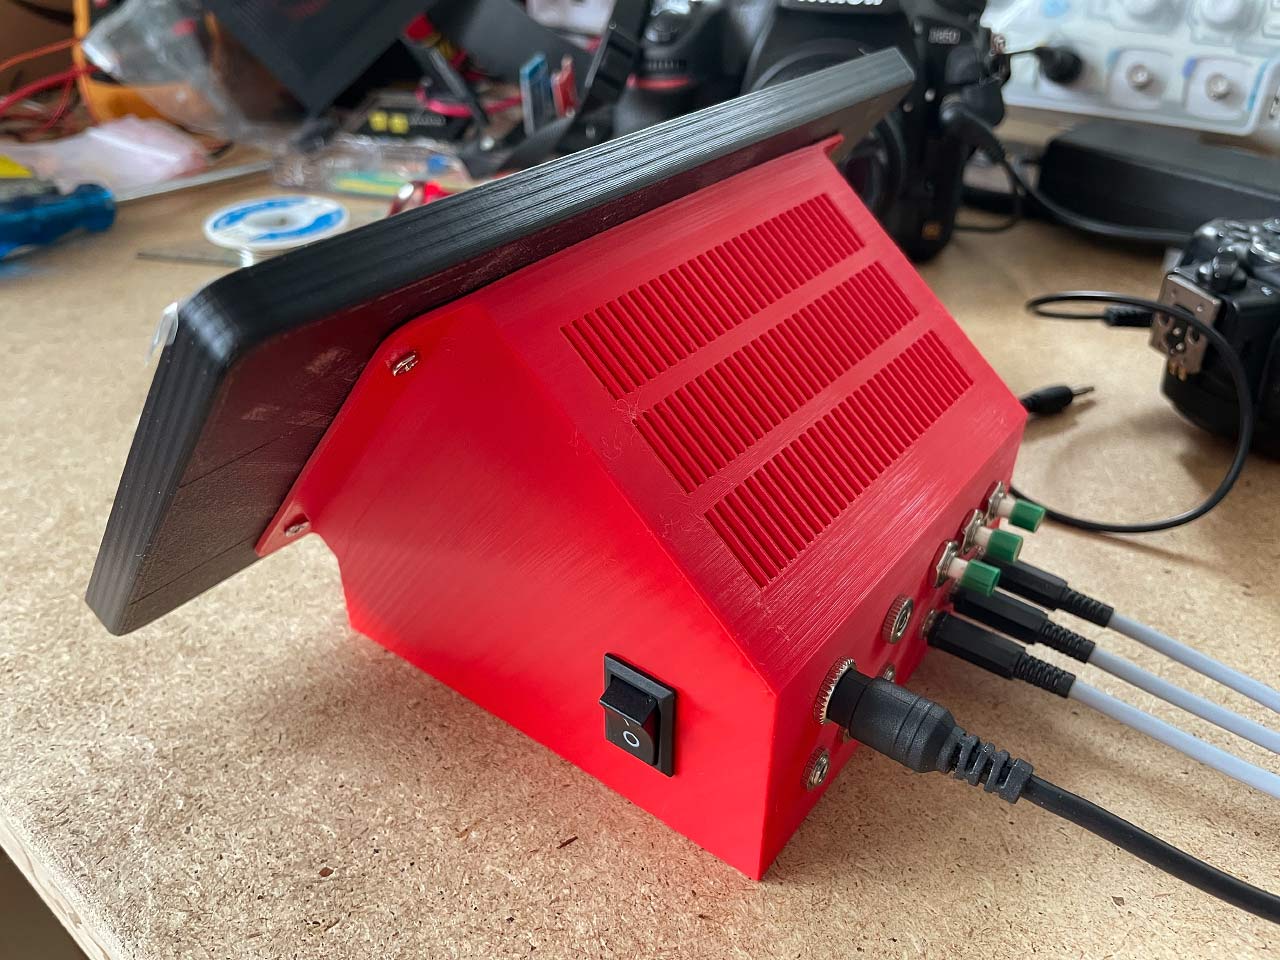
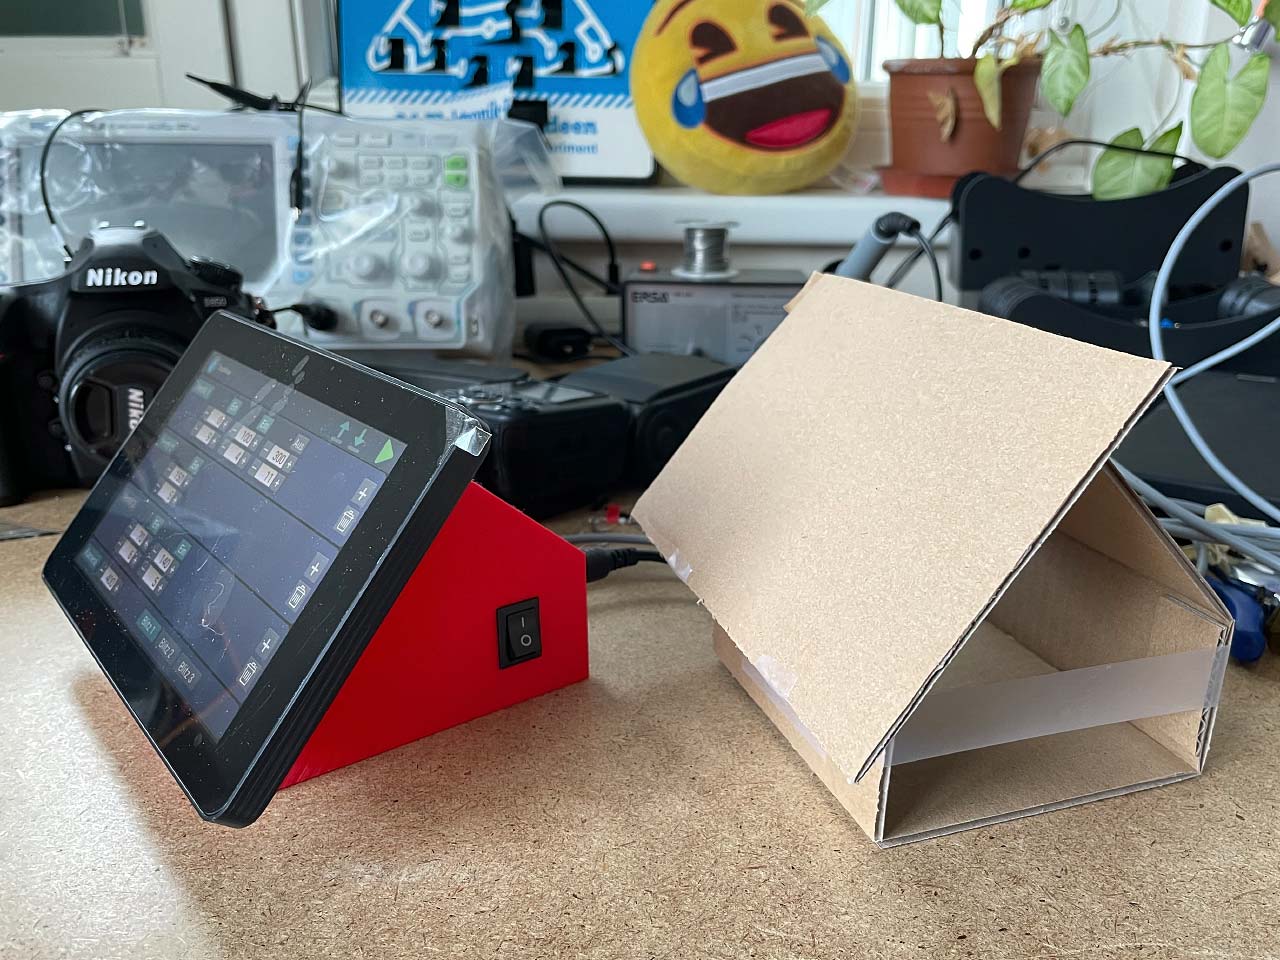
The case
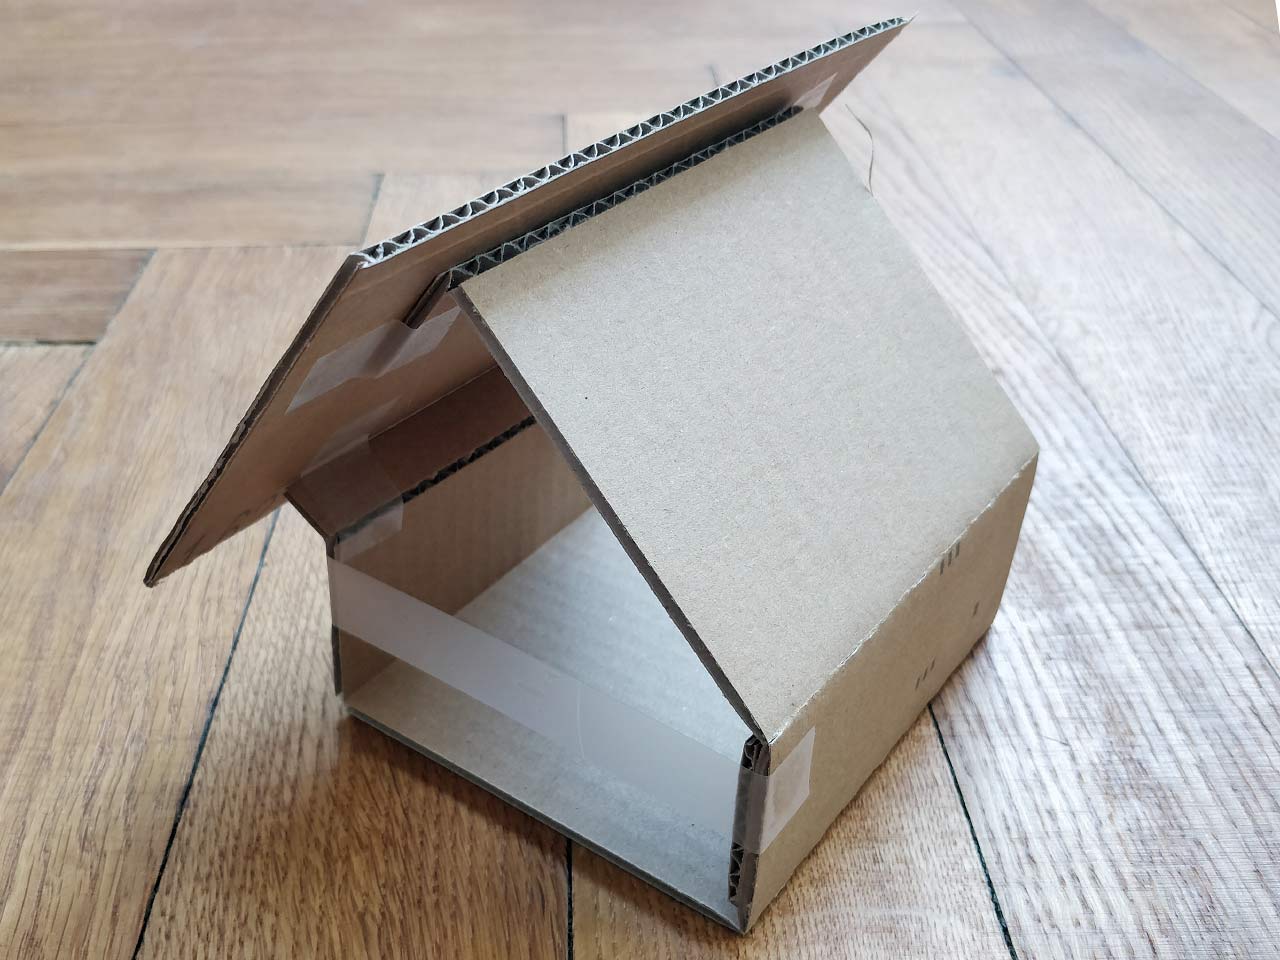
DropWise still needs a case. The search for something suitable was unsuccessful. But thanks to 3D printers, that's not really a problem. We started with a cardboard model so that we could roughly imagine the device and get a feel for the haptics. The cardboard model became the CAD model in Fusion 360. The housing for the controller consists of a front, the actual housing and the base plate. The challenge was to design the housing so that it could be printed by the 3D printer with as few individual parts as possible. And it should also look reasonably good. The result can be seen in the photos. Finally, everything was wired and screwed together.

Accessories
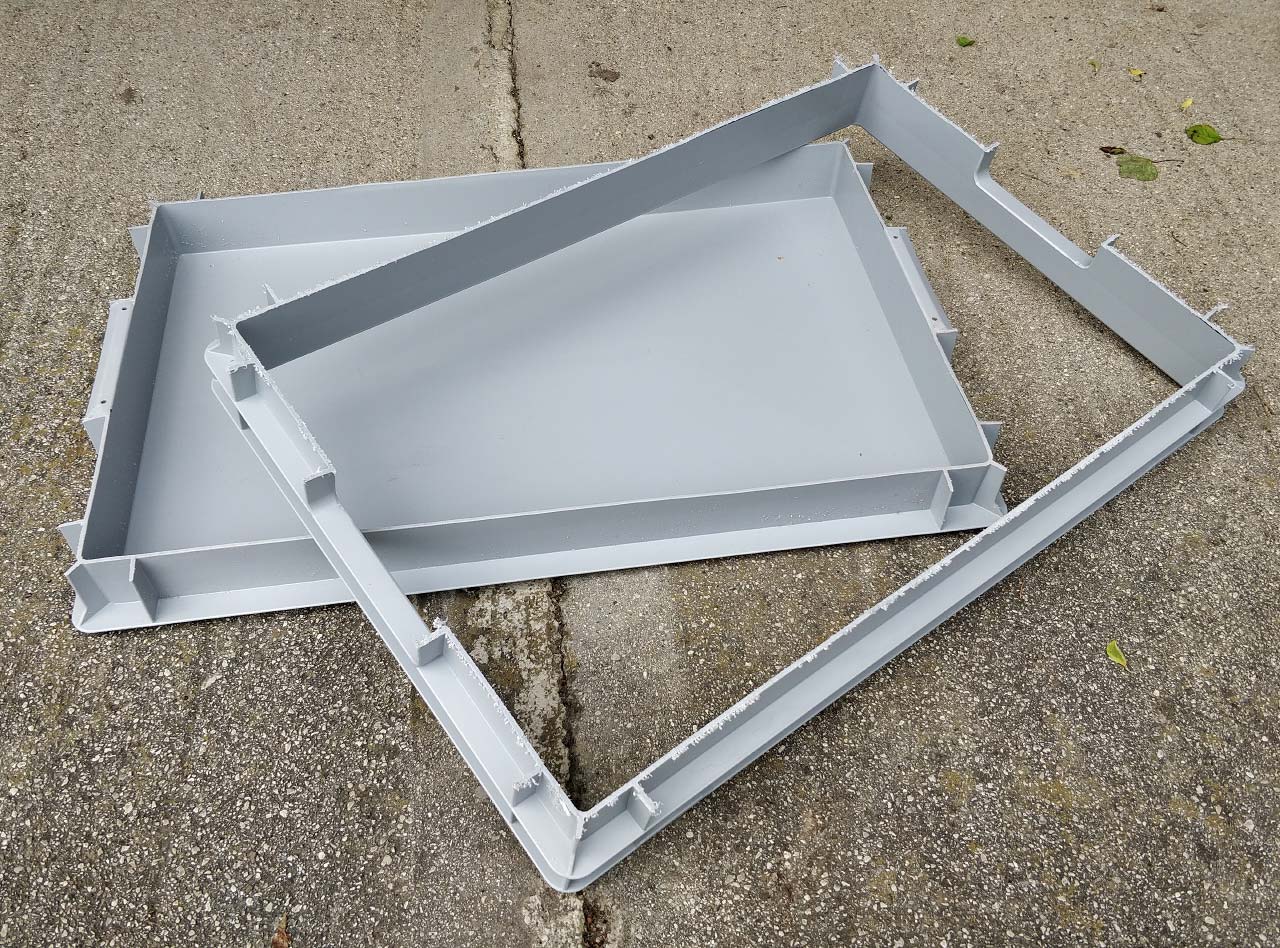
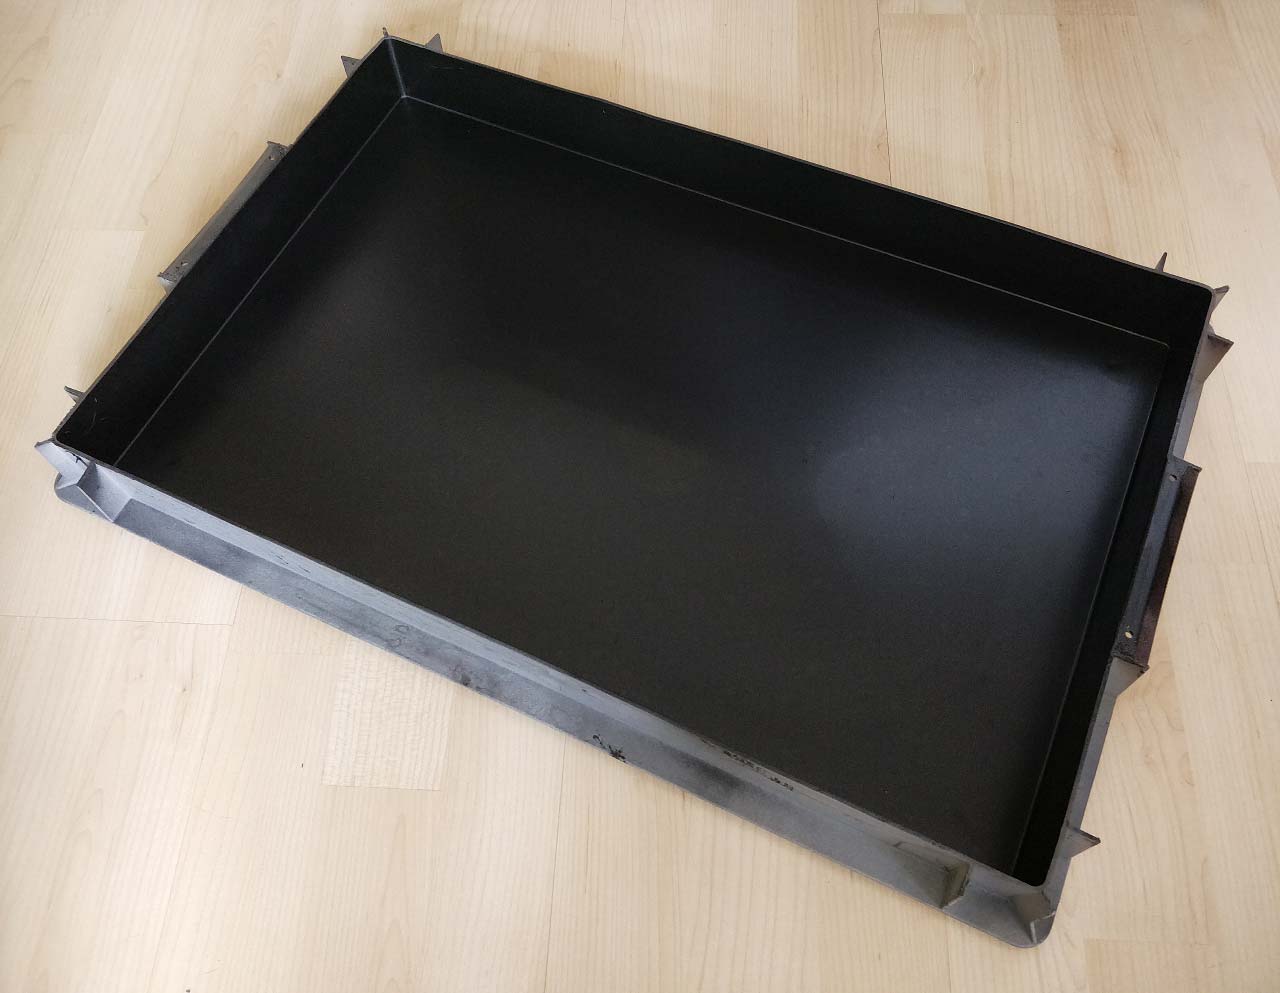
Drop tub
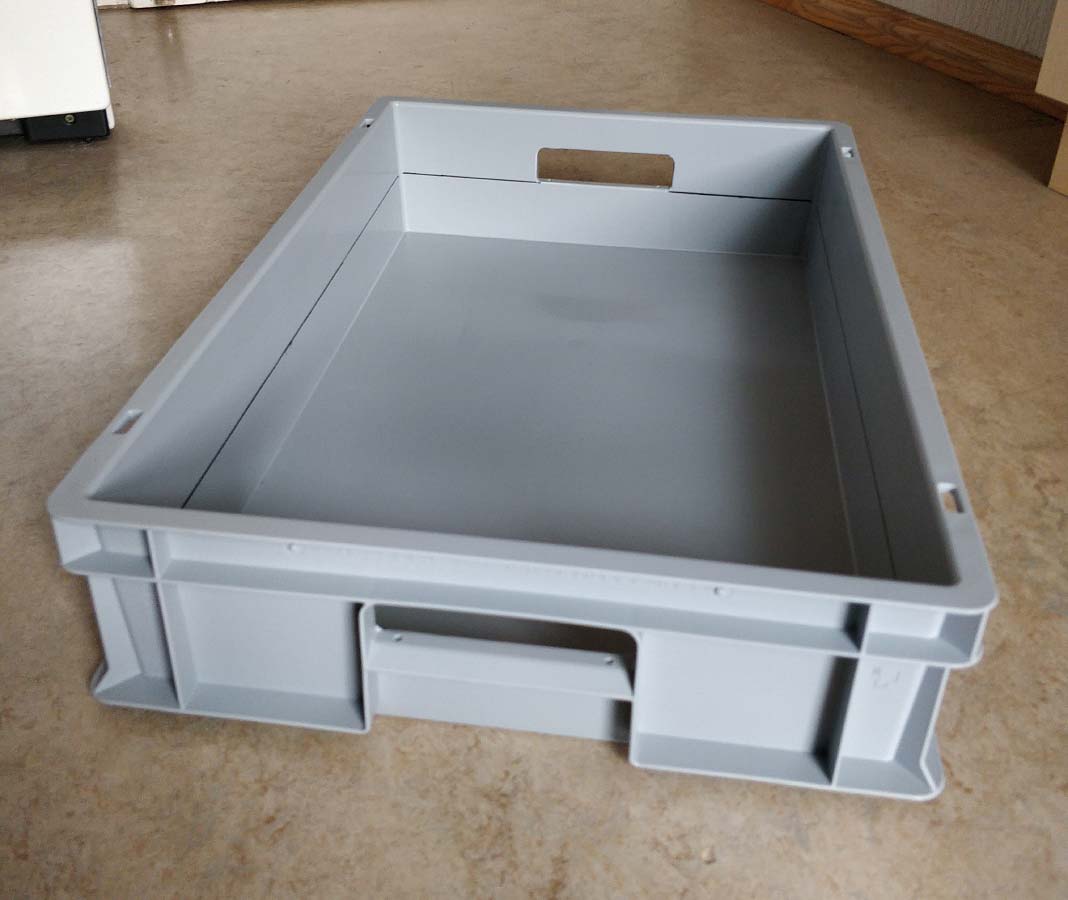
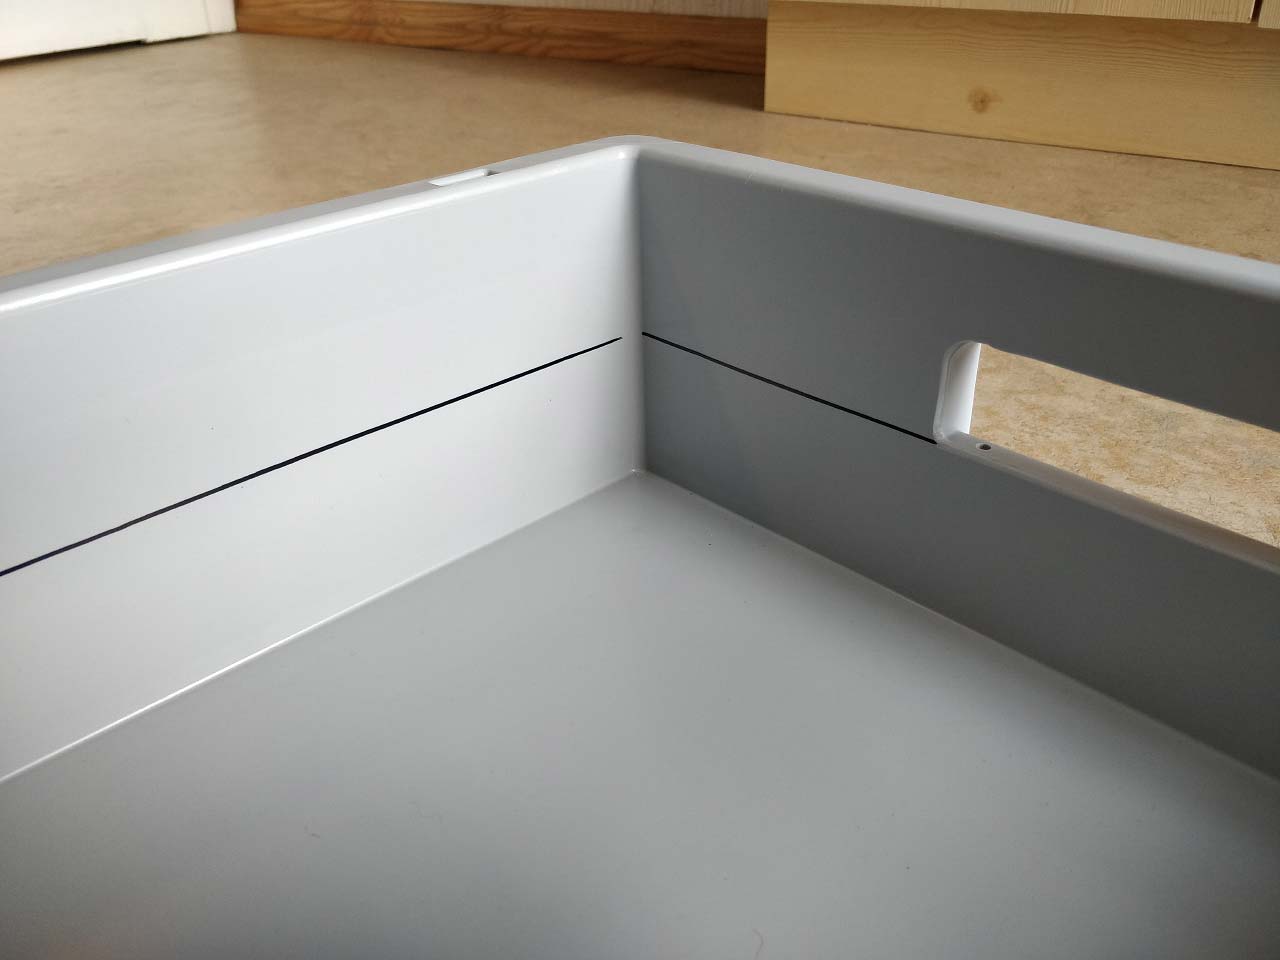
For water drop photography, a baking tray is basically enough to start with. But it can happen that you need the baking tray just at this moment for cooking and besides it is susceptible to rust. At least that's what happened to me. Another fairly simple solution for a drip pan is a so-called Euro container, which you can get at any hardware store. You can simply saw this box made of plastic to the desired height and finally paint it if needed. Of course there are other options such as plexiglass, but for my needs the simple box is enough.
Then, when the tub is under the valves, the camera still needs to be focused before the water drops can be photographed. To do this, I use a larger machine screw that I place in the tub at the point where the water drops land. While doing this, you can test the camera and flashes right away. The camera has to be set to manual focus for this. If the photo looks like this, the camera is perfectly focused.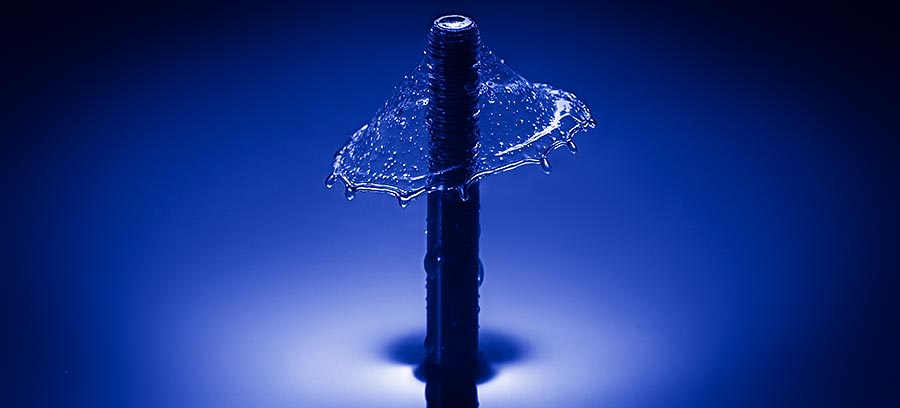
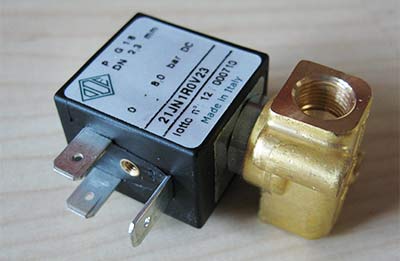
Valves
Mariotte bottle
The Mariotte bottle is used to keep the water pressure at a constant level. This is necessary so that the timings of the water drops remain the same regardless of the water level in the bottle. Again, I reused my old bottles. They are just normal 0.5 liter PET bottles.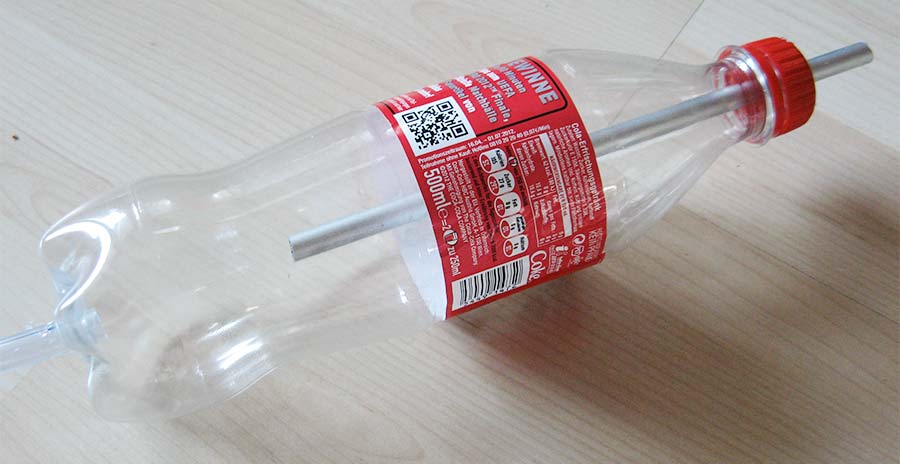
A hole is drilled in the cap, into which a short piece of aluminum tube is inserted and fixed with hot glue. On the underside of the bottle, another hole is drilled in which the tube leading to the valves is inserted. This tube is also fixed with hot glue. That's all you need for a Mariot bottle.
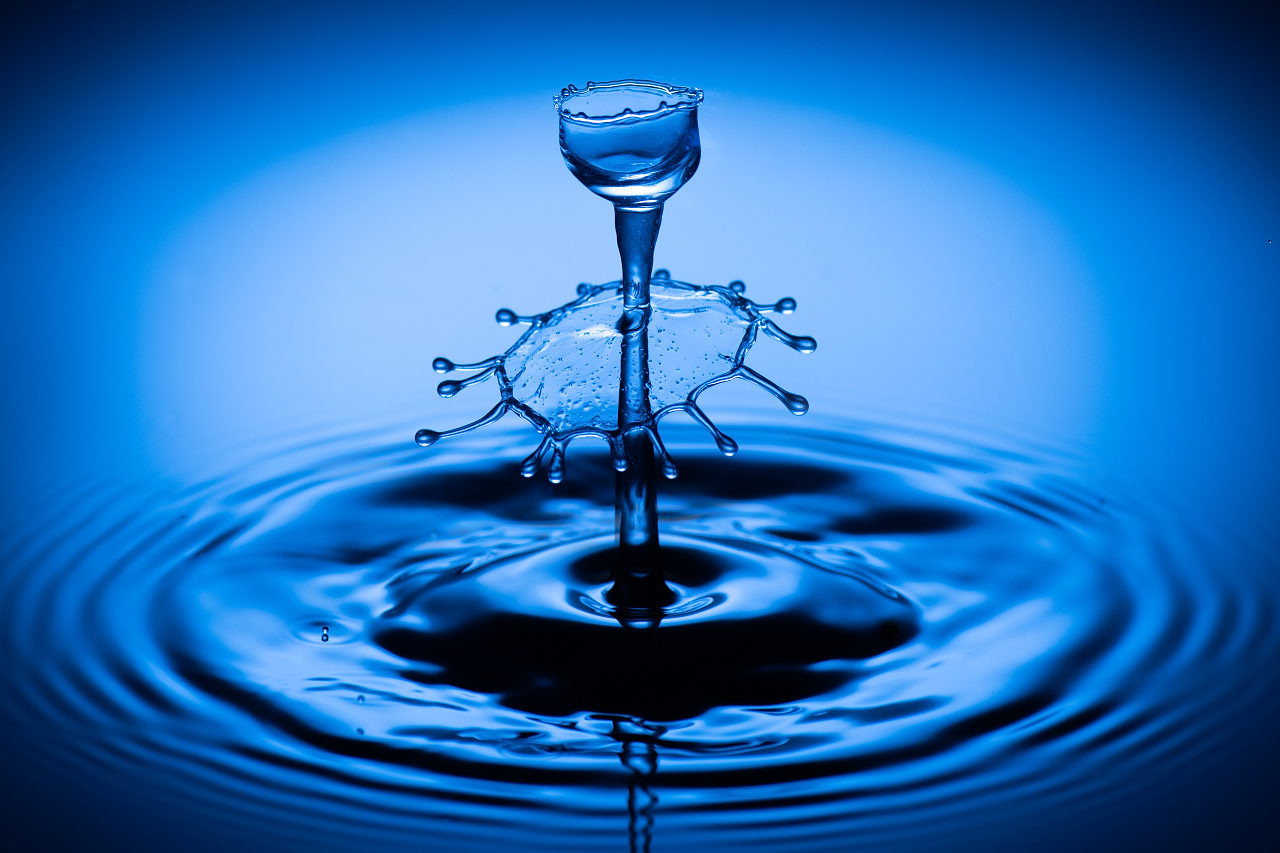
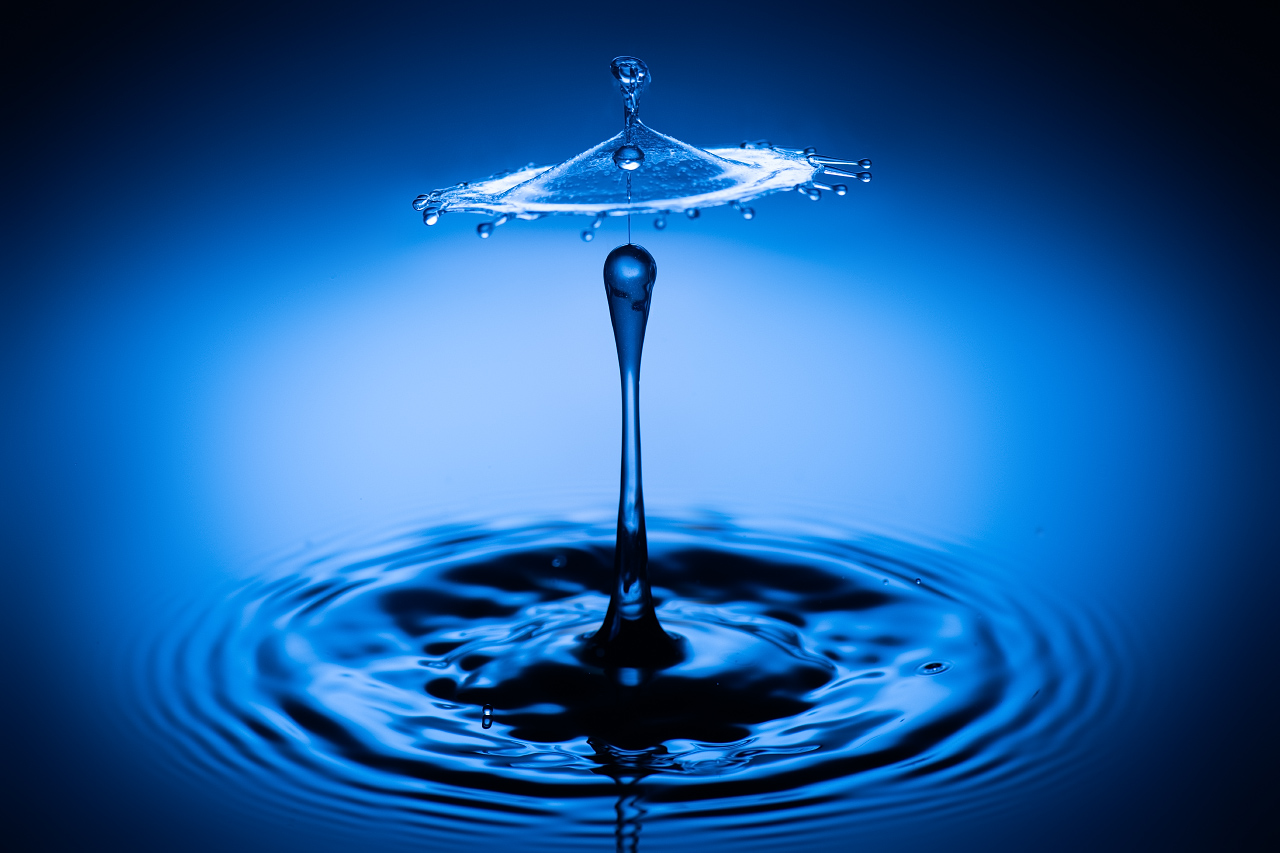
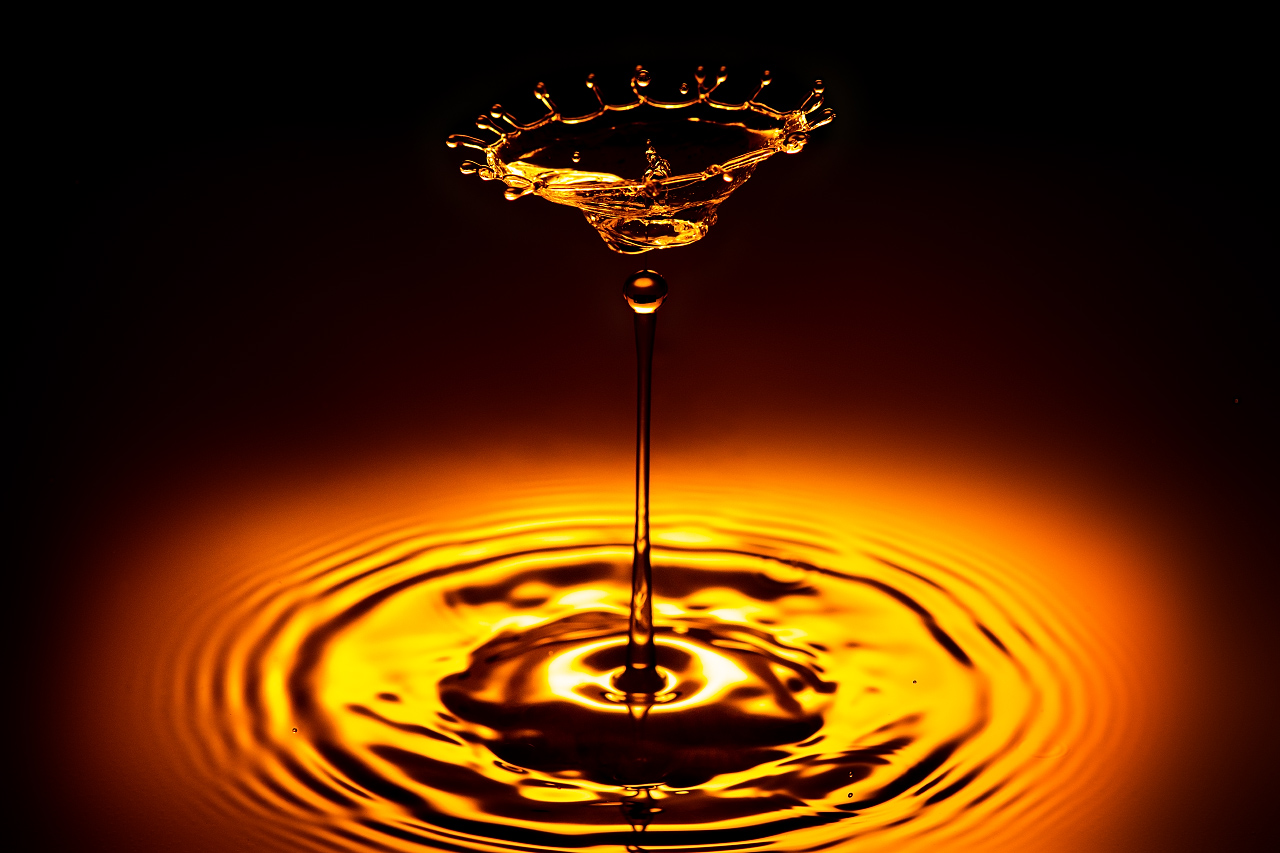
Photos
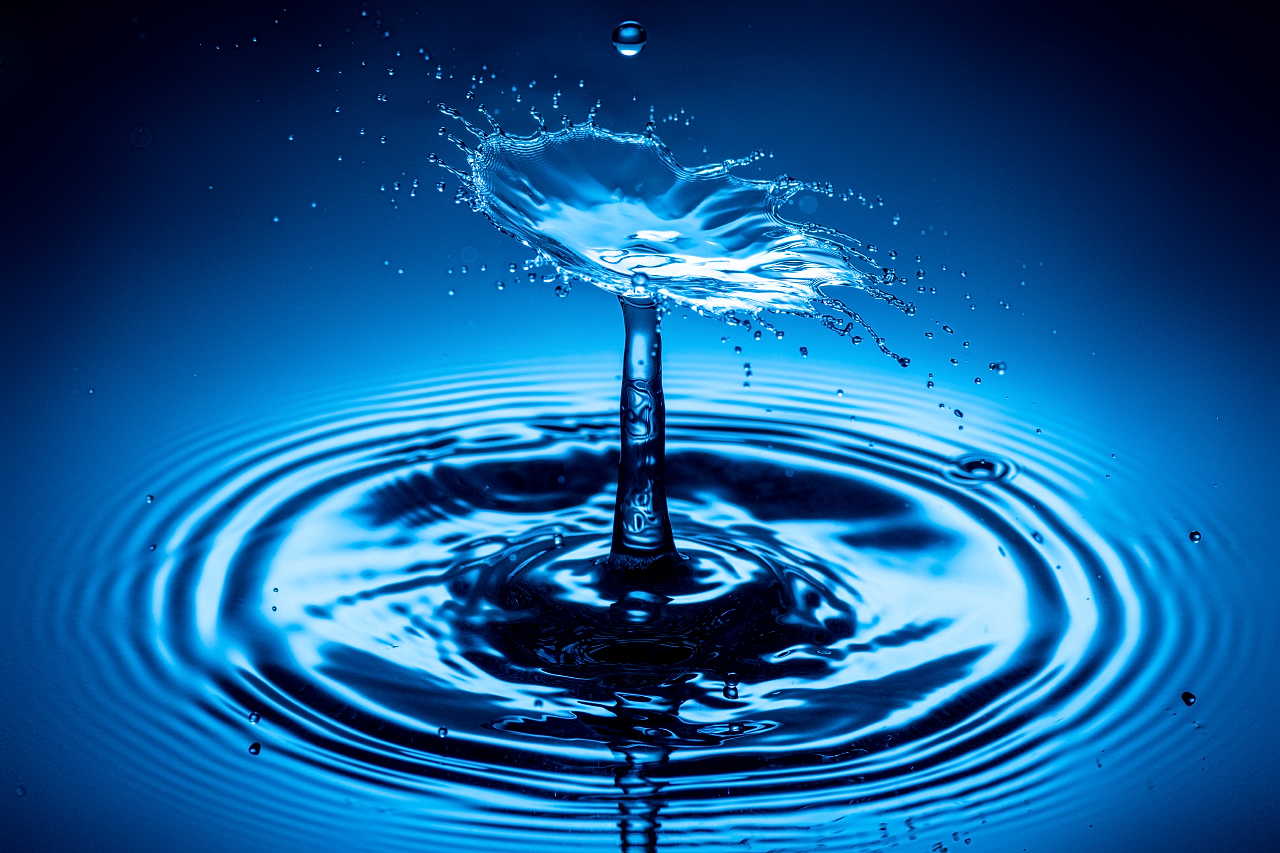
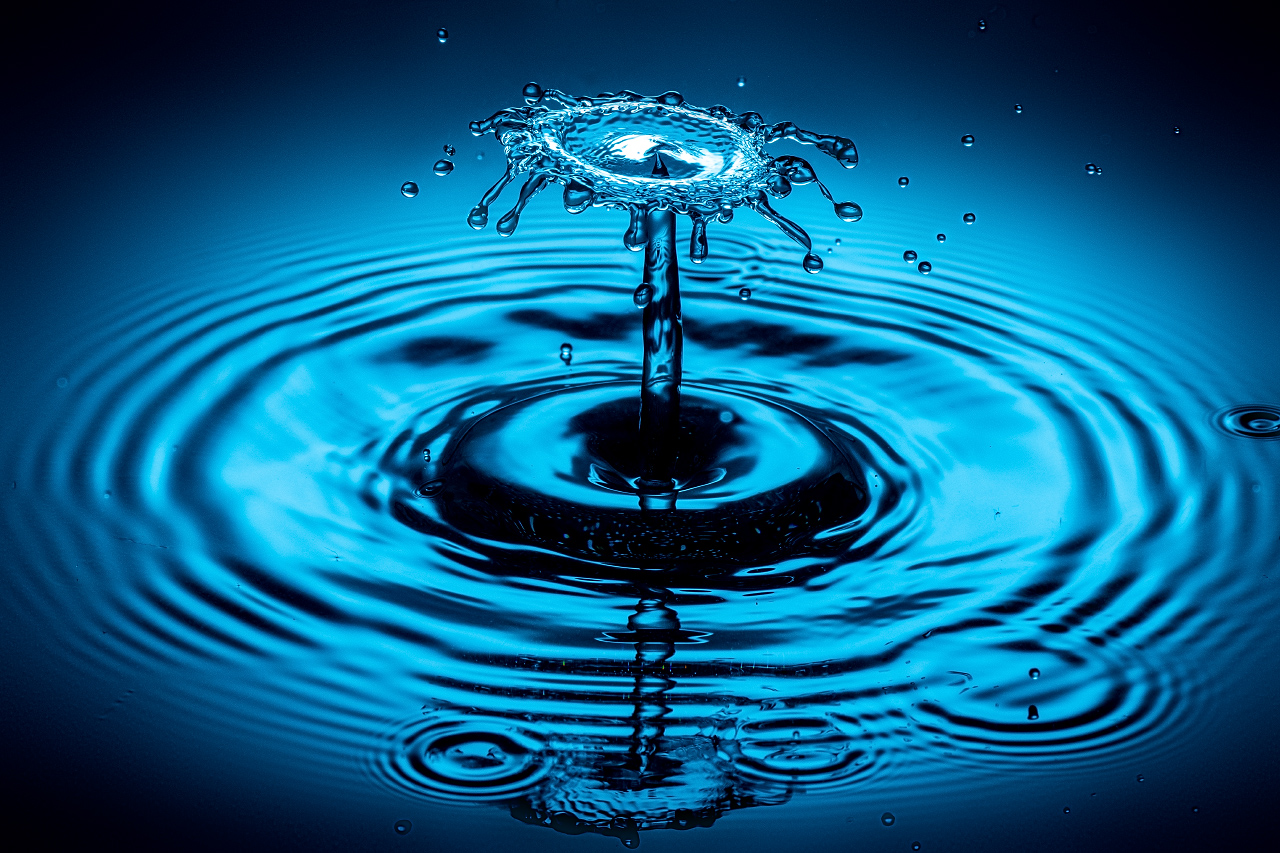
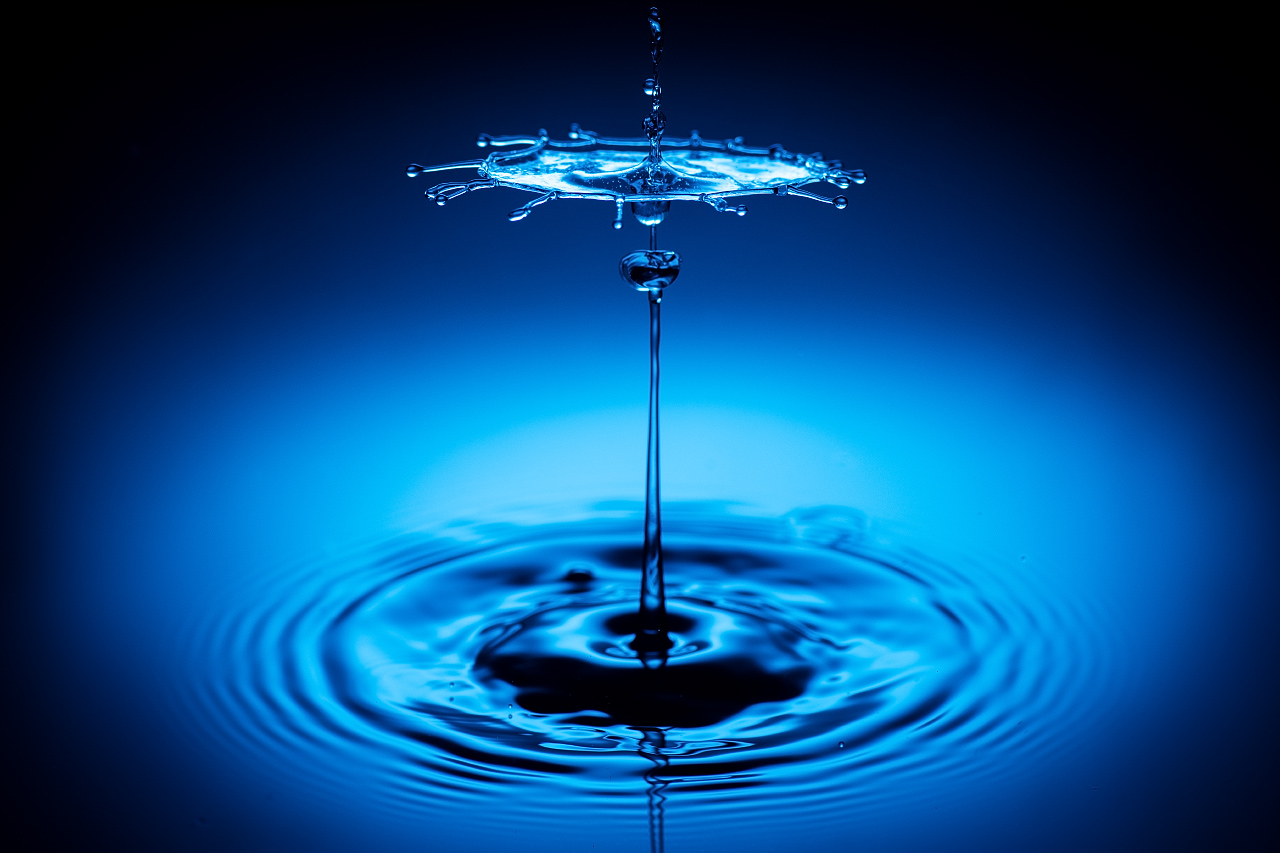
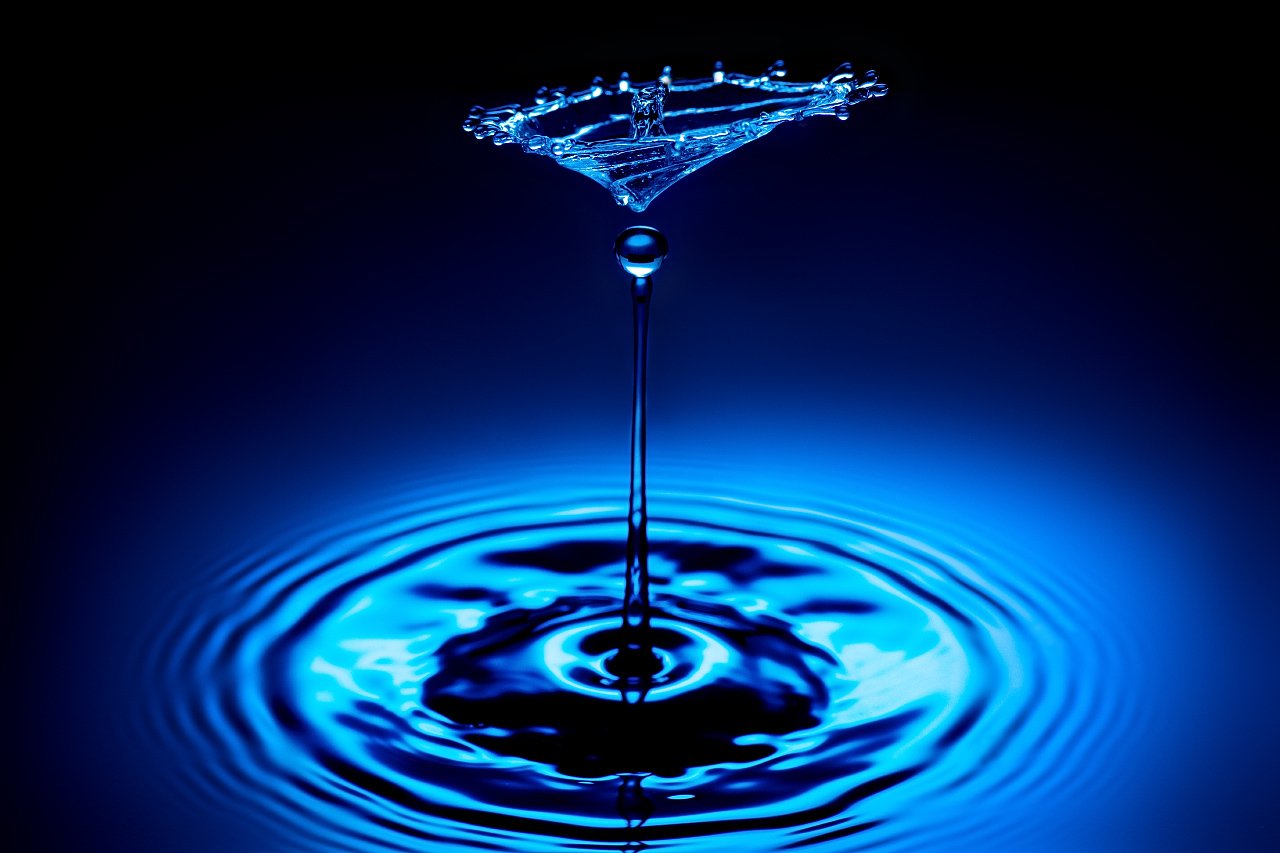
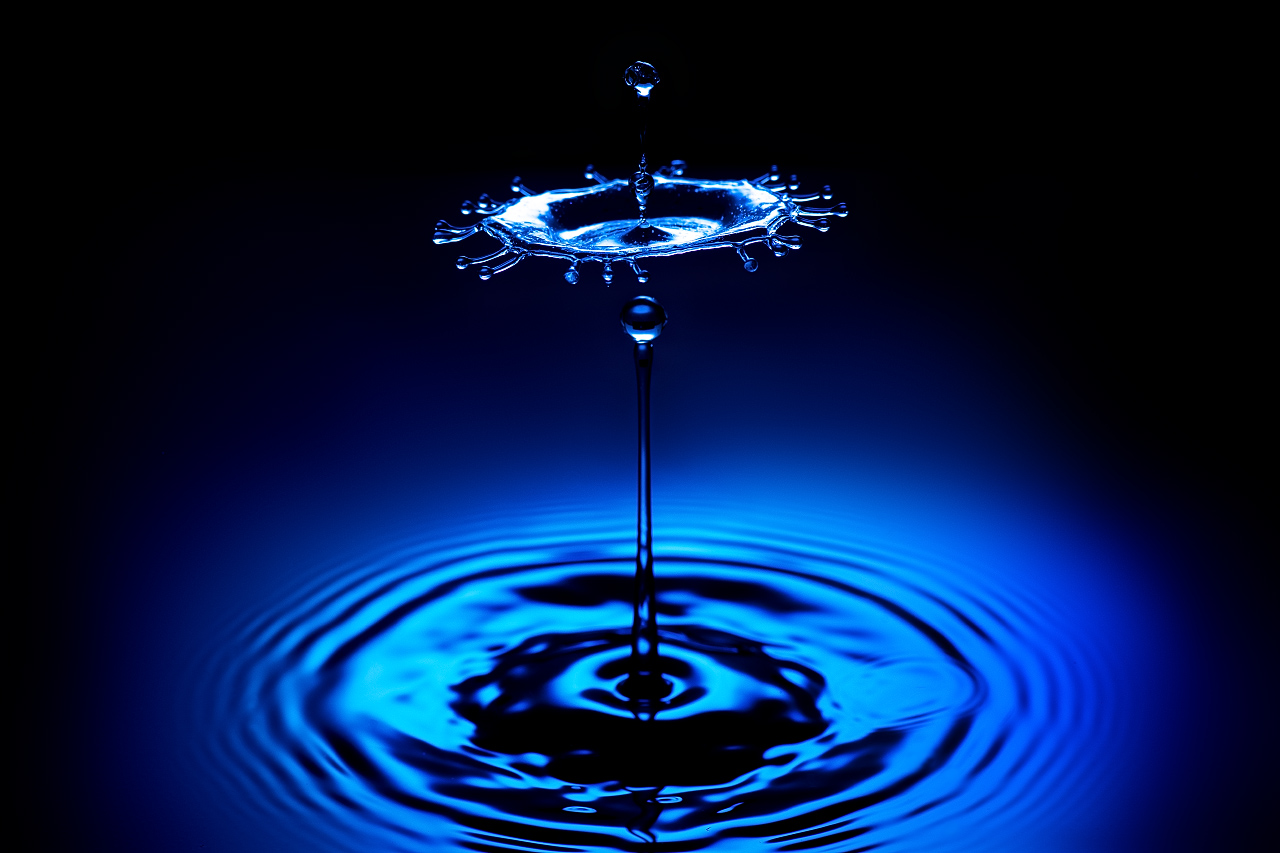
At the end, of course, some first examples of drop-on-drop photos must not be missing. At the moment only one valve is in operation, the extension to several valves will follow. The first test photos are made with pure water.
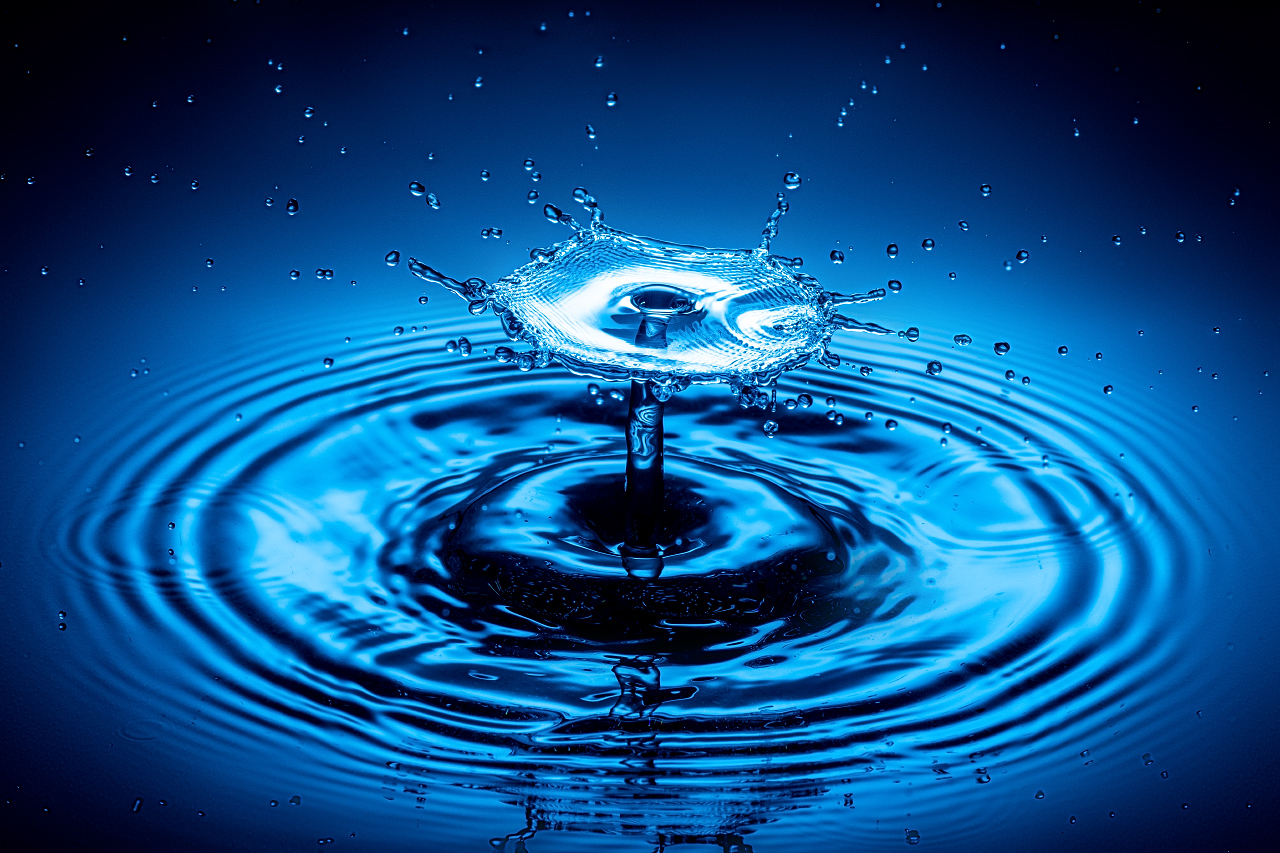
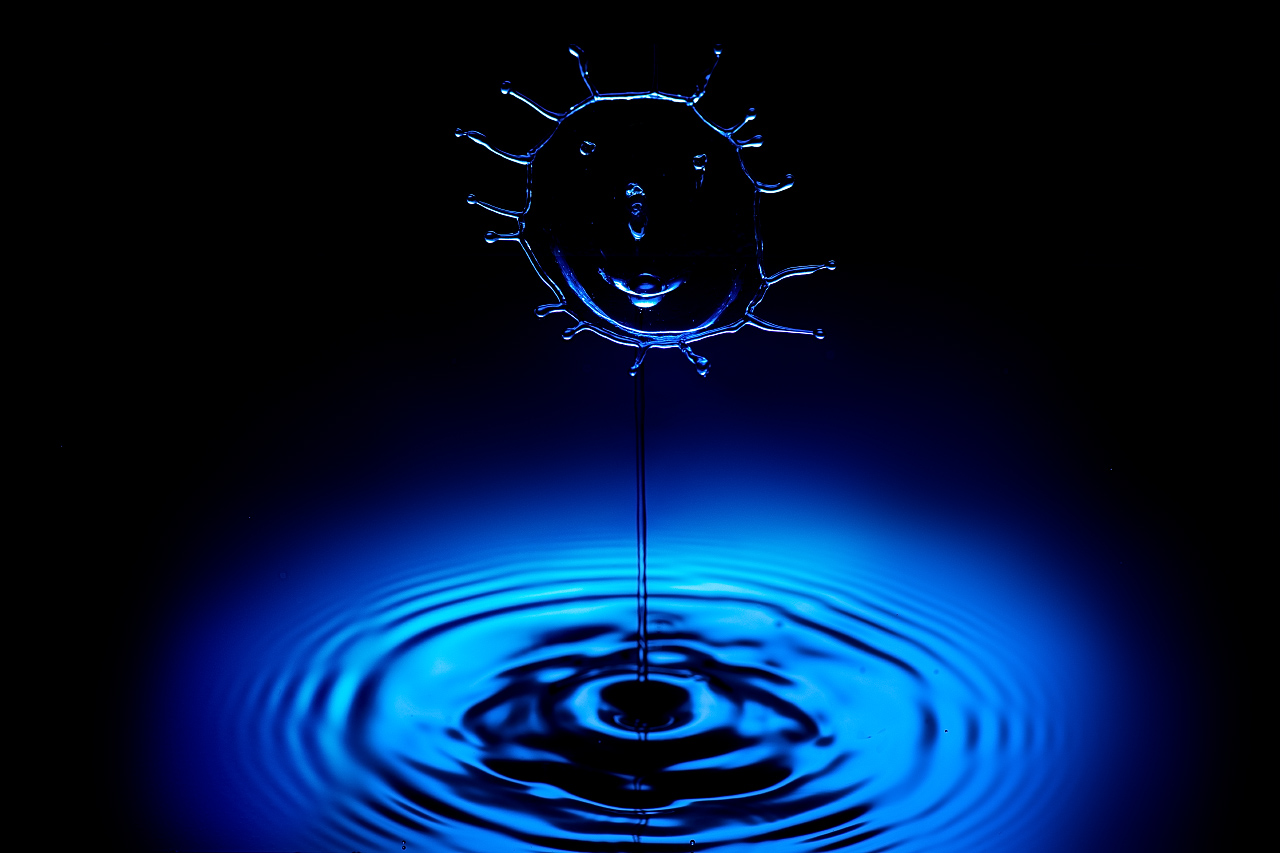
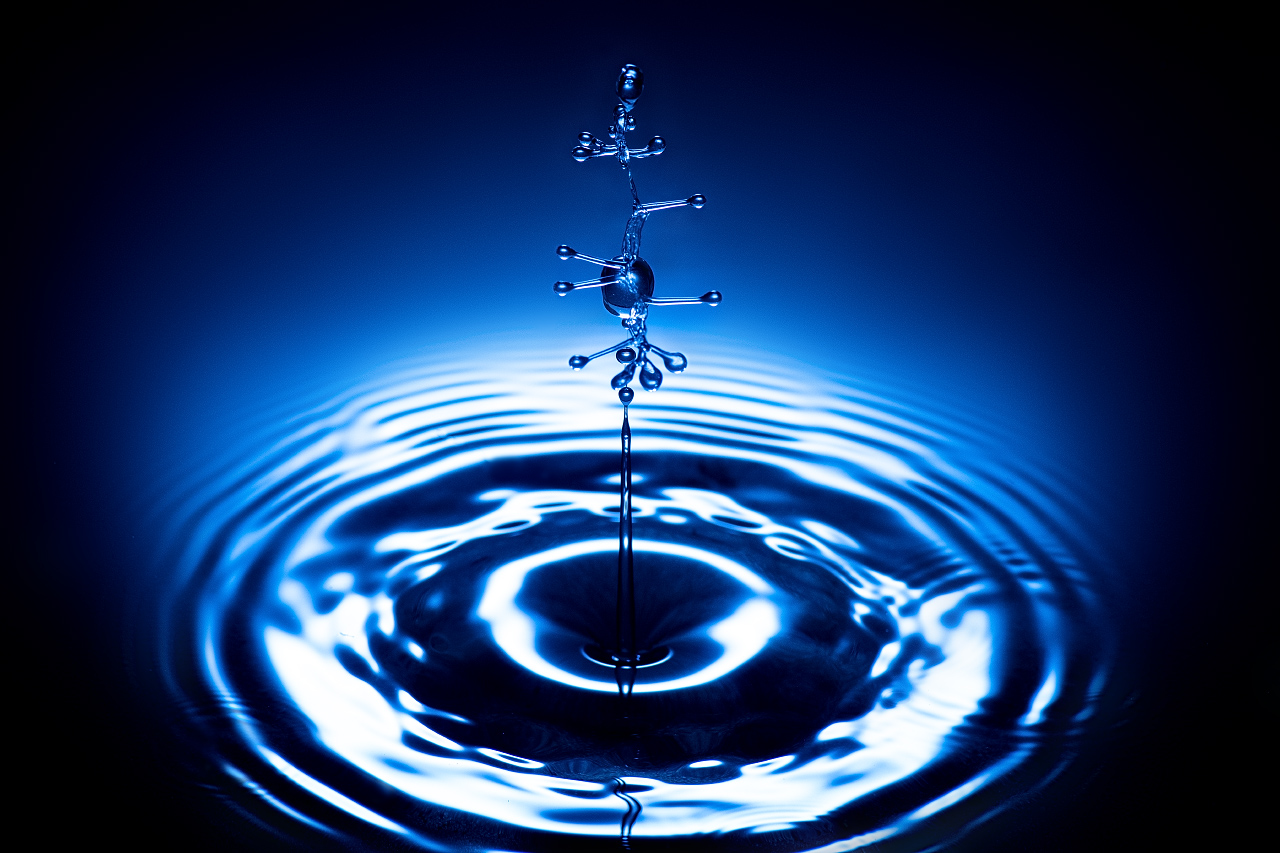
In the following pictures, the water has been thickened with a little guar gum. You can immediately see that the water has become somewhat calmer.
I'm sure there will be many more photos to come. I will then update the post as needed.
If you have any questions or suggestions for improvement, I would be very happy about a comment.