Getting started with the Sunton ESP32-S3
7 inch display, LovyanGFX and LVGL
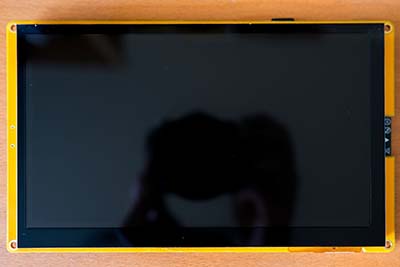
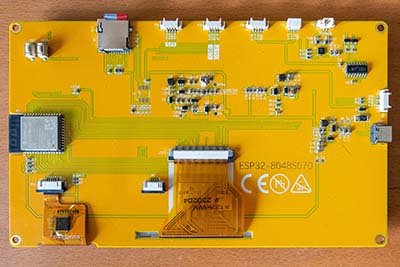
The ESP32-S3 7 inch display from Sunton (ESP32-8048S070) is one of the few boards that combines a modern microcontroller with a relatively large display. Since I had some problems with the board during my first attempts, I would like to introduce it here and show you how to get it up and running in just a few steps. In contrast to the provided sample code I don't use ArduinoGFX for this, but the in my opinion better LovyanGFX library.
Features of the Sunton ESP32-S3 7 inch display
- ESP32-S3 microcontroller with 8M PSRAM and 16M Flash.
- 7 inch TN display with 800x480 pixel resolution and parallel RGB-565 interface.
- Capacitive 5-point touch controller.
- I2S audio output with MAX98357 class D amplifier
- Micro SD card slot
- IO ports for expansion
- USB Type-C port
|
|
|
Unfortunately, the board also has some weak points:
- No IPS panel, so the screen is relatively low in contrast and very viewing angle dependent.
- Since the display needs a lot of ports of the ESP32, only a few ports are available for extensions.
- The 5V supply voltage is not available at the ports.
- The board does not use the integrated USB controller of the ESP32-S3. Therefore no JTAG debugging is possible, because the pins are used for the SD card slot.
- Unlike the smaller displays from Sunton, there is no photoresistor on the front to automatically control the display brightness.
PlatformIO Project Setup
The code of this small demo project is developed in Visual Studio Code with the PlatformIO plugin. Before starting the project, it is necessary to create a configuration file for the Sunton display with the following content:
{
  "build": {
    "arduino": {
      "ldscript": "esp32s3_out.ld",
      "partitions": "default_16MB.csv",
      "memory_type": "qio_opi"
    },
    "core": "esp32",
    "extra_flags": [
      "-DARDUINO_ESP32S3_DEV",
      "-DBOARD_HAS_PSRAM",
      "-DARDUINO_USB_MODE=1",
      "-DARDUINO_RUNNING_CORE=1",
      "-DARDUINO_EVENT_RUNNING_CORE=1",
      "-DARDUINO_USB_CDC_ON_BOOT=0"
    ],
    "f_cpu": "240000000L",
    "f_flash": "80000000L",
    "flash_mode": "qio",
    "hwids": [
      [
        "0x303A",
        "0x1001"
      ]
    ],
    "mcu": "esp32s3",
    "variant": "esp32s3"
  },
  "connectivity": [
    "wifi"
  ],
  "debug": {
    "openocd_target": "esp32s3.cfg"
  },
  "frameworks": [
    "arduino",
    "espidf"
  ],
  "name": "Sunton ESP32-S3",
  "upload": {
    "flash_size": "16MB",
    "maximum_ram_size": 327680,
    "maximum_size": 16777216,
    "use_1200bps_touch": true,
    "wait_for_upload_port": true,
    "require_upload_port": true,
    "speed": 460800
  },
  "url": "https://www.makerfabs.com/sunton-esp32-s3-7-inch-tn-display-with-touch.html",
  "vendor": "Sunton"
}
This file is stored under the name sunton_s3.json in the local user directory in the .platformio\platforms\espressif32\boards\ directory.
Then a new project is created in PlatformIO. In the list of boards the just created board is selected. The Arduino Framework is selected as the framework.
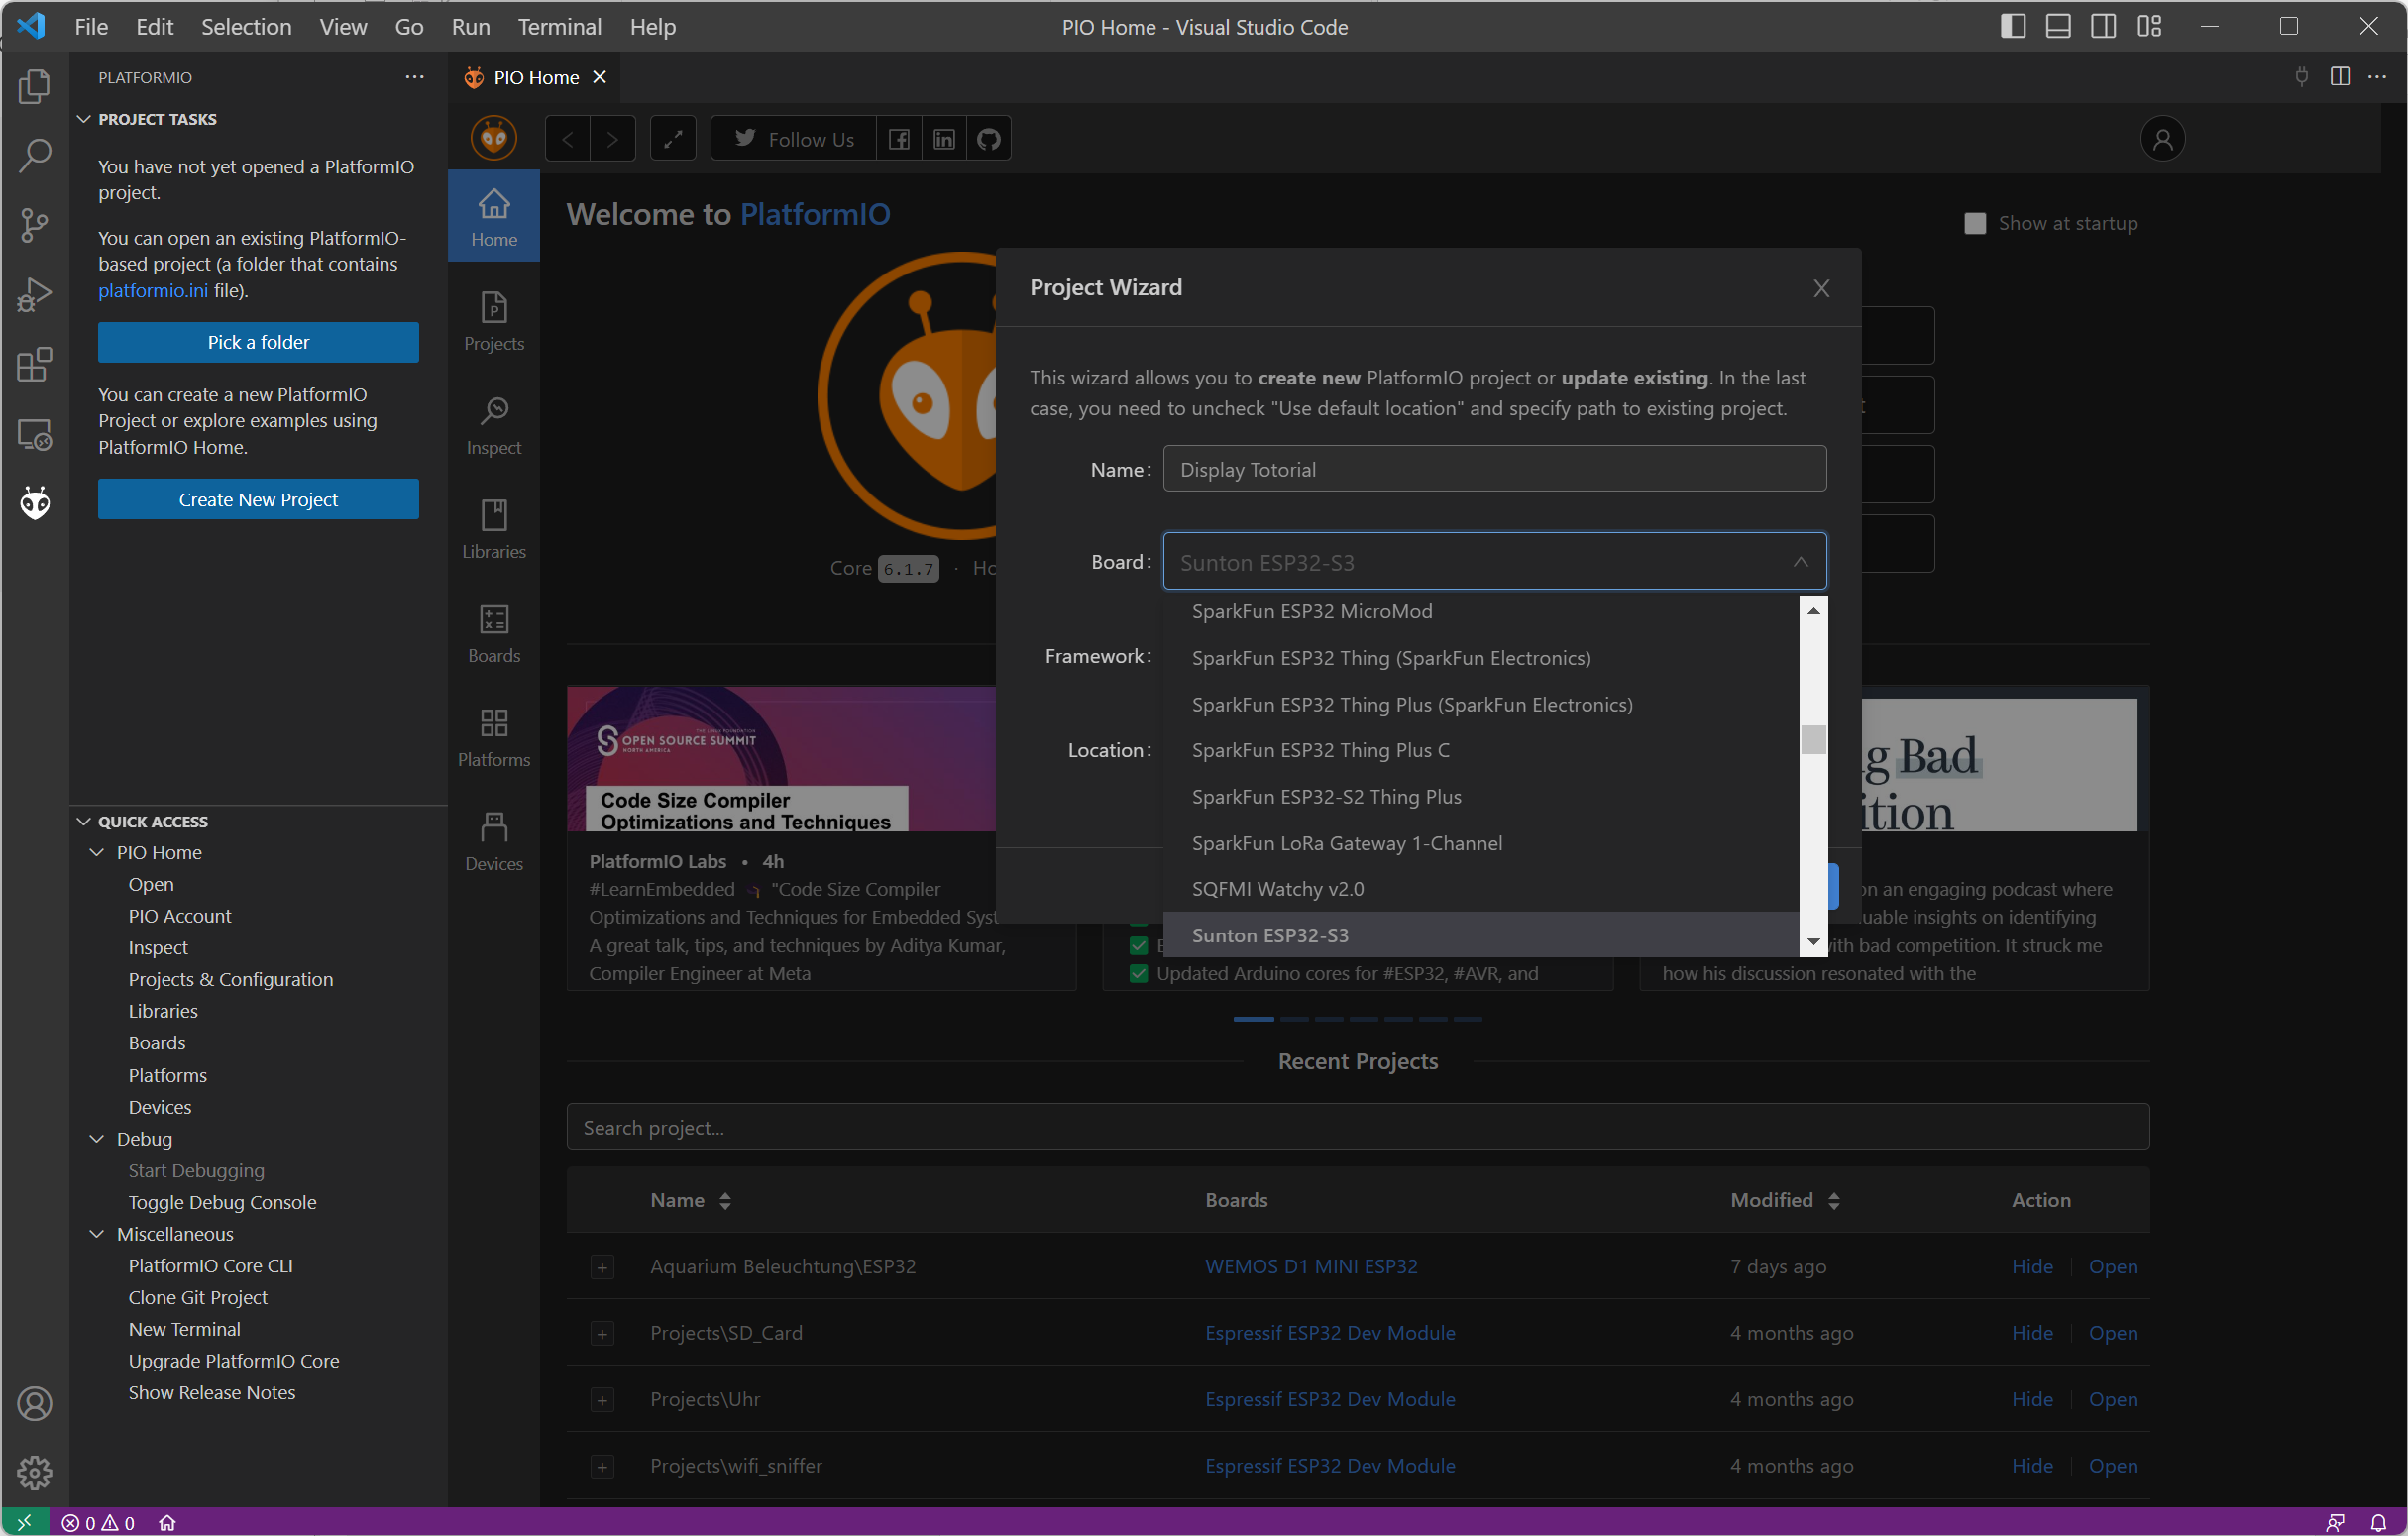
In the new project, the platform.ini file is adjusted first. The following changes are made in it:
- Use version 6.3.1 of the Espressif framework
- Use C++ standard 17 instead of 11
- Enable more compiler optimizations
- Include the LovyanGFX and LVGL libraries
- Change the include path for LVGL, so that lvgl.h is found in your own project.
The content will look like this:
; PlatformIO Project Configuration File
;
;   Build options: build flags, source filter
;   Upload options: custom upload port, speed and extra flags
;   Library options: dependencies, extra library storages
;   Advanced options: extra scripting
;
; Please visit documentation for the other options and examples
; https://docs.platformio.org/page/projectconf.html

[env:sunton_s3]
platform = espressif32@6.3.1
board = sunton_s3
framework = arduino
monitor_speed = 115200
monitor_port = COM3
upload_port = COM3

build_unflags =
    -std=gnu++11
build_flags =
    -Os
    -std=gnu++17
    -DCORE_DEBUG_LEVEL=3
    -DLV_CONF_INCLUDE_SIMPLE
    -DLV_CONF_SUPPRESS_DEFINE_CHECK
    -I./src

lib_deps =
    lovyan03/LovyanGFX@^1.1.7
    lvgl/lvgl@^8.3.7
LovyanGFX driver
Currently there is no driver for the Sunton ESP32-S3 7 inch display. However, drivers for smaller versions of the display are available. So it is enough to adapt the configuration for the 7 inch display and save it in the project. The adapted version looks like this:
#define LGFX_USE_V1
#include <LovyanGFX.hpp>

#include <lgfx/v1/platforms/esp32s3/Panel_RGB.hpp>
#include <lgfx/v1/platforms/esp32s3/Bus_RGB.hpp>
#include <driver/i2c.h>

class LGFX : public lgfx::LGFX_Device
{
public:

  lgfx::Bus_RGB     _bus_instance;
  lgfx::Panel_RGB   _panel_instance;
  lgfx::Light_PWM   _light_instance;
  lgfx::Touch_GT911 _touch_instance;

  LGFX(void)
  {
    {
      auto cfg = _panel_instance.config();

      cfg.memory_width  = 800;
      cfg.memory_height = 480;
      cfg.panel_width  = 800;
      cfg.panel_height = 480;

      cfg.offset_x = 0;
      cfg.offset_y = 0;

      _panel_instance.config(cfg);
    }

    {
      auto cfg = _panel_instance.config_detail();

      cfg.use_psram = 1;

      _panel_instance.config_detail(cfg);
    }

    {
      auto cfg = _bus_instance.config();
      cfg.panel = &_panel_instance;
      cfg.pin_d0  = GPIO_NUM_15;  // B0
      cfg.pin_d1  = GPIO_NUM_7;  // B1
      cfg.pin_d2  = GPIO_NUM_6; // B2
      cfg.pin_d3  = GPIO_NUM_5;  // B3
      cfg.pin_d4  = GPIO_NUM_4;  // B4
      cfg.pin_d5  = GPIO_NUM_9;  // G0
      cfg.pin_d6  = GPIO_NUM_46;  // G1
      cfg.pin_d7  = GPIO_NUM_3;  // G2
      cfg.pin_d8  = GPIO_NUM_8; // G3
      cfg.pin_d9  = GPIO_NUM_16; // G4
      cfg.pin_d10 = GPIO_NUM_1;  // G5
      cfg.pin_d11 = GPIO_NUM_14; // R0
      cfg.pin_d12 = GPIO_NUM_21; // R1
      cfg.pin_d13 = GPIO_NUM_47; // R2
      cfg.pin_d14 = GPIO_NUM_48; // R3
      cfg.pin_d15 = GPIO_NUM_45; // R4

      cfg.pin_henable = GPIO_NUM_41;
      cfg.pin_vsync   = GPIO_NUM_40;
      cfg.pin_hsync   = GPIO_NUM_39;
      cfg.pin_pclk    = GPIO_NUM_42;
      cfg.freq_write  = 12000000;

      cfg.hsync_polarity    = 0;
      cfg.hsync_front_porch = 8;
      cfg.hsync_pulse_width = 2;
      cfg.hsync_back_porch  = 43;
      cfg.vsync_polarity    = 0;
      cfg.vsync_front_porch = 8;
      cfg.vsync_pulse_width = 2;
      cfg.vsync_back_porch  = 12;
      cfg.pclk_idle_high    = 1;
      _bus_instance.config(cfg);
    }
    _panel_instance.setBus(&_bus_instance);

    {
      auto cfg = _light_instance.config();
      cfg.pin_bl = GPIO_NUM_2;
      _light_instance.config(cfg);
    }
    _panel_instance.light(&_light_instance);

    {
      auto cfg = _touch_instance.config();
      cfg.x_min      = 0;
      cfg.y_min      = 0;
      cfg.bus_shared = false;
      cfg.offset_rotation = 0;
      // I2C connection
      cfg.i2c_port   = I2C_NUM_0;
      cfg.pin_sda    = GPIO_NUM_19;
      cfg.pin_scl    = GPIO_NUM_20;
      cfg.pin_int    = GPIO_NUM_NC;
      cfg.pin_rst    = GPIO_NUM_38;
      cfg.x_max      = 800;
      cfg.y_max      = 480;
      cfg.freq       = 100000;
      _touch_instance.config(cfg);
      _panel_instance.setTouch(&_touch_instance);
    }

    setPanel(&_panel_instance);
  }
};
At the beginning I had the problem that the display occasionally flickered when the CPU load of the ESP32 was high. In the video you can see the flickering well:
The cause was the too high value for cfg.freq_write. Only with a value of 12000000 did the display run smoothly even under high load.
Create GUI with LVGL
Before the first widgets can be displayed with the LVGL library, a few more steps are necessary:
- Copy the file lvgl/lv_conf_template.h into the local project under the name lv_conf.h
- Create draw buffer
- Create a function that copies the rendered image into the display's memory.
- Create function that reads an input of the touchpad
More information can be found in the LovyanGFX documentation.
For the Sunton display the code looks like this:
#include <Arduino.h>
#include <Wire.h>
#include <lv_conf.h>
#include <lvgl.h>
#include "gui.h"

#include "../ui/ui.h"
#include "../gfx/LGFX_ESP32S3_RGB_MakerfabsParallelTFTwithTouch70.h"


static const char* TAG = "gui";

static const uint16_t screenWidth  = 800;
static const uint16_t screenHeight = 480;

static lv_disp_draw_buf_t draw_buf;
static lv_color_t buf[2][ screenWidth * 10 ];

LGFX gfx;

void my_disp_flush( lv_disp_drv_t *disp, const lv_area_t *area, lv_color_t *color_p )
{
    if (gfx.getStartCount() == 0)
    {
        gfx.startWrite();
    }
    gfx.pushImageDMA( area->x1
                    , area->y1
                    , area->x2 - area->x1 + 1
                    , area->y2 - area->y1 + 1
                    , ( lgfx::rgb565_t* )&color_p->full);
    lv_disp_flush_ready( disp );
}

void my_touchpad_read( lv_indev_drv_t * indev_driver, lv_indev_data_t * data )
{
    uint16_t touchX, touchY;

    data->state = LV_INDEV_STATE_REL;

    if( gfx.getTouch( &touchX, &touchY ) )
    {
        data->state = LV_INDEV_STATE_PR;

        /*Set the coordinates*/
        data->point.x = touchX;
        data->point.y = touchY;
    }
}

void gui_start(){

  // ----------- GFX -------------
  gfx.begin();
  gfx.setBrightness(127);


  lv_init();
  lv_disp_draw_buf_init( &draw_buf, buf[0], buf[1], screenWidth * 10 );

  /*Initialize the display*/
  static lv_disp_drv_t disp_drv;
  lv_disp_drv_init( &disp_drv );
  disp_drv.hor_res = screenWidth;
  disp_drv.ver_res = screenHeight;
  disp_drv.flush_cb = my_disp_flush;
  disp_drv.draw_buf = &draw_buf;
  lv_disp_drv_register( &disp_drv );

  /*Initialize the input device driver*/
  static lv_indev_drv_t indev_drv;
  lv_indev_drv_init( &indev_drv );
  indev_drv.type = LV_INDEV_TYPE_POINTER;
  indev_drv.read_cb = my_touchpad_read;
  lv_indev_drv_register( &indev_drv );

  // Your UI code or SquareLine Studio Code
  ui_init();
}
Now the driver is initialized and your own UI can be implemented. This can be done manually, but also with the graphical UI editor SquareLine Studio, which simplifies the creation significantly. For small projects the tool is free, for larger projects you have to purchase a monthly or annual license. The advantage of SquareLine Studio is that the graphical UI can be easily exported and copied to your own project.
Arduino Code
What is still missing are a few lines of Arduino code with the setup() and the loop() method:
#include <Arduino.h>
#include <lv_conf.h>
#include <lvgl.h>

#include "gui/gui.h"

void setup() {
  gui_start();
}

void loop() {
  lv_timer_handler();

  delay(5);
}
This completes the small example. If you have any questions, feel free to send me a message. The complete sourcecode is available on GitHub: https://github.com/HarryVienna/Makerfabs-Sunton-ESP32-S3-7-Display-with-LovyanGFX-and-LVGL